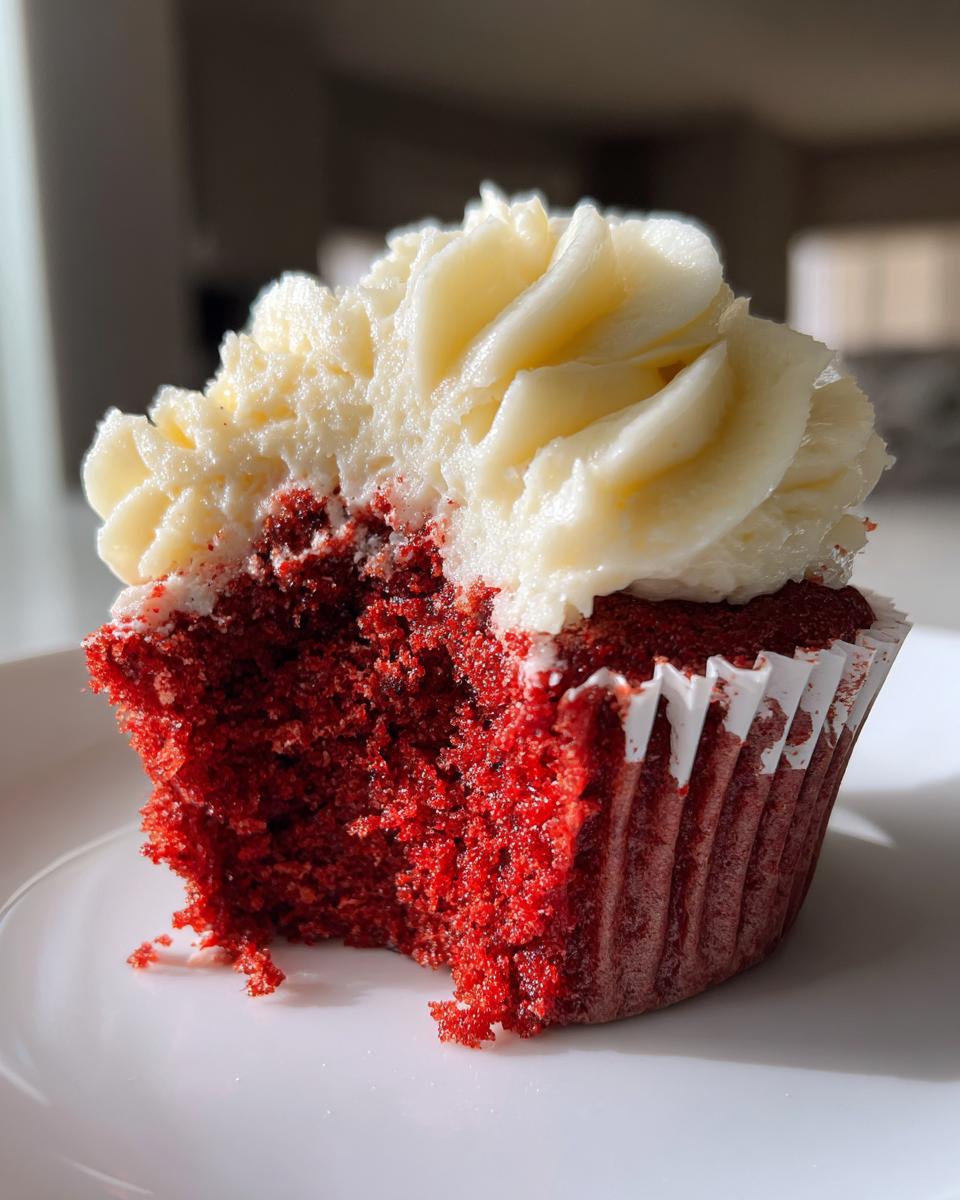
Oh my goodness, you guys! If there’s one dessert that just screams “special occasion” but is secretly super easy to whip up, it’s these incredible red velvet cupcakes. Seriously, I’m practically bouncing in my seat right now just thinking about them! We’re talking moist, fluffy, perfectly crimson little cakes, crowned with the most divine, tangy cream cheese frosting you could ever dream of. These aren’t just any red velvet cupcakes; this is *the* recipe, the one that makes everyone ask for seconds (and then thirds!).
I remember the first time I made these for my best friend’s birthday. She’s notoriously picky about her desserts, and I was so nervous! But the moment she took that first bite, her eyes just lit up. “This is it!” she exclaimed, frosting smudged on her nose, “The perfect red velvet cupcake!” And honestly, that’s been the reaction ever since. They’re a classic for a reason, blending that subtle cocoa flavor with a hint of tang, all wrapped up in a tender crumb. Trust me, once you try these red velvet cupcakes, you’ll understand why they’re a timeless treat!

Why These Red Velvet Cupcakes Will Be Your New Favorite
Okay, so why *these* red velvet cupcakes? Because they’re just that good, plain and simple! They hit all the right notes without being fussy or complicated. You’ll be amazed at how quickly you can whip up a batch that looks and tastes like it came from a fancy bakery. My favorite part is how they manage to be super rich in flavor but still feel light and fluffy. It’s truly a magical combination!
- Quick & Easy: Seriously, from start to oven in no time flat!
- Perfect Texture: Incredibly moist and tender, never dry.
- Rich, Balanced Flavor: That classic cocoa-vanilla tang that makes red velvet so irresistible.
- Showstopper Frosting: The tangy cream cheese frosting is the absolute dream topping!
The Allure of Red Velvet Cupcakes
There’s just something special about red velvet, isn’t there? It’s not just a flavor; it’s an experience! These red velvet cupcakes are perfect for literally *any* occasion – from a casual weeknight treat to a fancy dinner party, or even a holiday gathering. Their vibrant color and delicious taste make them an instant crowd-pleaser every single time.
Essential Equipment for Perfect Red Velvet Cupcakes
You don’t need a professional kitchen to make these amazing red velvet cupcakes, just a few basic tools! Having the right equipment on hand makes the whole process so much smoother and more fun. Trust me, a little preparation goes a long way to baking success!
- Muffin Pan: A standard 12-cup muffin pan is essential for baking your cupcakes.
- Paper Liners: Don’t forget these! They make cleanup a breeze and help your red velvet cupcakes look pretty.
- Large Mixing Bowls: You’ll need at least two – one for dry ingredients and one for wet.
- Whisks: Both a balloon whisk for dry ingredients and a smaller one for liquids work wonders.
- Electric Mixer: A hand mixer or stand mixer is super helpful for creaming butter and sugar, and especially for that dreamy cream cheese frosting.
- Rubber Spatula: Perfect for scraping down bowls and gently folding in ingredients.
- Measuring Cups & Spoons: Accuracy is key in baking, so have a good set handy.
- Wire Rack: Crucial for cooling your red velvet cupcakes completely before frosting.
Ingredients for Delicious Red Velvet Cupcakes
Alright, let’s talk ingredients! This is where the magic really starts to happen for our red velvet cupcakes. I’ve broken it down so you know exactly what you need for both the incredibly moist cake and that show-stopping cream cheese frosting. Using good quality ingredients really does make a difference, so try to grab the best you can find. And a little tip: make sure your cold ingredients, especially for the frosting, are at room temperature before you start. It makes everything blend so much smoother!
Wet Ingredients for Moist Red Velvet Cupcakes
These are the liquid components that bring all the flavor and that amazing moistness to your red velvet cupcakes. Make sure to measure carefully!
- 1 large egg: Just one! Make sure it’s at room temperature.
- 1/2 cup buttermilk: Don’t skip this! It’s key for the tang and tender crumb. If you don’t have it, you can make your own by adding 1/2 tablespoon of white vinegar or lemon juice to regular milk and letting it sit for 5-10 minutes.
- 1/2 cup vegetable oil: This keeps our red velvet cupcakes super moist.
- 1 teaspoon white vinegar: Works with the baking soda to give that signature lift and a little tang.
- 1 teaspoon alcohol-free vanilla extract: For that classic vanilla warmth.
- 2 tablespoons red food coloring: This is where the “red” in red velvet comes from! You can adjust to your preferred shade.
Dry Ingredients for Balanced Red Velvet Cupcakes
These dry ingredients are the backbone of our red velvet cupcakes, providing structure and flavor. Whisking them together properly is a small but mighty step!
- 1 1/2 cups all-purpose flour: Measured correctly, please! Spoon it into your measuring cup and level it off.
- 1 cup granulated sugar: For sweetness and to help with that tender texture.
- 1 teaspoon baking soda: Our main leavening agent, which reacts with the buttermilk and vinegar.
- 1 teaspoon cocoa powder: Just a touch, for that subtle chocolatey depth that defines red velvet.
- 1/2 teaspoon salt: Essential for balancing all the flavors and making everything pop!
Cream Cheese Frosting Ingredients for Red Velvet Cupcakes
Oh, the frosting! This tangy, sweet cream cheese frosting is the perfect partner for our red velvet cupcakes. Make sure your cream cheese and butter are nice and soft!
- 8 ounces cream cheese, softened: Take it out of the fridge a good hour or two before you start. It needs to be really soft!
- 1/2 cup unsalted butter, softened: Same deal as the cream cheese – soft, but not melted.
- 4 cups powdered sugar: Sift it if you want an extra smooth frosting, but I usually just go for it!
- 1 teaspoon alcohol-free vanilla extract: To round out the sweet and tangy flavors.
How to Make Red Velvet Cupcakes: Step-by-Step Guide
Okay, now for the fun part – actually *making* these glorious red velvet cupcakes! Don’t be shy, it’s super straightforward. Just follow along, and you’ll have a batch of these beauties in no time. I’ve broken it down into easy, bite-sized steps so you won’t miss a thing. Trust me, the aroma alone as these bake is going to make your kitchen smell absolutely divine!
Preparing the Red Velvet Cupcake Batter
- First things first, let’s get that oven ready! Preheat your oven to a cozy 350°F (175°C). While it’s warming up, grab your trusty 12-cup muffin pan and line it with paper liners. This makes cleanup a breeze and keeps your red velvet cupcakes looking picture-perfect.
- Now, in a big bowl, whisk together all your dry ingredients: the flour, granulated sugar, baking soda, cocoa powder, and salt. Give it a good whisk until everything’s nicely combined. You want to make sure there are no little pockets of flour hanging out.
- In a separate, medium-sized bowl, it’s time for the wet ingredients. Whisk together the egg, buttermilk, vegetable oil, white vinegar, alcohol-free vanilla extract, and that vibrant red food coloring. Make sure it’s all mixed well – you want that beautiful, consistent red hue!
- Pour the wet ingredients right into the dry ingredients. Now, here’s a crucial tip: mix until *just* combined. Seriously, stop mixing as soon as you don’t see any more dry streaks. Overmixing is the enemy of fluffy red velvet cupcakes, so resist the urge!
- Divide that gorgeous red batter evenly among your prepared muffin cups. I usually fill them about two-thirds full. This leaves just enough room for them to rise without overflowing.
Baking Your Red Velvet Cupcakes
- Pop that muffin pan into your preheated oven! Bake for about 18-22 minutes. Now, oven temperatures can be a little quirky, so keep an eye on them.
- You’ll know your red velvet cupcakes are done when a wooden skewer (or a toothpick!) inserted into the center comes out clean. If it’s still a little gooey, give them another minute or two. Don’t go too long though, we want them moist!
Crafting the Cream Cheese Frosting for Red Velvet Cupcakes
- While your cupcakes are cooling, let’s make that dreamy cream cheese frosting! In a large bowl, beat the softened cream cheese and softened butter with an electric mixer. Beat it until it’s super smooth and creamy – no lumps allowed! This step is so important for a luscious frosting.
- Now, gradually add the powdered sugar, about a cup at a time. Beat it until it’s fully incorporated and smooth after each addition. If you add it all at once, you’ll end up with a sugar cloud in your kitchen!
- Finally, stir in the alcohol-free vanilla extract. Give it one last good beat until it’s light, fluffy, and absolutely irresistible.
Assembling and Enjoying Your Red Velvet Cupcakes
- This part is key: let your red velvet cupcakes cool completely on a wire rack. I know, I know, it’s hard to wait! But if you try to frost warm cupcakes, you’ll end up with melted frosting and a sad mess. Patience, my friend!
- Once they’re completely cool, grab your piping bag (or even just an offset spatula if you’re going for a rustic look) and frost those beauties generously! Dollop that amazing cream cheese frosting right on top.
- And there you have it! Your very own batch of perfect red velvet cupcakes, ready to be devoured. Enjoy every single delicious bite!
Tips for Achieving the Best Red Velvet Cupcakes
Okay, so you’ve got the steps down, but I’ve got a few extra insider tips that’ll take your red velvet cupcakes from “good” to “OMG, you HAVE to try these!” These are the little things that make all the difference, trust me. We want consistently amazing red velvet cupcakes every single time!
- Room Temperature is Your Best Friend: For both the cupcakes and especially the frosting, make sure your eggs, buttermilk, cream cheese, and butter are all at room temperature. It helps everything emulsify beautifully, giving you a smooth batter and super creamy frosting.
- Don’t Overmix the Batter: I cannot stress this enough! As soon as those dry and wet ingredients are *just* combined, stop. Overmixing develops gluten, which leads to tough, dry red velvet cupcakes. We want tender and moist!
- Color Control: The amount of red food coloring can vary by brand. Start with the suggested amount, but don’t be afraid to add a tiny bit more if you want a really vibrant, deep red. Just make sure it’s a good quality gel food coloring for the best results without thinning your batter too much.
- Cool Completely: I know it’s hard to wait, but seriously, let those red velvet cupcakes cool down completely before you even *think* about frosting them. Warm cupcakes + cold frosting = a melty, sliding mess. Nobody wants that!
Common Questions About Red Velvet Cupcakes
I get a lot of questions about these red velvet cupcakes, and I love answering them! It shows you’re really thinking about what makes them so special. Here are some of the most common things people ask me when they’re whipping up a batch of these beauties. Don’t worry, I’ve got you covered!
Can I Substitute Buttermilk in Red Velvet Cupcakes?
Oh, the buttermilk question! Yes, you absolutely can, but I really encourage you to use actual buttermilk if you can get it. It adds a unique tang and tenderness that’s hard to beat in red velvet cupcakes. If you’re in a pinch, though, you can make a quick substitute: just add 1/2 tablespoon of white vinegar (or lemon juice) to your measuring cup, then fill the rest of the way with regular milk until you reach 1/2 cup. Let it sit for about 5-10 minutes until it looks slightly curdled. Voila! It’ll do the trick for your red velvet cupcakes.
How to Store Leftover Red Velvet Cupcakes?
If you actually have any leftover (which is a big “if” in my house!), you’ll want to store your frosted red velvet cupcakes in an airtight container in the refrigerator. Because of that delicious cream cheese frosting, they really need to stay chilled. They’ll keep beautifully for up to 3 days. Just pull them out about 30 minutes before serving to let the frosting soften up a bit and the cake come to room temperature for the best flavor and texture!
Why are My Red Velvet Cupcakes Not Red Enough?
This is a super common one! If your red velvet cupcakes aren’t as vibrantly red as you’d hoped, there are a few culprits. First, the type of cocoa powder matters – natural cocoa powder tends to be lighter in color, while Dutch-processed cocoa can be a bit darker and might mute the red. Second, and most importantly, it’s often about the food coloring! Make sure you’re using a good quality gel food coloring, not the liquid kind you find in the baking aisle for kids’ crafts. Gel colors are much more concentrated, so you get a deeper, richer red without adding too much liquid to your batter. Don’t be afraid to add a tiny bit more if you want that iconic, deep red velvet shade!
Estimated Nutritional Information for Red Velvet Cupcakes
Okay, so while we’re all about enjoying these delicious red velvet cupcakes, I know some of you like to keep an eye on the nutritional side of things, and that’s totally fair! I’ve put together some estimated nutritional info for you below. Just a little heads-up though: these numbers are just estimates. They can totally change depending on the exact brands you use for your ingredients, how precise your measurements are, and even the size of your cupcakes. Think of it as a general guide, not a strict rule book!
- Serving Size: 1 cupcake
- Calories: 450
- Sugar: 55g
- Sodium: 200mg
- Fat: 25g
- Saturated Fat: 15g
- Unsaturated Fat: 8g
- Trans Fat: 0.5g
- Carbohydrates: 50g
- Fiber: 1g
- Protein: 3g
- Cholesterol: 60mg
Share Your Red Velvet Cupcakes Experience
I absolutely LOVE hearing from you all! So, once you’ve whipped up a batch of these incredible red velvet cupcakes, please come back and tell me all about it! Did you love them? Did they disappear in minutes? Leave a comment below, rate the recipe, or even better, snap a photo and share your creations on social media! Tag me, I’d be absolutely thrilled to see your beautiful red velvet cupcakes!
Print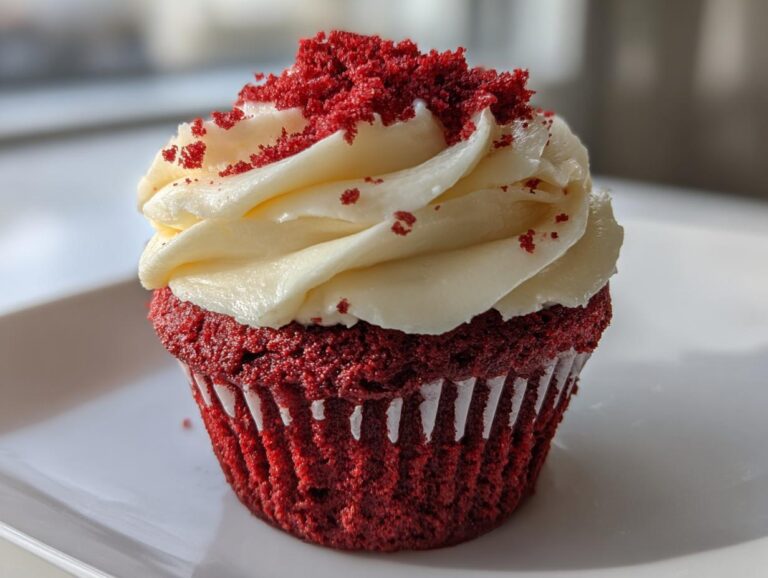
Red Velvet Cupcakes with Cream Cheese Frosting
These red velvet cupcakes are moist, fluffy, and topped with a tangy cream cheese frosting. They are a classic dessert, perfect for any occasion.
- Total Time: 40 minutes
- Yield: 12 cupcakes 1x
Ingredients
- 1 1/2 cups all-purpose flour
- 1 cup granulated sugar
- 1 teaspoon baking soda
- 1 teaspoon cocoa powder
- 1/2 teaspoon salt
- 1 large egg
- 1/2 cup buttermilk
- 1/2 cup vegetable oil
- 1 teaspoon white vinegar
- 1 teaspoon vanilla extract
- 2 tablespoons red food coloring
- 8 ounces cream cheese, softened
- 1/2 cup unsalted butter, softened
- 4 cups powdered sugar
- 1 teaspoon vanilla extract
Instructions
- Preheat oven to 350°F (175°C). Line a 12-cup muffin pan with paper liners.
- In a large bowl, whisk together the flour, sugar, baking soda, cocoa powder, and salt.
- In a separate medium bowl, whisk together the egg, buttermilk, vegetable oil, vinegar, vanilla extract, and red food coloring.
- Pour the wet ingredients into the dry ingredients and mix until just combined. Do not overmix.
- Divide the batter evenly among the prepared muffin cups, filling each about two-thirds full.
- Bake for 18-22 minutes, or until a wooden skewer inserted into the center comes out clean.
- Let cupcakes cool in the pan for a few minutes before transferring them to a wire rack to cool completely.
- For the frosting, in a large bowl, beat the softened cream cheese and butter with an electric mixer until smooth and creamy.
- Gradually add the powdered sugar, one cup at a time, beating until fully incorporated and smooth.
- Stir in the vanilla extract.
- Once the cupcakes are completely cool, frost them using a piping bag or an offset spatula.
Notes
- For a deeper red color, you can add a little more red food coloring.
- Ensure all ingredients for the frosting are at room temperature for a smooth consistency.
- Store frosted cupcakes in an airtight container in the refrigerator for up to 3 days.
- Prep Time: 20 minutes
- Cook Time: 20 minutes
- Category: Dessert
- Method: Baking
- Cuisine: American
- Diet: Vegetarian
Nutrition
- Serving Size: 1 cupcake
- Calories: 450
- Sugar: 55g
- Sodium: 200mg
- Fat: 25g
- Saturated Fat: 15g
- Unsaturated Fat: 8g
- Trans Fat: 0.5g
- Carbohydrates: 50g
- Fiber: 1g
- Protein: 3g
- Cholesterol: 60mg