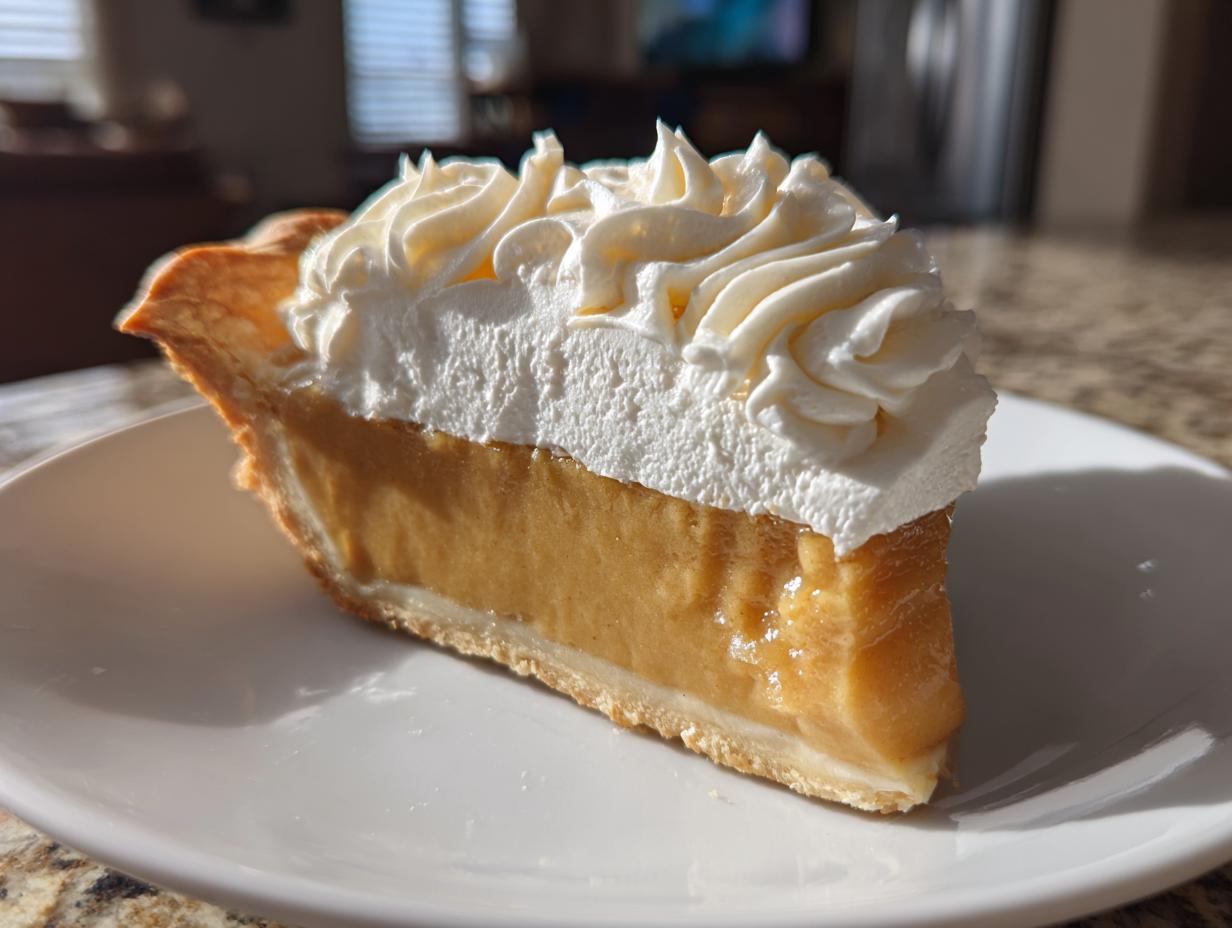
Oh, there’s just something magical about a homemade dessert, isn’t there? It’s not just about the sweetness; it’s about the comfort, the memories, and that incredible feeling of sharing something truly special. And when it comes to comfort, my absolute go-to, hands down, is this amazing butterscotch pie recipe. Seriously, if you’ve never experienced the silky, rich, utterly irresistible delight of a perfect butterscotch pie, you are in for a treat!
This isn’t just any old pie; it’s *the* pie that brings everyone to the table, eyes wide with anticipation. It’s got this ridiculously rich, creamy butterscotch filling that just melts in your mouth, all snuggled into a flaky, golden crust, and then crowned with a cloud of homemade whipped cream. Every single bite is pure bliss. It’s been a family favorite for as long as I can remember, and trust me, once you try it, you’ll understand why. It’s simple, it’s classic, and it’s always, always a showstopper!
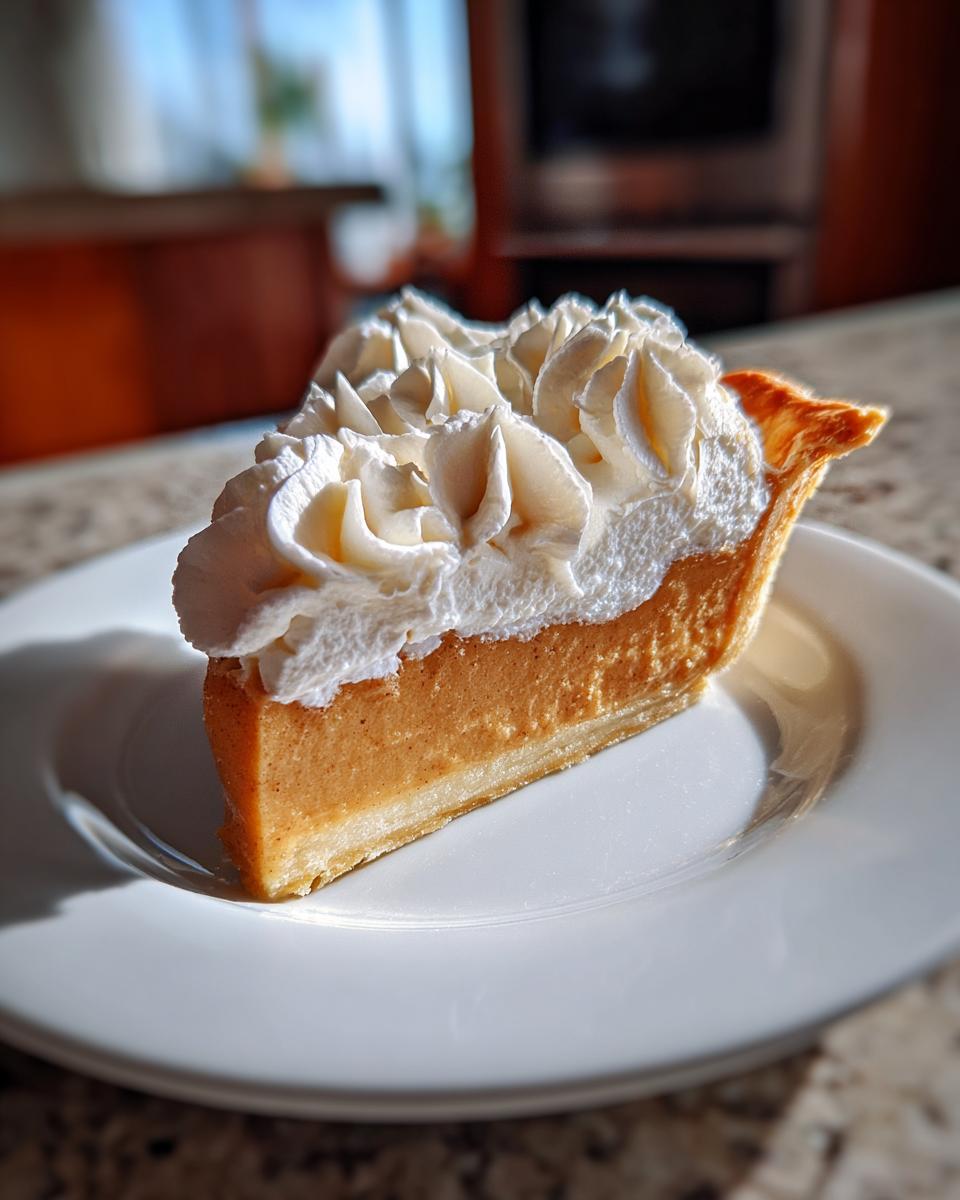
Why You’ll Love This Butterscotch Pie Recipe
Okay, so why *this* butterscotch pie recipe? Well, besides tasting like a dream, it’s genuinely a joy to make and even more of a joy to eat! You’re going to fall head over heels for it because:
- It’s surprisingly straightforward! Don’t let that fancy look fool you; it’s totally achievable for home cooks.
- The flavor is out of this world – that deep, caramel-y butterscotch goodness is just heavenly.
- It’s a total crowd-pleaser! Perfect for holidays, potlucks, or just a Tuesday night when you need a little extra sweetness.
- It feels incredibly special, but you don’t need a culinary degree to pull it off.
The Irresistible Charm of Butterscotch Pie
Oh, the charm! It’s not just a dessert; it’s a feeling. That first spoonful of this butterscotch pie, with its smooth, velvety filling and the light, airy whipped cream, just transports you. It’s sweet, but not cloyingly so, with those lovely, warm notes of brown sugar. It reminds me of cozy afternoons and happy memories. The smell alone, when that filling is simmering on the stove, is enough to make your heart sing!
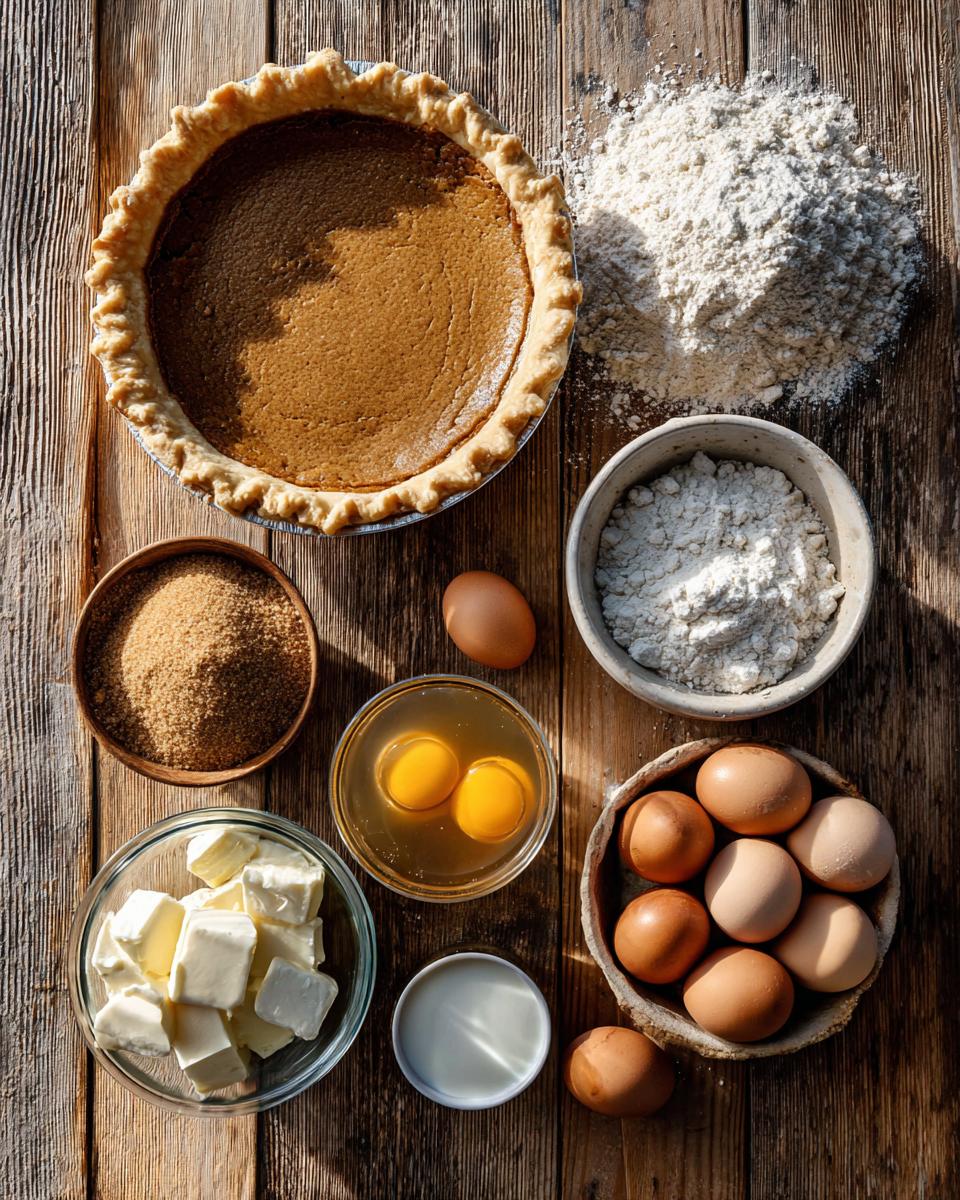
Essential Equipment for Your Butterscotch Pie
You don’t need a professional kitchen to whip up this incredible butterscotch pie, I promise! Most of these tools you probably already have stashed away. Having the right gear just makes the whole process smoother and more fun, ensuring your pie turns out beautifully every single time. It’s all about making your life easier in the kitchen!
Tools for a Perfect Butterscotch Pie
For this butterscotch pie, you’ll want a sturdy medium saucepan for cooking the filling – something heavy-bottomed is great for even heat. A good whisk is your best friend here, especially for getting that filling silky smooth without any lumps. You’ll also need a heatproof spatula for scraping every last bit of that deliciousness into your 9-inch pie plate. And a cold mixing bowl and beaters are crucial for whipping up that dreamy cloud of cream!
Ingredients for a Classic Butterscotch Pie
Alright, let’s talk ingredients! This is where the magic really starts to happen for our butterscotch pie. Don’t let the simplicity fool you; every single item here plays a crucial role in building those incredible layers of flavor and texture. I’m going to walk you through exactly what you need, down to the specifics, because getting these right is key to that perfect, dreamy pie!
Building the Perfect Butterscotch Pie: The Filling
For that luscious, irresistible butterscotch filling, you’ll need a few pantry staples and a couple of fresh items:
- 1 9-inch baked pie crust: Store-bought is fine, or if you’re feeling ambitious, your favorite homemade recipe works too! Just make sure it’s fully baked and cooled.
- 1 cup packed light brown sugar: “Packed” is important here! It gives that deep, caramel-y flavor that butterscotch is famous for.
- 1/2 cup granulated sugar: Just enough to balance the brown sugar and add a touch more sweetness.
- 1/3 cup all-purpose flour: Our thickening agent! This is what makes the filling so wonderfully rich and custardy.
- 1/2 teaspoon salt: Don’t skip this! It really brings out all the sweet flavors and keeps the pie from being one-note.
- 2 1/2 cups whole milk: Whole milk is essential for that creamy, decadent texture. Lower fat milk just won’t give you the same richness.
- 4 large egg yolks, beaten: These add richness, color, and help with the thickening. Make sure they’re well-beaten before you add them!
- 1/4 cup unsalted butter: Room temperature is best, as it melts beautifully into the hot filling.
- 1 teaspoon vanilla extract (alcohol-free): For that classic, warm vanilla note.
Topping Your Butterscotch Pie: Whipped Cream Essentials
And for the grand finale, that cloud-like topping! It’s super simple but makes all the difference:
- 1 1/2 cups heavy cream: Make sure it’s cold, cold, cold! This is non-negotiable for whipping up perfectly stiff peaks.
- 2 tablespoons powdered sugar: Also known as confectioners’ sugar. It dissolves easily and gives a smooth sweetness.
- 1/2 teaspoon vanilla extract (alcohol-free): Just a touch more vanilla for that extra layer of flavor in your whipped cream!
Crafting Your Butterscotch Pie: Step-by-Step Instructions
Okay, deep breaths! This is where we turn those amazing ingredients into the butterscotch pie of your dreams. Don’t be intimidated; I’m going to walk you through every single step. Think of me as your personal kitchen coach, cheering you on! Precision here is your friend, but so is a little bit of intuition. Let’s make some magic!
Preparing the Rich Butterscotch Pie Filling
First things first, grab that medium saucepan. You’re going to whisk together all your dry filling ingredients: the brown sugar, granulated sugar, flour, and salt. Give them a really good whisk until there are no clumps and everything is evenly combined. This is super important to avoid lumps in your finished pie!
Next, slowly, I mean *slowly*, pour in the whole milk while you’re constantly whisking. You want a smooth, lump-free mixture before it even hits the heat. Once it’s smooth, pop that saucepan over medium heat. Now, this is crucial: you *must* stir constantly. Don’t walk away! Keep stirring until the mixture gets thick and starts to boil. Once it’s boiling, let it bubble gently for just one minute, still stirring, then take it off the heat.
Now for the egg yolks – they need a little special treatment! In a separate bowl, beat your four large egg yolks. Take a small amount, maybe a ladleful, of your hot butterscotch mixture and gradually whisk it into the beaten egg yolks. This is called tempering, and it prevents the eggs from scrambling when they hit the hot mixture. Once tempered, pour that egg yolk mixture *back* into the saucepan, whisking constantly. Return the saucepan to medium-low heat and continue stirring for another 1-2 minutes until it thickens up beautifully. Remember, no boiling here, or your eggs might curdle!
Once it’s thick and gorgeous, remove it from the heat. Stir in the unsalted butter and that lovely alcohol-free vanilla extract. Stir until the butter is completely melted and incorporated. Look at that creamy, dreamy filling! You’re doing great!
Assembling and Chilling Your Butterscotch Pie
Now, immediately pour that warm butterscotch filling into your already baked and cooled 9-inch pie crust. Get every last drop out of that pan – you don’t want to waste any of that deliciousness! Once it’s in the crust, grab some plastic wrap. This next step is a non-negotiable for a smooth, skin-free top: press the plastic wrap *directly* onto the surface of the filling. This creates a seal and keeps that dreaded “skin” from forming as it cools.
Once it’s covered, pop that pie into the refrigerator. It needs to chill for at least 4 hours, but honestly, overnight is even better if you can swing it. You want it thoroughly chilled and completely set. Patience is a virtue here, my friend, and it will be so worth it!
Whipped Cream Perfection for Your Butterscotch Pie
When your pie is perfectly chilled and you’re ready to serve, it’s time for the crowning glory: homemade whipped cream! Make sure your mixing bowl and beaters are super cold – I like to stick mine in the freezer for 10-15 minutes beforehand. Pour your cold heavy cream into the bowl, add the powdered sugar and the other half teaspoon of alcohol-free vanilla extract.
Now, beat it! Start on medium speed and gradually increase to high. Keep beating until you see beautiful, stiff peaks form. You want it firm enough to hold its shape but not so firm that it looks curdled. It should be light, airy, and oh-so-fluffy!
Once your whipped cream is perfect, you can either gently spread it over the chilled pie with a spatula or, if you’re feeling fancy, pipe it on with a pastry bag. Serve it up right away and watch those happy faces!
Tips for an Unforgettable Butterscotch Pie
Alright, you’ve put in the work, and your kitchen probably smells divine! Now, let’s talk about those little extra touches, those insider secrets that take your amazing butterscotch pie from “good” to “oh-my-gosh-I-need-another-slice” unforgettable. These are the things I’ve learned over countless pies that just make all the difference. Trust me, these small details will elevate your pie to legendary status!
Ensuring Your Butterscotch Pie is a Success
First off, the crust is SO important. A truly good pie starts with a great foundation. Whether you make your own or buy one, make sure it’s a high-quality, flaky baked pie crust. It really makes a difference in every bite when it’s crisp and holds up to that rich filling. Also, don’t rush the chilling! I know it’s hard to wait, but that long chill time is crucial for the butterscotch pie to set perfectly. It needs to be firm and cold before you even *think* about adding that fluffy whipped cream.
And for a little extra pizzazz, think about garnishes! A sprinkle of cinnamon or a few butterscotch chips on top of the whipped cream can add a lovely finish. Sometimes, I even shave a bit of chocolate over it if I’m feeling extra fancy. These little touches just make your butterscotch pie feel even more special and inviting!
Butterscotch Pie: Storage and Reheating
Okay, so you’ve miraculously managed to have some leftover butterscotch pie (a rare occurrence in my house!). You’ll want to store it properly to keep it tasting amazing. This pie is best served chilled, so reheating isn’t really a thing here. It’s all about keeping that creamy texture and fresh whipped cream perfect in the fridge!
Keeping Your Butterscotch Pie Fresh
To keep your butterscotch pie delicious, cover it loosely with plastic wrap or aluminum foil. You don’t want to squish that beautiful whipped cream! Store it in the refrigerator. It’ll stay wonderfully fresh for up to 3-4 days. While the pie is best enjoyed within a day or two for peak whipped cream fluffiness, the filling itself holds up beautifully, sometimes even getting richer in flavor over time. Just make sure it’s always kept cold!
Frequently Asked Questions About Butterscotch Pie
Okay, I get a lot of questions about this butterscotch pie, and I’m always happy to share my tips! You know, sometimes the simplest things can make all the difference in getting that perfect, creamy pie just right. Here are some of the most common things people ask me when they’re whipping up their own batch of this deliciousness.
Can I make this butterscotch pie ahead of time?
Oh, absolutely! This butterscotch pie is actually fantastic made ahead. You can prepare the entire pie, including the whipped cream topping, up to 24 hours in advance. Just make sure it’s covered loosely and kept in the refrigerator. The flavors really meld and deepen overnight, making it even more delicious. Just be aware that the whipped cream might lose a tiny bit of its stiffness on day two, but it’ll still be super tasty!
What kind of pie crust is best for butterscotch pie?
For this butterscotch pie, a classic, flaky shortcrust pastry is my top recommendation. You want something that provides a nice textural contrast to the silky filling. You can totally use a good quality store-bought crust – no shame in that game! Just make sure it’s fully baked and cooled before you pour in the filling. If you’re feeling ambitious, a homemade butter crust is divine. Some people even love a graham cracker crust, but I find the classic pastry really lets the butterscotch shine.
How do I prevent a skin from forming on my butterscotch pie filling?
This is a super common question, and I’ve got the trick! As soon as you pour the hot butterscotch pie filling into your baked crust, grab some plastic wrap. You need to press the plastic wrap *directly* onto the surface of the filling. Make sure there are no air bubbles between the plastic and the filling. This creates a barrier that prevents a “skin” from forming as the pie cools and chills. It’s a little step that makes a huge difference in keeping that top perfectly smooth and creamy!
Estimated Nutritional Information for Butterscotch Pie
Just a quick note on the numbers for this butterscotch pie! Based on an 8-serving pie, each slice is an estimated 450 calories, with about 28g of total fat (17g saturated), 48g carbohydrates, 45g sugar, 1g fiber, and 6g protein. These are just estimates, of course! Your exact values might vary a bit depending on the specific brands of ingredients you use and how generous your slices are. But hey, it’s a treat, so enjoy every delicious bite!
Share Your Butterscotch Pie Creation!
Alright, my fellow pie enthusiasts, you’ve made it! Now that you’ve whipped up your very own incredible butterscotch pie, I absolutely cannot wait to hear all about it! Did it disappear in minutes? Did your family beg for more? Please, oh please, leave a comment below and tell me how your pie turned out. Rate the recipe, share your photos on social media (tag me!), and let’s spread the butterscotch love far and wide!
Print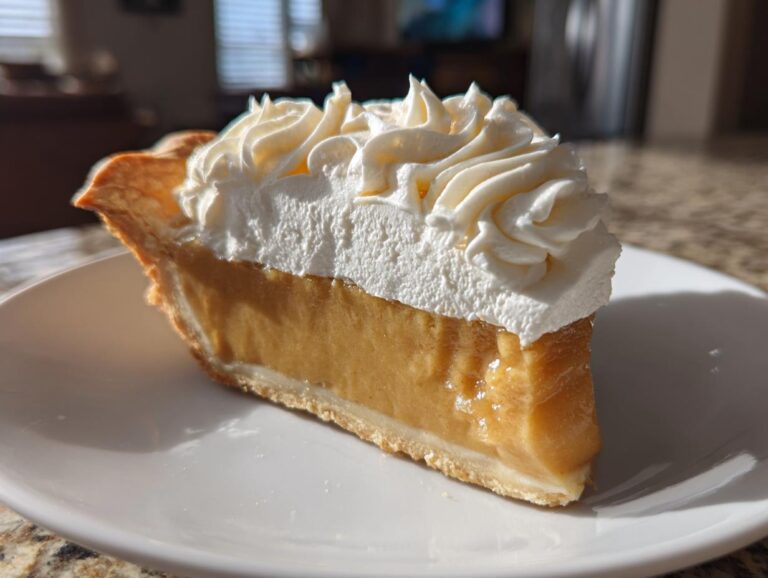
Classic Butterscotch Pie
This butterscotch pie recipe makes a rich, creamy, and irresistible dessert. It features a sweet, smooth butterscotch filling in a flaky pie crust, topped with whipped cream.
- Total Time: 4 hours 45 minutes
- Yield: 8 servings 1x
Ingredients
- 1 9-inch baked pie crust
- 1 cup packed light brown sugar
- 1/2 cup granulated sugar
- 1/3 cup all-purpose flour
- 1/2 teaspoon salt
- 2 1/2 cups whole milk
- 4 large egg yolks, beaten
- 1/4 cup unsalted butter
- 1 teaspoon vanilla extract (alcohol-free)
- 1 1/2 cups heavy cream
- 2 tablespoons powdered sugar
- 1/2 teaspoon vanilla extract (alcohol-free)
Instructions
- In a medium saucepan, whisk together the brown sugar, granulated sugar, flour, and salt.
- Gradually whisk in the milk until smooth.
- Cook over medium heat, stirring constantly, until the mixture thickens and comes to a boil. Boil for 1 minute, stirring.
- Remove from heat. Gradually whisk a small amount of the hot mixture into the beaten egg yolks.
- Pour the egg yolk mixture back into the saucepan, whisking constantly.
- Return to medium-low heat and cook for 1-2 minutes, stirring constantly, until thickened. Do not boil.
- Remove from heat and stir in the butter and 1 teaspoon vanilla extract.
- Pour the butterscotch filling into the baked pie crust.
- Cover the surface of the filling directly with plastic wrap to prevent a skin from forming.
- Refrigerate for at least 4 hours, or until thoroughly chilled and set.
- Before serving, beat the heavy cream, powdered sugar, and 1/2 teaspoon vanilla extract in a cold bowl with cold beaters until stiff peaks form.
- Spread or pipe the whipped cream over the chilled pie.
- Serve immediately.
Notes
- For best results, use a high-quality baked pie crust.
- Ensure the filling is completely chilled before adding the whipped cream.
- The pie can be made a day in advance and stored in the refrigerator.
- Garnish with butterscotch chips or a sprinkle of cinnamon, if desired.
- Prep Time: 30 minutes
- Cook Time: 15 minutes
- Category: Dessert
- Method: Baking and No-Bake
- Cuisine: American
- Diet: Vegetarian
Nutrition
- Serving Size: 1 slice
- Calories: 450
- Sugar: 45g
- Sodium: 200mg
- Fat: 28g
- Saturated Fat: 17g
- Unsaturated Fat: 8g
- Trans Fat: 0.5g
- Carbohydrates: 48g
- Fiber: 1g
- Protein: 6g
- Cholesterol: 120mg