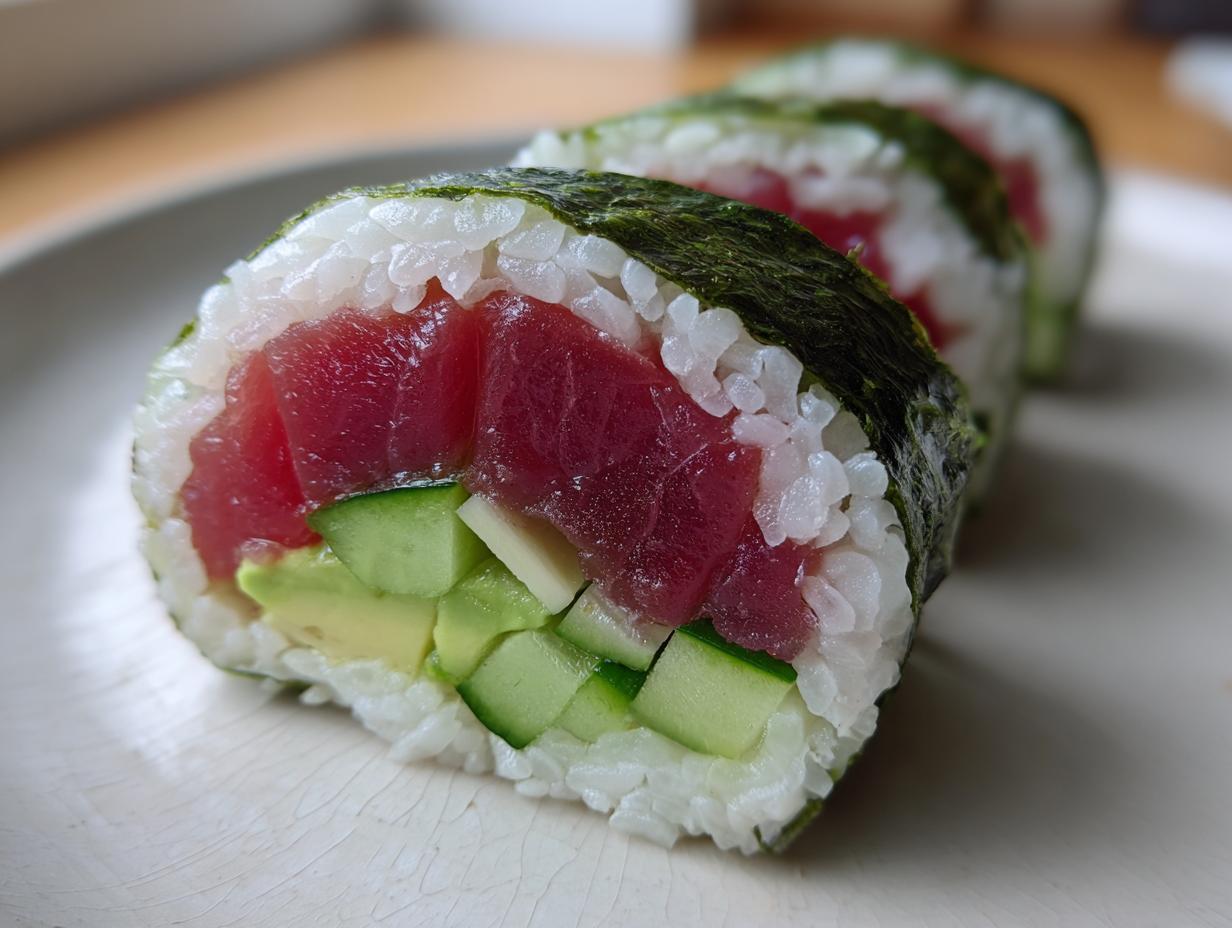
Oh, you guys, there’s just something so incredibly satisfying about making your own sushi at home! I mean, seriously, the first time I rolled a perfect Tuna Sushi Roll, I felt like a culinary superhero. For years, I was convinced that sushi was this mystical art form reserved for highly trained chefs. I’d spend a small fortune at my favorite Japanese restaurant, always admiring those perfectly crafted rolls. But then, a few years ago, my friend Hiro, who grew up in Japan, showed me just how approachable it can be.
He patiently guided me through making my very first Tuna Sushi Rolls, and honestly, it was a game-changer. The freshness of the tuna, the slightly tangy rice, and the satisfying crunch of the nori – it’s just pure magic. Plus, knowing exactly what goes into each bite? That’s a huge win for healthy eating. There’s so much joy in creating something so beautiful and delicious with your own hands, and I can’t wait to share all my tips with you so you can experience it too!
Why You’ll Love These Tuna Sushi Rolls
Trust me, once you try making these Tuna Sushi Rolls, you’ll be hooked! They’re just so incredibly rewarding. Here’s why I know you’re going to adore them:
- Surprisingly Easy: Don’t be intimidated! With a few simple tricks, you’ll be rolling like a pro in no time.
- Unbeatable Freshness: You control every single ingredient, so you get the freshest, most vibrant flavors possible.
- Deliciously Customizable: While tuna is a classic, you can totally swap in your favorite veggies or even add a little kick with some spicy sauce.
- Healthy & Wholesome: Packed with lean protein and fresh veggies, these rolls are a fantastic feel-good meal.
The Joy of Homemade Tuna Sushi Rolls
There’s a special kind of pride that comes with serving up beautiful, restaurant-quality sushi that you made yourself. It’s not just about the incredible taste of those fresh ingredients; it’s about the satisfaction of creating something truly special. You get to pick exactly what goes in, ensuring every bite is perfect for you!
Essential Equipment for Making Tuna Sushi Rolls
Okay, before we dive into the deliciousness, let’s talk tools! You don’t need a fancy chef’s kitchen, but a few key items will make your sushi-making journey super smooth. The most important one? A bamboo sushi mat! It’s your best friend for getting those rolls nice and tight. Besides that, a good sharp knife is a must for clean slices, and a sturdy saucepan for your rice.
Ingredients for Perfect Tuna Sushi Rolls
Alright, let’s talk ingredients! This is where the magic really starts. You don’t need a huge list, just good quality stuff, especially when it comes to the star of the show – the tuna! Getting everything prepped and ready before you start rolling is my secret to a smooth sushi-making session. Trust me, you’ll thank yourself later!
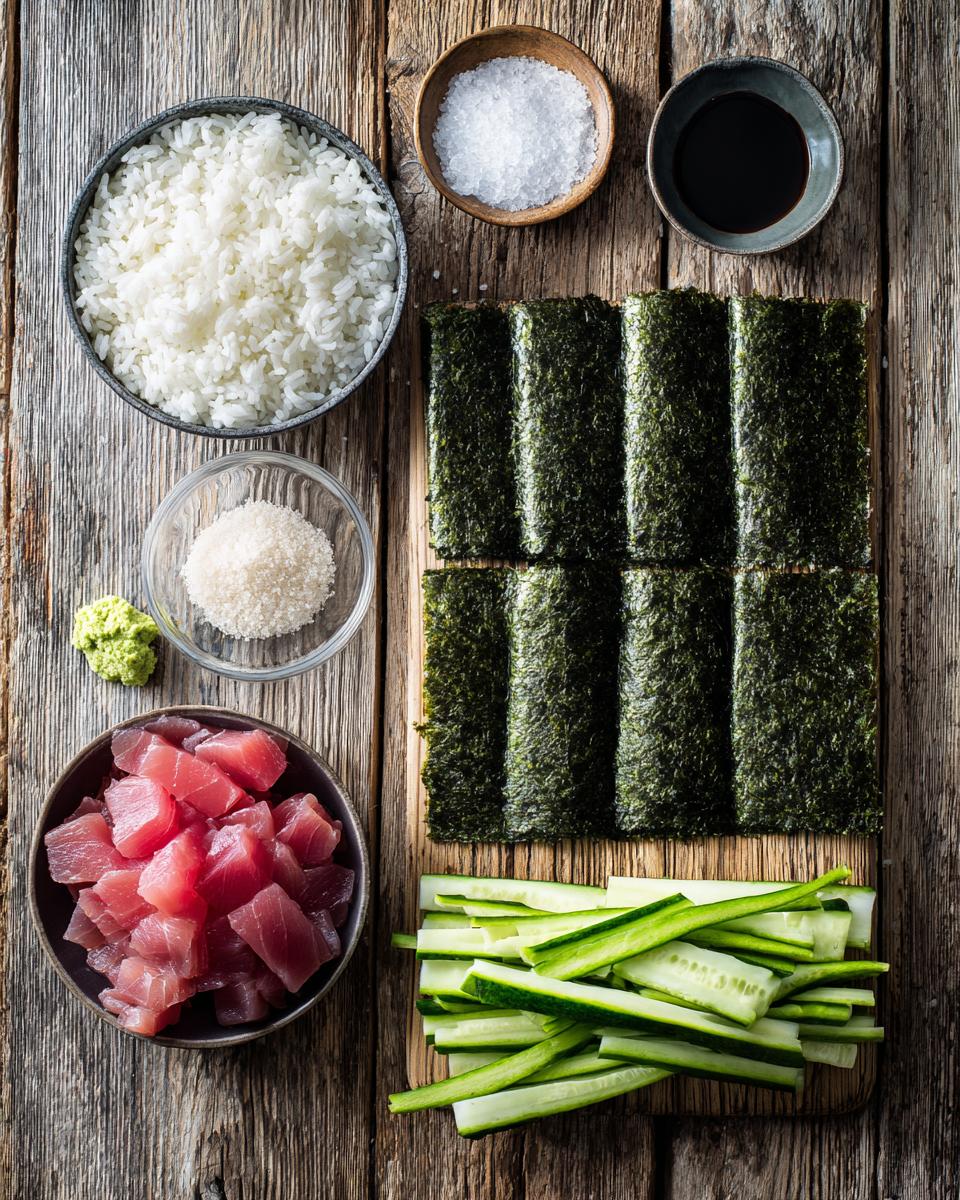
- Sushi Rice (1 cup): This isn’t just any rice, folks! Look for short-grain sushi rice. It has that perfect sticky texture we need.
- Water (1.5 cups): For cooking our rice to perfection.
- Rice Vinegar (2 tablespoons): This gives our sushi rice that signature tangy flavor.
- Sugar (1 tablespoon): Balances out the vinegar beautifully.
- Salt (0.5 teaspoon): A little pinch to enhance all those lovely flavors.
- Nori (seaweed) (4 sheets): These are the edible wraps for our rolls. Make sure they’re fresh and crispy!
- Sushi-Grade Tuna (6 ounces): This is HUGE. You absolutely need tuna that’s labeled “sushi-grade” or “sashimi-grade” for safety and the best flavor. Cut it into nice 1/4-inch strips.
- Cucumber (0.5, cut into thin strips): Adds a lovely crunch and freshness.
- Avocado (0.5, thinly sliced): For that creamy, rich texture.
- Soy Sauce, Wasabi, Pickled Ginger: For serving – essential for the full sushi experience!
Fresh Fillings for Your Tuna Sushi Rolls
The fillings are what make each bite exciting! For our tuna, make sure it’s cut into even, thin strips – about 1/4 inch thick is perfect so it rolls nicely and doesn’t overpower the rice. As for the cucumber and avocado, slice them thinly and evenly. This helps them lay flat in the roll, making it much easier to get that tight, beautiful sushi roll we’re aiming for. Precision here really pays off!
How to Make Amazing Tuna Sushi Rolls
Okay, this is where the fun really begins! Don’t worry if it feels a little tricky at first; making sushi is a skill, and like any skill, it gets easier with practice. I’m going to walk you through each step just like Hiro walked me through it, breaking down everything so you can create perfect Tuna Sushi Rolls every time. The key is to be patient and enjoy the process – it’s part of the experience!
- Rinse that Rice: First things first, get your sushi rice into a fine-mesh sieve and rinse it under cold running water. You want to keep rinsing until the water that drains out is completely clear. This step is super important for getting that perfect sticky, non-gummy texture.
- Cook the Rice: Now, combine your rinsed rice and water in a saucepan. Bring it to a good boil, then immediately reduce the heat to the lowest setting, pop a lid on, and let it simmer for 15 minutes. Don’t peek! Once the 15 minutes are up, remove it from the heat but keep that lid on for another 10 minutes. This lets the rice steam and absorb all that goodness.
- Make the Vinegar Mixture: While the rice is doing its thing, grab a small bowl and whisk together your rice vinegar, sugar, and salt until everything is dissolved. This is our seasoning, and it’s what gives sushi rice its distinctive flavor.
- Season the Rice: Transfer your cooked rice to a large bowl – a shallow, wide one is best. Gradually pour in the vinegar mixture, folding it gently with a paddle or wooden spoon. You want to combine it well without mashing the rice. Keep folding until the rice looks shiny and delicious. Now, and this is crucial, let it cool completely to room temperature. Warm rice will make your nori soggy, and we don’t want that!
- Prep Your Station: Lay out your bamboo sushi mat on a clean surface. Place one sheet of nori, shiny side down, on the mat. Get a small bowl of water ready for moistening your hands – it’s a lifesaver for preventing sticky rice fingers!
- Spread the Rice: Moisten your hands well. Grab about 3/4 cup of the cooled sushi rice and spread it evenly over the nori. You want to leave about a 1-inch border at the top edge of the nori. This border will help you seal the roll later. Don’t press too hard, just a gentle, even layer.
- Add Your Fillings: Arrange a few strips of your beautiful tuna, cucumber, and avocado horizontally across the center of the rice. Don’t overfill! Less is more here for a tight, easy-to-roll sushi.
- Time to Roll!: This is the moment! Carefully lift the edge of the bamboo mat closest to you, bringing it up and over the fillings. Press gently to create a compact log. Keep rolling tightly, using the mat to help you compress the roll as you go.
- Seal the Deal: Once you get to the end, moisten that 1-inch bare border of nori with a little water. This acts like glue! Finish rolling, pressing firmly to seal the roll.
- Slice and Serve: Repeat with your remaining nori, rice, and fillings. Now, for slicing, use a very sharp knife and keep it wet! Dip it in water between each slice to prevent sticking and get those clean, beautiful pieces. Slice each roll into 6-8 pieces. Serve immediately with your favorite soy sauce, wasabi, and pickled ginger. Enjoy your masterpiece!
- Serving Size: 1 roll (6-8 pieces)
- Calories: 350
- Fat: 10g
- Protein: 20g
- Carbohydrates: 50g
- Sugar: 5g
- Sodium: 600mg
- Total Time: 55 minutes
- Yield: 4 rolls (24-32 pieces) 1x
- 1 cup sushi rice
- 1.5 cups water
- 2 tablespoons rice vinegar
- 1 tablespoon sugar
- 0.5 teaspoon salt
- 4 sheets nori (seaweed)
- 6 ounces sushi-grade tuna, cut into 1/4-inch strips
- 0.5 cucumber, cut into thin strips
- 0.5 avocado, thinly sliced
- Soy sauce for serving
- Wasabi for serving
- Pickled ginger for serving
- Rinse sushi rice under cold water until the water runs clear.
- Combine rice and water in a saucepan. Bring to a boil, then reduce heat to low, cover, and simmer for 15 minutes. Remove from heat and let stand, covered, for 10 minutes.
- In a small bowl, mix rice vinegar, sugar, and salt until dissolved.
- Transfer cooked rice to a large bowl. Gradually fold in the vinegar mixture until well combined and the rice is shiny. Let cool to room temperature.
- Place a bamboo sushi mat on a clean surface. Lay one sheet of nori, shiny side down, on the mat.
- Moisten your hands with water. Spread about 3/4 cup of sushi rice evenly over the nori, leaving a 1-inch border at the top.
- Arrange a few strips of tuna, cucumber, and avocado horizontally across the center of the rice.
- Carefully lift the edge of the bamboo mat closest to you and roll it tightly over the filling, pressing gently to form a compact log.
- Continue rolling until the end, sealing the edge with a little water.
- Repeat with the remaining nori, rice, and fillings.
- Slice each roll into 6-8 pieces using a sharp, wet knife.
- Serve immediately with soy sauce, wasabi, and pickled ginger.
- Use sushi-grade tuna for safety and best flavor.
- To prevent rice from sticking to your hands, keep a bowl of water nearby to moisten them.
- For extra flavor, you can add a thin layer of mayonnaise or cream cheese before adding the tuna and vegetables.
- If you do not have a bamboo mat, you can use a clean kitchen towel covered with plastic wrap.
- Prep Time: 30 minutes
- Cook Time: 25 minutes
- Category: Main Dish
- Method: Rolling
- Cuisine: Japanese
- Diet: Low Fat
- Serving Size: 1 roll (6-8 pieces)
- Calories: 350
- Sugar: 5g
- Sodium: 600mg
- Fat: 10g
- Saturated Fat: 2g
- Unsaturated Fat: 5g
- Trans Fat: 0g
- Carbohydrates: 50g
- Fiber: 3g
- Protein: 20g
- Cholesterol: 30mg
Preparing the Sushi Rice for Tuna Sushi Rolls
The rice is truly the heart of your Tuna Sushi Rolls, so getting it right is super important! Make sure to rinse it until the water runs completely clear – this washes away extra starch for that perfect sticky (but not gummy!) texture. After cooking and resting, gently fold in that amazing vinegar mixture until it’s all shiny and delicious. And remember, patience is key here: let that rice cool completely to room temperature before you even think about putting it on the nori. It makes all the difference!
Rolling Your Tuna Sushi Rolls Like a Pro
Alright, this is where you become a sushi artist! Lay your nori, shiny side down, on your bamboo mat. Moisten your hands – seriously, don’t skip this – and spread the rice evenly, leaving that little border at the top. Layer your beautiful tuna, cucumber, and avocado in the middle. Now, lift the mat, roll tightly over the filling, pressing gently. Keep rolling, keeping it snug, and use a little water on that top edge to seal it up. For slicing, a super sharp, wet knife is your best friend for those clean, professional-looking pieces!
Tips for Success with Your Tuna Sushi Rolls
Okay, you’ve got the basics down, but I’ve picked up a few little tricks over the years that will take your Tuna Sushi Rolls from good to absolutely amazing! These are the pro tips that make all the difference, trust me. First, that bowl of water for your hands isn’t optional – it’s your absolute best friend for keeping the rice from sticking. Dunk your hands often! Also, when you’re rolling, don’t be afraid to apply firm, even pressure. This is how you get those super tight rolls that hold together beautifully when you slice them. And speaking of slicing, a really sharp knife, kept wet between each cut, is non-negotiable for clean, pretty pieces. If you don’t have a bamboo mat, a clean kitchen towel covered with plastic wrap works surprisingly well in a pinch!
Variations for Your Tuna Sushi Rolls
The beauty of homemade sushi is that you can totally make it your own! Love a little heat? Mix some sriracha with mayo for a spicy tuna kick. A thin layer of cream cheese before your tuna and veggies adds a lovely richness. Or maybe swap out the cucumber for thinly sliced bell peppers or some crisp blanched asparagus. Don’t be shy – experiment with your favorite flavors!
Common Questions About Tuna Sushi Rolls
I get a lot of questions about making sushi at home, and that’s totally understandable! It can feel a little intimidating at first, but honestly, once you get the hang of it, you’ll be answering these questions yourself. Here are some of the most common things people ask me about making these delicious Tuna Sushi Rolls, and my best advice for each one. Don’t sweat it – we’ll get you rolling like a pro!
What kind of tuna is best for Tuna Sushi Rolls?
Oh, this is super important! You absolutely, positively need to use “sushi-grade” or “sashimi-grade” tuna. This means it’s safe to eat raw. You can usually find it at specialty fish markets or some larger grocery stores with a good seafood counter. Don’t skimp here!
Can I make Tuna Sushi Rolls ahead of time?
You totally can, but fresh is always best! If you need to make them a few hours in advance, wrap the uncut rolls tightly in plastic wrap and store them in the fridge. They’re best eaten within a day, though, because the nori can get a little soft if they sit too long.
How do I prevent my Tuna Sushi Rolls from falling apart?
Ah, the dreaded sushi collapse! The key here is twofold: first, make sure your rice isn’t too wet or too dry – it needs to be just sticky enough. Second, and this is big, roll it TIGHTLY! Use that bamboo mat to really compress the ingredients as you roll. Firm, even pressure makes all the difference for sturdy rolls.
Serving and Storing Your Tuna Sushi Rolls
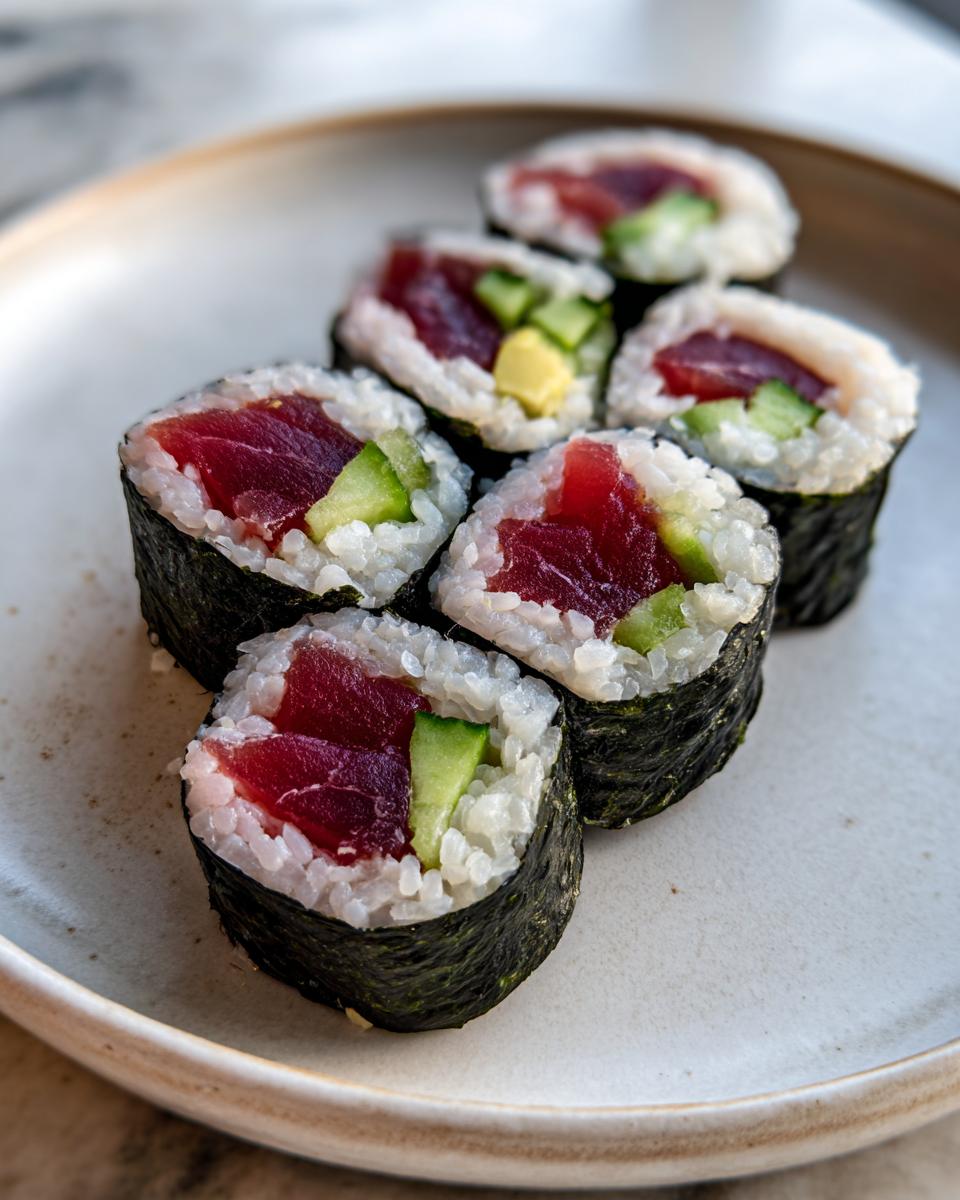
Alright, you’ve done it! Your beautiful Tuna Sushi Rolls are ready, and now it’s time to enjoy your masterpiece. The traditional way to serve them is with little bowls of soy sauce for dipping – I love a low-sodium one myself. Don’t forget a tiny dollop of vibrant green wasabi for that spicy kick, and some pickled ginger to cleanse your palate between bites. If you happen to have any leftovers (which, let’s be real, is rare!), wrap the uncut rolls tightly in plastic wrap and pop them in the fridge. They’re best eaten within 24 hours to keep that nori nice and fresh, but honestly, they rarely last that long in my house!
Estimated Nutritional Information for Tuna Sushi Rolls
I know a lot of you like to keep an eye on what you’re eating, so I’ve put together some estimated nutritional info for these Tuna Sushi Rolls. Just remember, these are estimates! The exact numbers can totally change depending on the brands you use, how much filling you pack in, and even the size of your slices. But this should give you a good general idea:
Share Your Tuna Sushi Rolls Experience
I absolutely LOVE hearing from you all! So, once you’ve whipped up these amazing Tuna Sushi Rolls, please come back and tell me all about it in the comments below. Did you try a fun variation? Share your tips! Don’t forget to rate the recipe, too. And if you snap a pic of your beautiful creations, tag me on social media! I can’t wait to see your sushi masterpieces!
Print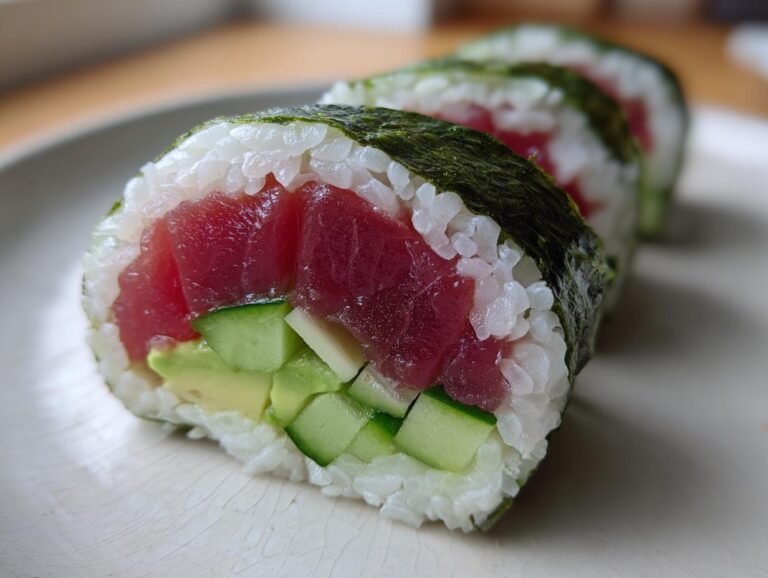
Tuna Sushi Rolls (Maki)
Tuna Sushi Rolls, also known as Maki, are a classic Japanese dish. They feature seasoned sushi rice, fresh tuna, and sometimes other fillings, all rolled in nori (seaweed) and sliced into bite-sized pieces. These rolls are a popular and delicious way to enjoy sushi.