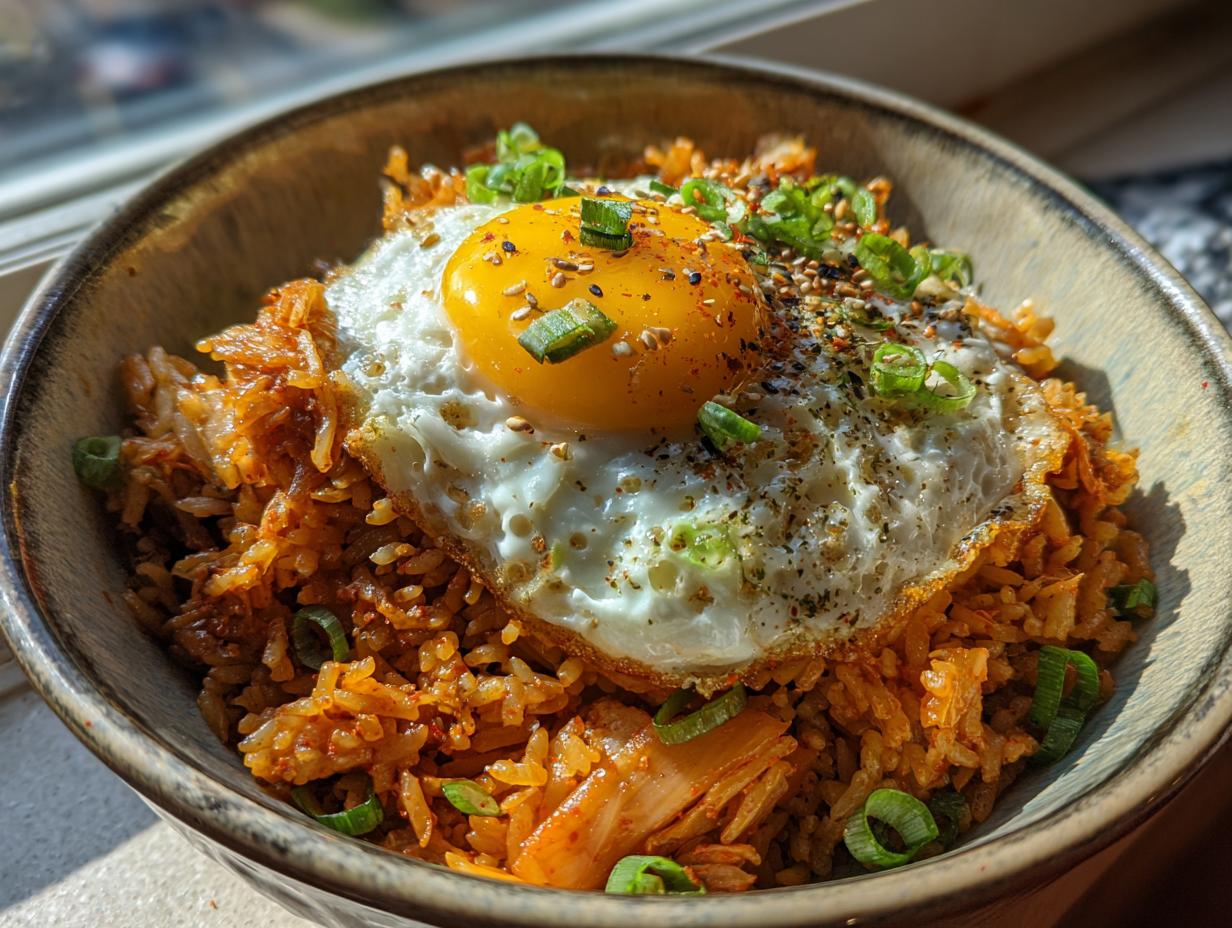
Oh my goodness, friend, if you’re anything like me, you live for those moments when you can whip up something ridiculously delicious without spending hours in the kitchen! And let me tell you, this Tuna Kimchi Fried Rice? It’s an absolute game-changer. I first stumbled upon this gem during my “empty fridge, but starving” phase in college, and it instantly became my go-to. I mean, who knew humble pantry staples could create such a flavor explosion?
I’ve always had a soft spot for Korean-inspired dishes, and this one truly hits all the right notes. It’s got that incredible savory depth from the tuna, a fantastic spicy and tangy kick from the kimchi, all perfectly harmonized in one sizzling pan. Seriously, this Tuna Kimchi Fried Rice is *the* dish for using up leftover rice, clearing out those almost-empty cans, and satisfying your cravings for something exciting. It’s quick, it’s easy, and it’s just so, so good!
Why You’ll Love This Tuna Kimchi Fried Rice
Okay, so why should *this* Tuna Kimchi Fried Rice be your next kitchen adventure? Because it’s pure magic, that’s why! It truly checks all the boxes for a fantastic meal, especially when life gets a little wild. You’re going to adore how quickly it comes together and the incredible flavors it brings to your table. Plus, it’s super friendly on your grocery list, relying on everyday ingredients you probably already have!
- It’s incredibly fast to make.
- The steps are super simple, even for beginner cooks.
- It uses up those handy pantry staples and leftover rice.
- The flavor? Oh my goodness, it’s out of this world!
Quick and Easy Tuna Kimchi Fried Rice
Seriously, if you need dinner on the table, like, five minutes ago, this is your recipe! We’re talking minimal chopping and just a quick sizzle in the pan. It’s truly a lifesaver for those busy weeknights when you want something homemade and hearty but don’t have hours to spare. You’ll be amazed at how fast it goes from pan to plate!
Flavorful and Satisfying Tuna Kimchi Fried Rice
Get ready for a flavor party! This dish perfectly balances the savory richness of the tuna with the zesty, spicy, and tangy punch of kimchi. Then, that glorious gochujang and soy sauce come in with all the umami goodness. Every single bite is comforting, exciting, and just so darn satisfying. It’s the kind of meal that makes you say, “Wow!” out loud.
Essential Ingredients for Tuna Kimchi Fried Rice
Alright, let’s talk ingredients! This is where the magic really starts to come together. One of the reasons I adore this Tuna Kimchi Fried Rice so much is that it relies on some super common pantry items, but don’t let their simplicity fool you – they pack a huge flavor punch when combined just right. I’m going to walk you through exactly what you’ll need, down to the nitty-gritty, so you can have everything prepped and ready to go. Trust me, having your ingredients ready before you start cooking makes the whole process so much smoother and more fun!
You’ll want to gather these beauties:
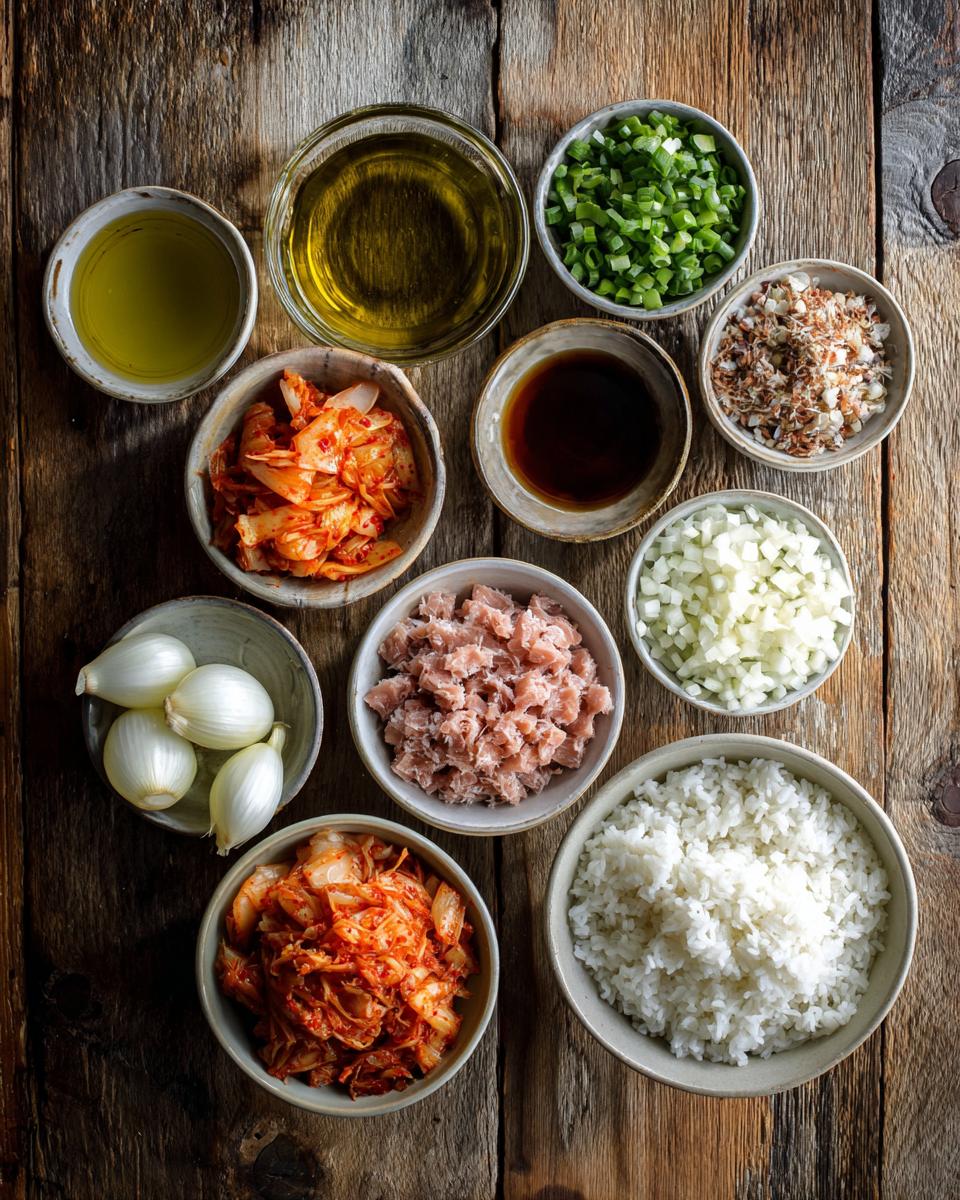
- 2 tablespoons vegetable oil (or any neutral oil you love)
- 1 medium onion, diced
- 2 cloves garlic, minced (don’t skimp on the garlic!)
- 1 cup chopped kimchi, squeezed of excess liquid
- 1 (5 ounce) can tuna in oil, thoroughly drained
- 3 cups cooked day-old rice (this is SUPER important, more on that later!)
- 2 tablespoons soy sauce
- 1 tablespoon gochujang (Korean chili paste – get ready for some spice!)
- 1 teaspoon sesame oil
- 2 green onions, chopped, for garnish
- 1 fried egg per serving (totally optional, but highly recommended!)
Pantry Staples for Your Tuna Kimchi Fried Rice
Now, a little bit more detail on those key players. For your onion, I usually go for a yellow or white onion, finely diced so it practically melts into the rice. Garlic, of course, needs to be freshly minced – no jarred stuff here if you can help it! The kimchi is crucial; make sure it’s chopped into bite-sized pieces and you really squeeze out that extra liquid. For the tuna, the kind packed in oil gives a richer flavor, but just make sure it’s well-drained. And that day-old rice? It’s non-negotiable for that perfect fried rice texture. Soy sauce and gochujang are your flavor powerhouses, and a tiny drizzle of sesame oil at the end just ties it all together beautifully. Don’t forget those fresh green onions and a perfectly fried egg for serving!
How to Make Tuna Kimchi Fried Rice
Alright, my friend, this is where the magic happens! Don’t be intimidated; making this Tuna Kimchi Fried Rice is actually super straightforward and incredibly satisfying. We’re going to build layers of flavor, one delicious step at a time. Just make sure you have all your ingredients prepped and ready to go, because once we start, it moves pretty quickly. Get your biggest skillet or wok out, because we want plenty of surface area for that rice to get nice and crispy!
Preparing Your Tuna Kimchi Fried Rice Base
First things first, let’s get that pan screaming hot! Pour your 2 tablespoons of vegetable oil into a large skillet or wok and crank the heat to medium-high. Once it’s shimmering, toss in your diced onion. We’re going for softened and slightly translucent here, which usually takes about 3-5 minutes. Don’t rush it; those onions are building our flavor foundation! Next, add your minced garlic – oh, that smell! Stir it in for just about a minute until it’s fragrant. We don’t want burnt garlic, so keep an eye on it. Now, for the star: add your chopped kimchi. Cook it for another 3-5 minutes, stirring occasionally. You’re looking for it to start caramelizing a bit, really developing those deep, tangy flavors.
Combining and Cooking Your Tuna Kimchi Fried Rice
Now, let’s bring in the tuna! Add your thoroughly drained tuna to the skillet and break it up with your spoon. Mix it with the kimchi for 2-3 minutes, letting those flavors meld. Then, it’s rice time! Add your day-old rice to the skillet. This is where you get to be a little aggressive – break up any clumps with your spoon. You want individual grains, not big sticky balls! Next, pour in your soy sauce and that glorious gochujang. Stir, stir, stir! Make sure every grain of rice and every bit of tuna and kimchi is coated evenly. Continue cooking for 5-7 minutes, stirring occasionally. This is crucial for getting that perfect fried rice texture – slightly crispy, slightly chewy. Don’t overmix, let it sit and get a little color!
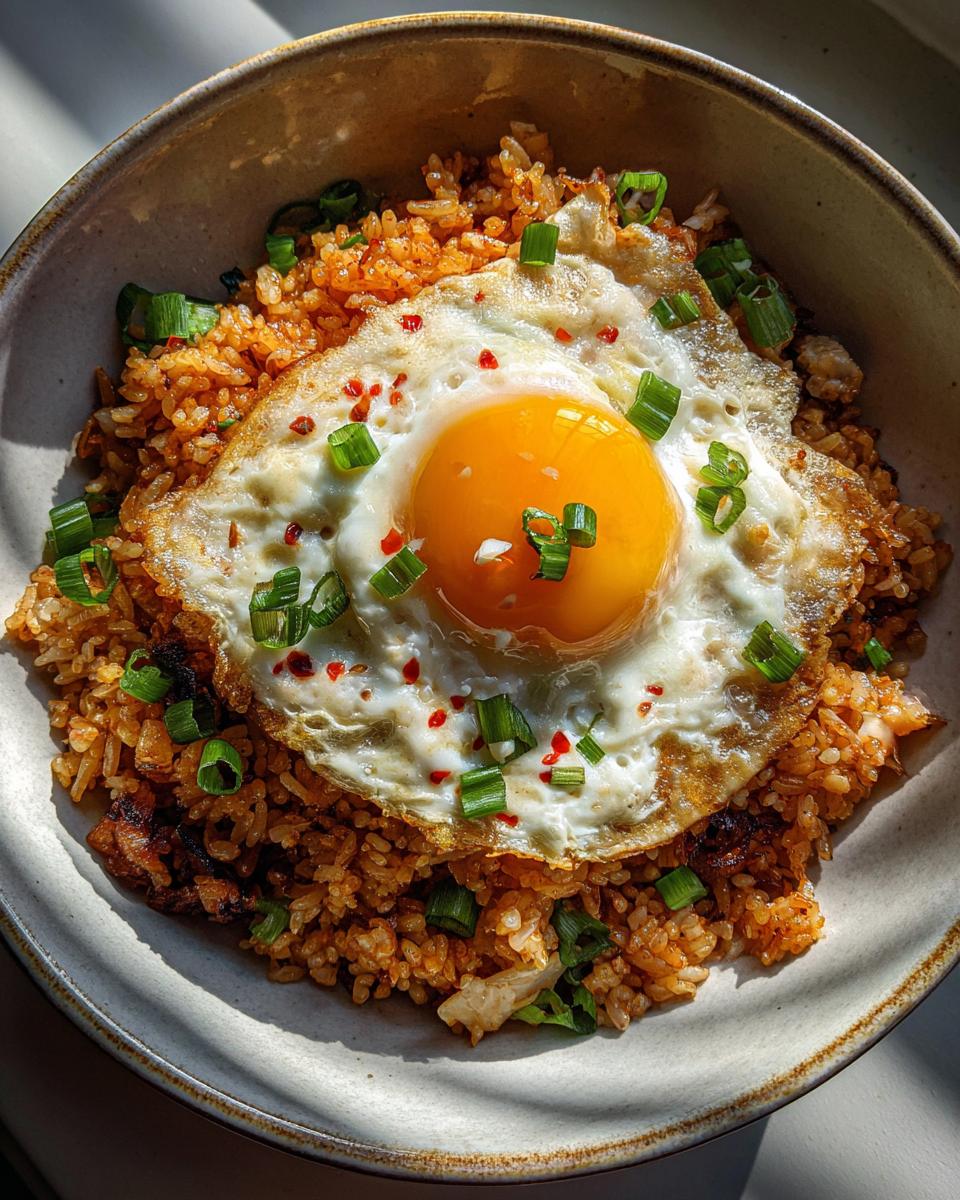
Finishing Touches for Tuna Kimchi Fried Rice
Almost there, just one more little flavor boost! Once your rice is looking perfectly crispy and heated through, drizzle in that teaspoon of sesame oil. Give it one last gentle stir to distribute that nutty aroma. And that’s it, my friend! Serve it up immediately, straight from the pan. For the ultimate experience, garnish generously with your chopped green onions. And if you’re feeling extra fancy (or just extra hungry, like me!), top each serving with a beautifully fried egg. The runny yolk mixing with the spicy rice? Pure heaven!
Tips for Perfect Tuna Kimchi Fried Rice
Okay, you’ve got the basic steps down, but if you want your Tuna Kimchi Fried Rice to go from “good” to “OMG, I need more!” then pay attention to these little nuggets of wisdom. These are the things I’ve learned over countless batches, saving you from any potential fried rice mishaps. It’s all about nailing that texture, balancing those incredible flavors, and making sure every single ingredient shines!
Day-Old Rice for the Best Tuna Kimchi Fried Rice
I cannot stress this enough, my friend: day-old rice is NOT optional; it’s absolutely crucial for amazing fried rice! Freshly cooked rice is just too moist and steamy, and when you try to fry it, you’ll end up with a sticky, mushy mess. Day-old rice, on the other hand, has dried out a bit in the fridge, making those grains separate beautifully and get all nice and crispy in the pan. Trust me on this – plan ahead for perfection!
Customizing Your Tuna Kimchi Fried Rice Spice Level
Spice is personal, right? That’s why gochujang is your best friend here. If you’re a heat-seeker like me, feel free to add an extra half-tablespoon (or even a full one!) of gochujang. If you prefer things milder, start with just half a tablespoon and taste as you go. For an extra layer of tangy, spicy goodness, don’t be afraid to drizzle in a little bit of that kimchi juice you squeezed out earlier – it adds so much depth!
Tuna Kimchi Fried Rice Variations
Once you’ve mastered the classic Tuna Kimchi Fried Rice, the world is your oyster for customization! This recipe is incredibly forgiving and loves a little personalization. Feeling like adding more veggies? Absolutely! Toss in some frozen peas, diced carrots, or bell peppers with the onions for extra nutrition and crunch. If you don’t have tuna, cooked chicken or even some thinly sliced beef would be delicious. You could even swap out the tuna for pan-fried tofu for a plant-based twist. Don’t be afraid to experiment and make it truly your own!
Common Questions About Tuna Kimchi Fried Rice
Okay, so you’re probably buzzing with excitement to make this amazing Tuna Kimchi Fried Rice, but maybe a few questions are popping into your head. Don’t worry, I’ve got you covered! I’ve answered some of the most common questions I get about this recipe, especially regarding ingredients and how to get that perfect fried rice experience. Think of me as your personal kitchen hotline!
Can I use fresh rice for Tuna Kimchi Fried Rice?
Oh, friend, I really, *really* recommend against using fresh rice for your Tuna Kimchi Fried Rice! Fresh rice is just too moist and will turn your delicious dish into a clumpy, mushy mess. If you absolutely have no day-old rice, cook fresh rice, spread it thin on a baking sheet, and pop it in the fridge (or even freezer for 15-20 min) to dry out before using.
What kind of tuna is best for Tuna Kimchi Fried Rice?
For the best Tuna Kimchi Fried Rice, I always reach for tuna packed in oil. It just gives a richer, more satisfying flavor and a better texture that stands up to the bold kimchi. Tuna packed in water works in a pinch, but it can sometimes make the dish a little drier. Just make sure to drain whatever kind you use really well!
How spicy is Tuna Kimchi Fried Rice?
The spice level of this Tuna Kimchi Fried Rice is totally up to you! As written, with 1 tablespoon of gochujang, it’s got a lovely medium kick – enough to warm your mouth without overwhelming the other flavors. If you’re a spice fiend, add another half tablespoon or even a whole one! If you’re sensitive to heat, start with just half a tablespoon and taste as you go.
Storing and Reheating Your Tuna Kimchi Fried Rice
Okay, so you’ve made a glorious batch of Tuna Kimchi Fried Rice, and maybe, just maybe, you have some leftovers (though I doubt it, this stuff is addictive!). Don’t fret about keeping it delicious for later. Just transfer any cooled leftovers into an airtight container and pop it in the fridge. It’ll stay fantastic for up to 3-4 days. When you’re ready for round two, my favorite way to reheat it is in a skillet over medium heat. Add a tiny splash of water or oil to keep it from drying out, and stir until it’s heated through. The microwave works too, but the skillet really helps bring back those crispy bits!
Estimated Nutritional Information for Tuna Kimchi Fried Rice
I know many of you like to keep an eye on the nutritional side of things, and I totally get it! While I can’t provide exact numbers because ingredients and brands vary wildly, I want to give you a heads-up that this Tuna Kimchi Fried Rice is a pretty hearty and satisfying meal. Please remember that any nutritional information you see for recipes is always an estimate, and it can change based on the specific brands you use for your tuna, soy sauce, and even the type of rice. It’s packed with flavor, and that’s what truly matters!
Share Your Tuna Kimchi Fried Rice Experience
Well, there you have it, my friend! My absolute favorite Tuna Kimchi Fried Rice recipe. Now it’s YOUR turn! I’d totally love to hear how it went for you. Did you add extra gochujang? Did you put a fried egg on top? Please, please, pretty please, leave a comment below and let me know your thoughts! And if you snap a pic, tag me on social media – I can’t wait to see your delicious creations!
Print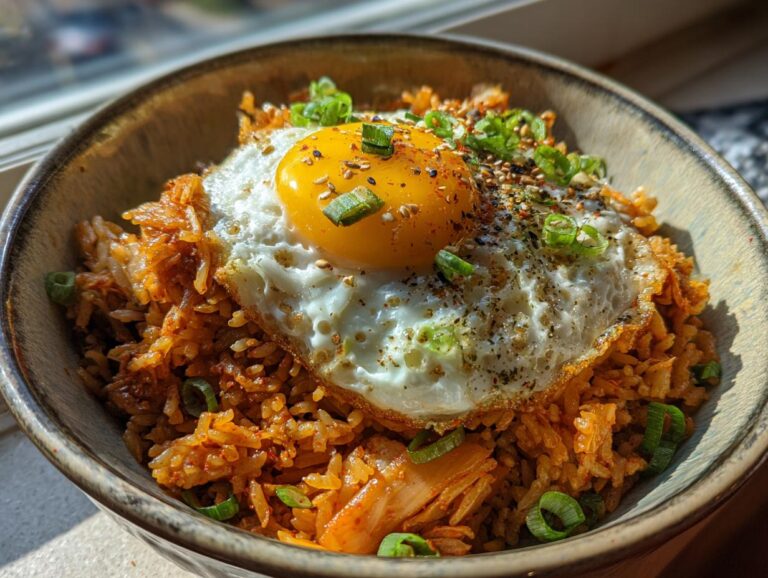
Tuna Kimchi Fried Rice
This recipe guides you through making a flavorful tuna kimchi fried rice. It is a quick and satisfying meal, perfect for using leftover rice and pantry staples. The dish combines the savory goodness of tuna with the spicy and tangy kick of kimchi, all brought together in a sizzling pan.
- Total Time: 35 minutes
- Yield: 2-3 servings 1x
Ingredients
- 2 tablespoons vegetable oil
- 1 medium onion, diced
- 2 cloves garlic, minced
- 1 cup chopped kimchi, squeezed of excess liquid
- 1 (5 ounce) can tuna in oil, drained
- 3 cups cooked day-old rice
- 2 tablespoons soy sauce
- 1 tablespoon gochujang (Korean chili paste)
- 1 teaspoon sesame oil
- 2 green onions, chopped, for garnish
- 1 fried egg per serving (optional)
Instructions
- Heat vegetable oil in a large skillet or wok over medium-high heat.
- Add diced onion and cook until softened, about 3-5 minutes.
- Stir in minced garlic and cook for another minute until fragrant.
- Add the chopped kimchi to the skillet and cook for 3-5 minutes, stirring occasionally, until it begins to caramelize.
- Add the drained tuna to the skillet, breaking it up with a spoon. Cook for 2-3 minutes, stirring to combine with the kimchi.
- Add the day-old rice to the skillet. Break up any clumps with a spoon.
- Pour in the soy sauce and gochujang. Stir well to coat all the ingredients evenly. Cook for 5-7 minutes, stirring occasionally, until the rice is heated through and slightly crispy.
- Stir in the sesame oil.
- Serve immediately, garnished with chopped green onions and a fried egg on top, if desired.
Notes
- Using day-old rice is crucial for the best fried rice texture, as fresh rice can be too moist and lead to a mushy dish.
- Adjust the amount of gochujang to your spice preference.
- Feel free to add other vegetables like peas, carrots, or bell peppers for extra nutrition and flavor.
- For an extra layer of flavor, you can add a drizzle of kimchi juice (from the squeezed kimchi) at the end.
- Prep Time: 15 minutes
- Cook Time: 20 minutes
- Category: Main Dish
- Method: Stovetop
- Cuisine: Korean
- Diet: None
Nutrition
- Serving Size: 1 serving
- Calories: 450
- Sugar: 5g
- Sodium: 1200mg
- Fat: 20g
- Saturated Fat: 3g
- Unsaturated Fat: 15g
- Trans Fat: 0g
- Carbohydrates: 50g
- Fiber: 4g
- Protein: 25g
- Cholesterol: 50mg