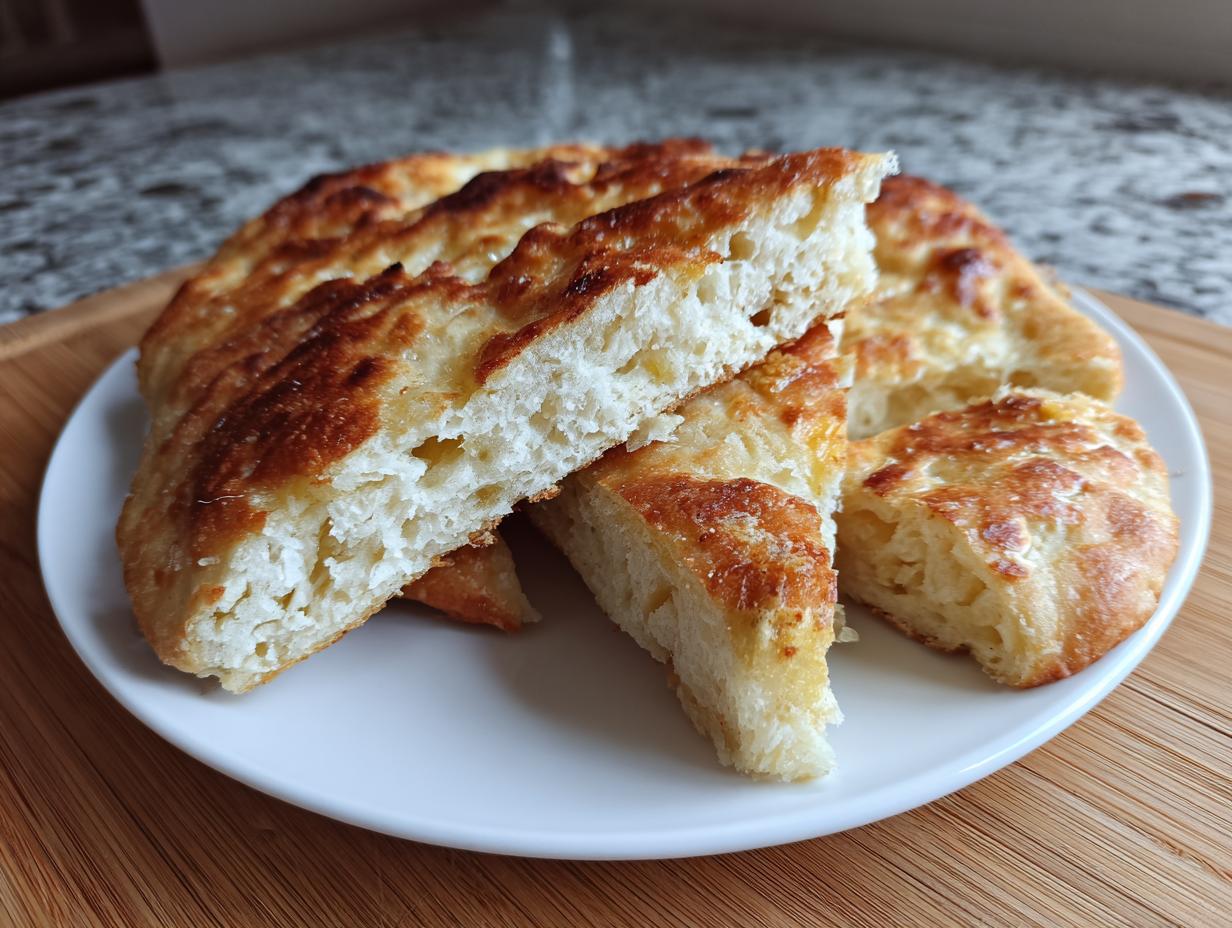
Oh my goodness, you guys, get ready for a treat! There’s something so incredibly comforting about traditional Irish baking, right? It just *feels* like home, even if you’ve never been to Ireland. Today, we’re diving into the wonderful world of Soda Farls! These aren’t just any quick bread; they’re these perfectly soft, slightly dense, utterly delightful little wedges that are an absolute staple in an Irish breakfast. I first stumbled upon them during a whirlwind trip to Dublin years ago, and honestly, it was love at first bite. I couldn’t believe how simple they were to make, yet how much flavor and joy they packed into every single crumb. They’re basically the ultimate easy-peasy, super-satisfying bread that’s perfect for breakfast, a quick snack, or really, anytime you need a little hug in food form. Trust me, once you make these, you’ll wonder where they’ve been all your life!
Why You’ll Love These Soda Farls
Honestly, what’s not to love? These Soda Farls are total game-changers, especially if you’re looking for something quick, comforting, and utterly delicious. I mean, who has hours for baking every day? Not me! That’s why I adore these so much. You get that amazing homemade goodness without all the fuss.
The Simplicity of Making Soda Farls
Seriously, if you can stir, you can make these! We’re talking basic pantry staples and just a few minutes of your time. No fancy equipment, no waiting for yeast to rise – just mix, shape, and cook. It’s the perfect recipe for beginners, or for those busy mornings when you still want something special.
Versatile and Delicious Soda Farls
Oh, the possibilities! These aren’t just for breakfast, though they shine there, slathered with butter and jam. But try them with a fried egg and beef bacon, or even alongside a hearty stew. They’re amazing warm, cold, sweet, or savory. Your imagination is the limit!
Authentic Irish Flavor in Every Bite
There’s just something about that subtle tang from the buttermilk and the simple, honest flavor of these Farls that transports you straight to a cozy Irish kitchen. It’s that true, comforting taste of tradition, and it’s just so incredibly satisfying. You’ll feel like a master baker, I promise!
Essential Ingredients for Perfect Soda Farls
Alright, let’s talk ingredients! One of the reasons I adore these Soda Farls so much is how incredibly simple the ingredient list is. We’re talking pantry staples, folks! You probably have most of this stuff on hand right now. But don’t let the simplicity fool you; each one plays a crucial role in getting that perfect texture and flavor. No weird, hard-to-find items here, just good, honest baking basics.
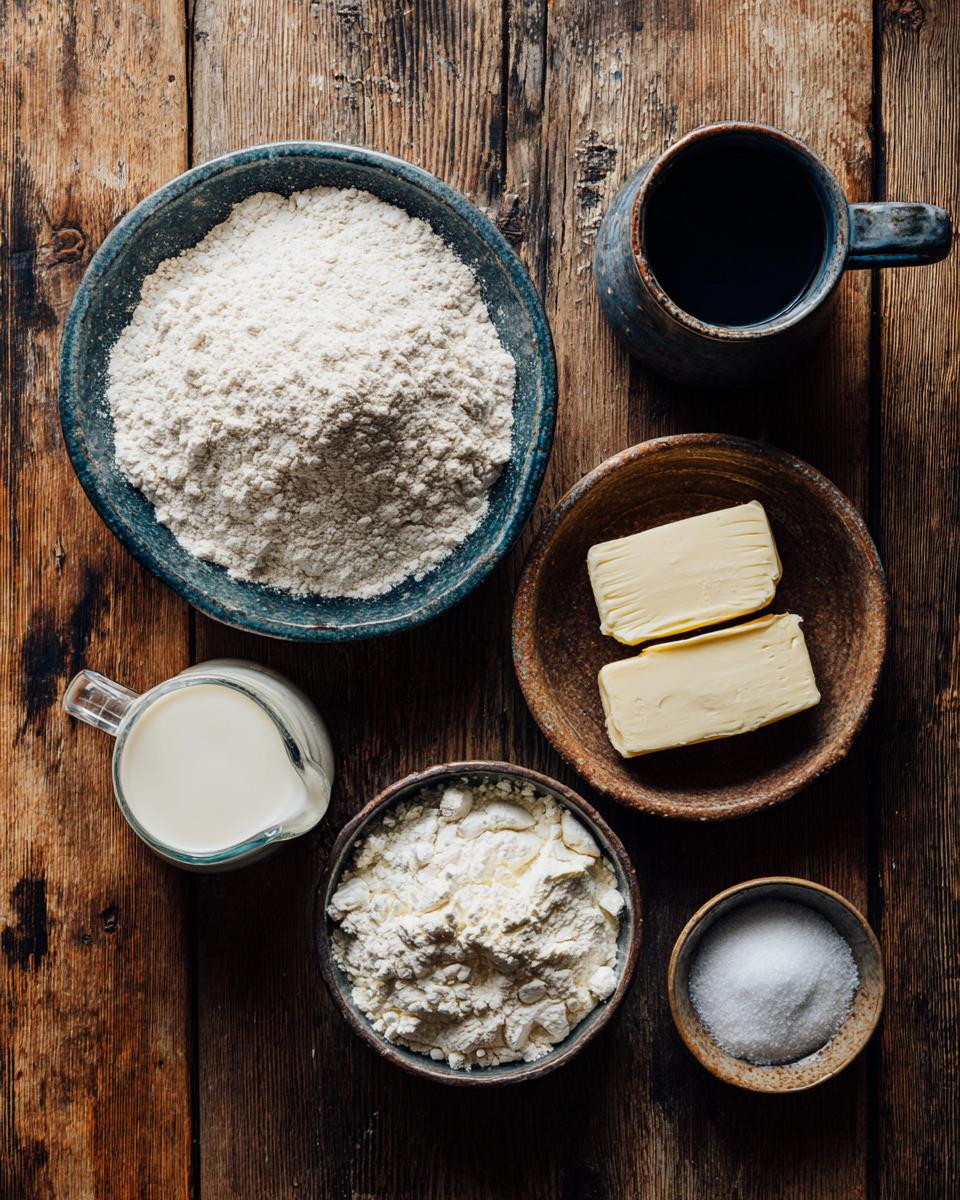
Gathering Your Soda Farls Ingredients
- 2 cups all-purpose flour: Just your regular, trusty flour.
- 1 teaspoon baking soda: This is our leavening agent, giving the farls their lift.
- 1/2 teaspoon salt: Balances everything out and brings out the flavors.
- 1 tablespoon unsalted butter, softened: Make sure it’s soft, not melted, for easy mixing!
- 3/4 cup buttermilk: The star of the show for that classic tang and tender crumb.
Step-by-Step Guide to Making Soda Farls
Okay, now for the fun part! Making these Soda Farls is incredibly straightforward, so don’t be intimidated. We’re going to break it down into super easy steps, and you’ll be enjoying warm, homemade farls in no time. Just follow along, and I promise you’ll have perfect results!
Preparing Your Soda Farls Dough
First things first, grab a big bowl. In it, you’re going to whisk together all your dry ingredients: the flour, baking soda, and salt. Give it a good whisk until everything is nicely combined. You want to make sure that baking soda is evenly distributed, trust me!
Next up, it’s time for that softened unsalted butter. You’re going to “cut it in.” This just means you’re breaking up the butter into small pieces and mixing it into the flour mixture. I usually use my fingertips or a pastry blender for this until it looks like coarse crumbs. You don’t want big chunks of butter, but you also don’t need it to be perfectly smooth. This is where the magic starts to happen for that tender texture!
Now, pour in the buttermilk. And this is crucial: mix it *just* until a soft dough forms. I usually use a wooden spoon for this. Seriously, stop mixing as soon as everything comes together. Overmixing is the enemy of tender farls; it makes them tough, and we definitely don’t want that!
Shaping and Cutting Your Soda Farls
Time to get a little hands-on! Lightly flour your countertop or a clean surface. Turn your dough out onto it. Now, gently knead the dough for just 1-2 minutes. We’re not trying to develop gluten here like with yeast breads; we just want to bring it together until it’s smooth. Remember, gentle is key!
Once it’s smooth, shape that beautiful dough into a round, flat disc. Aim for about 1/2 inch thick. Try to make it as even as possible so all your farls cook consistently. Then, using a sharp knife or a dough cutter, cut the disc into four equal wedges. Ta-da! You’ve got your farls ready for the griddle!
Cooking Your Delicious Soda Farls
Heat a lightly oiled griddle or a non-stick pan over medium heat. You don’t want it scorching hot, just a nice, steady medium. Once it’s warmed up, carefully place your farls onto the griddle. Don’t crowd the pan; if you need to, cook them in batches.
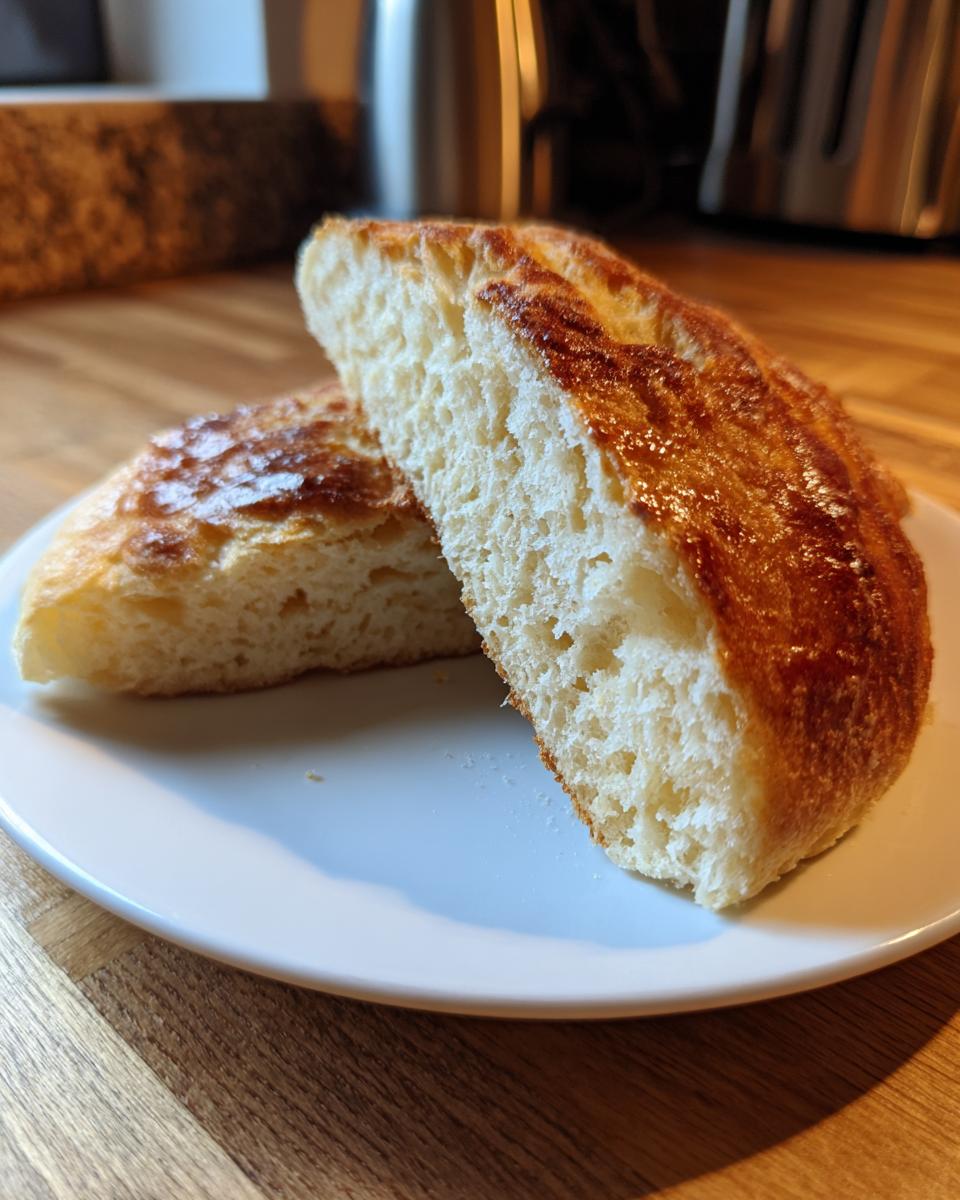
Now, let them cook! It usually takes about 5-7 minutes per side. You’re looking for them to turn a lovely golden brown. When you flip them, they should look beautifully toasted. And how do you know they’re cooked through? They’ll be golden on both sides, feel firm to the touch, and if you gently press one in the middle, it should spring back. Oh, and they’ll smell absolutely divine! Serve them up warm, and get ready for a treat!
Tips for Success with Your Soda Farls
Okay, so you’ve got the basics down, but I’ve got a few extra nuggets of wisdom that will take your Soda Farls from “good” to “OMG, these are amazing!” These are the little tricks I’ve picked up that make all the difference. Baking is all about feeling and a bit of intuition, right? So, let’s get you feeling confident in the kitchen!
Avoiding Tough Soda Farls
This is probably the NUMBER ONE tip I can give you: DO. NOT. OVERMIX! Seriously, I can’t stress this enough. As soon as your dough just comes together, stop. I mean it! If you keep stirring and kneading, you’ll develop too much gluten, and instead of a tender, fluffy farl, you’ll get something that feels more like a hockey puck. We want soft, pillowy goodness, so be gentle, okay? Just a minute or two of light kneading is all it needs.
Achieving the Perfect Golden Brown on Your Soda Farls
Getting that beautiful, inviting golden-brown crust is key! It’s not just about looks; that crust adds a lovely texture. My best advice here is to trust your griddle and your eyes. Medium heat is your friend. If it’s too high, they’ll burn on the outside before cooking through. Too low, and they’ll just dry out. You want a steady sizzle, not a frantic one. Watch for those beautiful golden edges creeping up, and when you flip them, they should have that perfect toasted color. If they’re browning too fast, just nudge your heat down a tiny bit!
Serving Suggestions for Your Soda Farls
Alright, you’ve got these gorgeous, warm Soda Farls fresh off the griddle – now what?! This is where the real fun begins! They’re so versatile, you can go classic or get totally creative. Honestly, sometimes I just eat them plain, they’re that good, but adding a little something extra just elevates the whole experience!
Classic Pairings for Soda Farls
You truly can’t go wrong with the classics, my friends. My absolute favorite way to enjoy a warm Soda Farl is slathered with a generous pat of good quality butter – it just melts into all those nooks and crannies, pure bliss! Then, add a dollop of your favorite jam, maybe a tangy raspberry or a sweet strawberry. Marmalade is also fantastic, giving it a lovely citrusy kick. Simple, perfect, and utterly comforting!
Creative Toppings for Your Soda Farls
But hey, if you’re feeling adventurous, let’s get creative! For a sweet treat, a drizzle of honey or maple syrup is divine. A sprinkle of cinnamon sugar? Yes, please! For a savory twist, these are amazing with a fried egg and some crispy beef bacon, or even alongside a bowl of hearty soup. I’ve even spread some cream cheese and chives on them – don’t knock it ’til you try it! They’re a blank canvas for deliciousness!
Storing and Reheating Your Soda Farls
Got some leftover Soda Farls? Lucky you! While they’re absolutely best fresh off the griddle, these little beauties store surprisingly well, so you can enjoy that comforting taste for a couple more days. We definitely don’t want any of our hard work going to waste, right?
Keeping Your Soda Farls Fresh
Once your Soda Farls have cooled completely (this is important, otherwise they’ll get soggy!), just pop them into an airtight container or a resealable bag. They’ll be perfectly happy hanging out on your kitchen counter at room temperature for up to two days. If you want to keep them longer, you can definitely store them in the fridge for up to a week, or even freeze them for a month or two! Just make sure they’re wrapped really well to prevent freezer burn.
Enjoying Leftover Soda Farls
Reheating is super easy! If they’re from the fridge or counter, a quick zap in the microwave for 15-30 seconds will warm them right up. My absolute favorite way, though, is to pop them back onto a warm griddle or into a toaster oven for a few minutes until they’re lightly toasted and crispy again. It brings back that fresh-baked magic! If they were frozen, let them thaw first, then reheat as usual. You’ll be amazed at how good they taste, almost like they were just made!
Common Questions About Soda Farls
Okay, so you’ve got your hands dirty (in the best way!) making these delicious Soda Farls, and maybe a few questions popped into your head. Don’t worry, I’ve got you covered! Here are some of the common things people ask about these wonderful Irish quick breads.
What are Soda Farls?
So, what exactly are these magical things? Well, Soda Farls are a traditional Irish quick bread. “Farl” actually comes from the Irish word “fáirlín,” meaning a fourth part, because they’re typically cut into four wedges from a round disc of dough. They’re made with baking soda (hence “soda”!) as the leavening agent, rather than yeast, which is why they come together so quickly. They’re usually cooked on a griddle or in a frying pan, giving them that lovely crust and tender, slightly dense interior. Think of them as a cousin to soda bread, but flatter and faster to cook!
Can I make Soda Farls without buttermilk?
Ah, the age-old question! Buttermilk is definitely key for that classic tangy flavor and tender crumb in Soda Farls. It reacts with the baking soda to create lift. But if you’re in a pinch and don’t have any, don’t despair! You can absolutely make your own “sour milk” substitute. Just measure out 3/4 cup of regular milk (whole milk works best!) and add one tablespoon of white vinegar or lemon juice. Let it sit for about 5-10 minutes until it looks slightly curdled. It won’t be exactly the same as real buttermilk, but it’ll work beautifully in a pinch and still give your farls that necessary acidity.
What is the best way to cook Soda Farls?
For me, the best way to cook Soda Farls is definitely on a griddle or in a heavy-bottomed non-stick pan over medium heat. This method gives them that perfect golden-brown crust and allows them to cook evenly through. You get that lovely slightly crispy exterior and soft interior. While you *could* technically bake them in an oven, you wouldn’t get that same griddle-cooked texture, and they might dry out a bit more. The griddle is traditional for a reason, and it’s what gives them their authentic charm!
How do I know when my Soda Farls are fully cooked?
This is important, right? Nobody wants a raw center! You’ll know your Soda Farls are fully cooked when they’re beautifully golden brown on both sides. They should also feel firm to the touch when you gently press them in the middle. Another great sign is that they’ll often sound kind of hollow when you tap them. And, of course, they’ll smell absolutely incredible, filling your kitchen with that warm, comforting aroma. If you’re really unsure, you can always poke a thin skewer or toothpick into the thickest part; it should come out clean.
Estimated Nutritional Information for Soda Farls
Understanding Your Soda Farls Nutrition
Just a quick heads-up on the numbers! While I’m not a nutritionist, I can give you an estimate of what you’re looking at with these delicious Soda Farls. Per serving (that’s one farl!), you can expect around 250 calories, 8g of fat, 40g of carbohydrates, and 6g of protein. Remember, these are approximate values and can change a bit depending on your exact ingredients and how big you cut them. But hey, it’s good to have a general idea, right?
Share Your Soda Farls Experience
We’d Love to Hear About Your Soda Farls!
So, you’ve made them! How did your Soda Farls turn out? Did you stick to the classics, or did you get creative with your toppings? I’d absolutely love to hear all about it in the comments below! Don’t be shy – share your successes, your variations, or even just what you thought of them. Happy baking, friends!
Print
Simple Irish Soda Farls for Griddle
Soda Farls are traditional Irish quick breads, often served as part of a hearty breakfast. They are simple to make and have a soft, slightly dense texture.
- Total Time: 35 minutes
- Yield: 4 farls 1x
Ingredients
- 2 cups all-purpose flour
- 1 teaspoon baking soda
- 1/2 teaspoon salt
- 1 tablespoon unsalted butter, softened
- 3/4 cup buttermilk
Instructions
- In a large bowl, whisk together the flour, baking soda, and salt.
- Cut in the softened butter until the mixture resembles coarse crumbs.
- Pour in the buttermilk and mix until a soft dough forms. Avoid overmixing.
- Turn the dough out onto a lightly floured surface and gently knead for 1-2 minutes until smooth.
- Shape the dough into a round, flat disc about 1/2 inch thick.
- Cut the disc into four equal wedges (farls).
- Heat a lightly oiled griddle or non-stick pan over medium heat.
- Cook the farls for 5-7 minutes per side, or until golden brown and cooked through.
- Serve warm with butter, jam, or your favorite breakfast toppings.
Notes
- Do not overmix the dough, as this can make the farls tough.
- Adjust the cooking time based on the thickness of your farls and the heat of your pan.
- Farls can be stored in an airtight container at room temperature for up to 2 days.
- Prep Time: 15 minutes
- Cook Time: 20 minutes
- Category: Breakfast
- Method: Griddle
- Cuisine: Irish
- Diet: Vegetarian
Nutrition
- Serving Size: 1 farl
- Calories: 250
- Sugar: 2g
- Sodium: 400mg
- Fat: 8g
- Saturated Fat: 5g
- Unsaturated Fat: 2g
- Trans Fat: 0g
- Carbohydrates: 40g
- Fiber: 2g
- Protein: 6g
- Cholesterol: 20mg