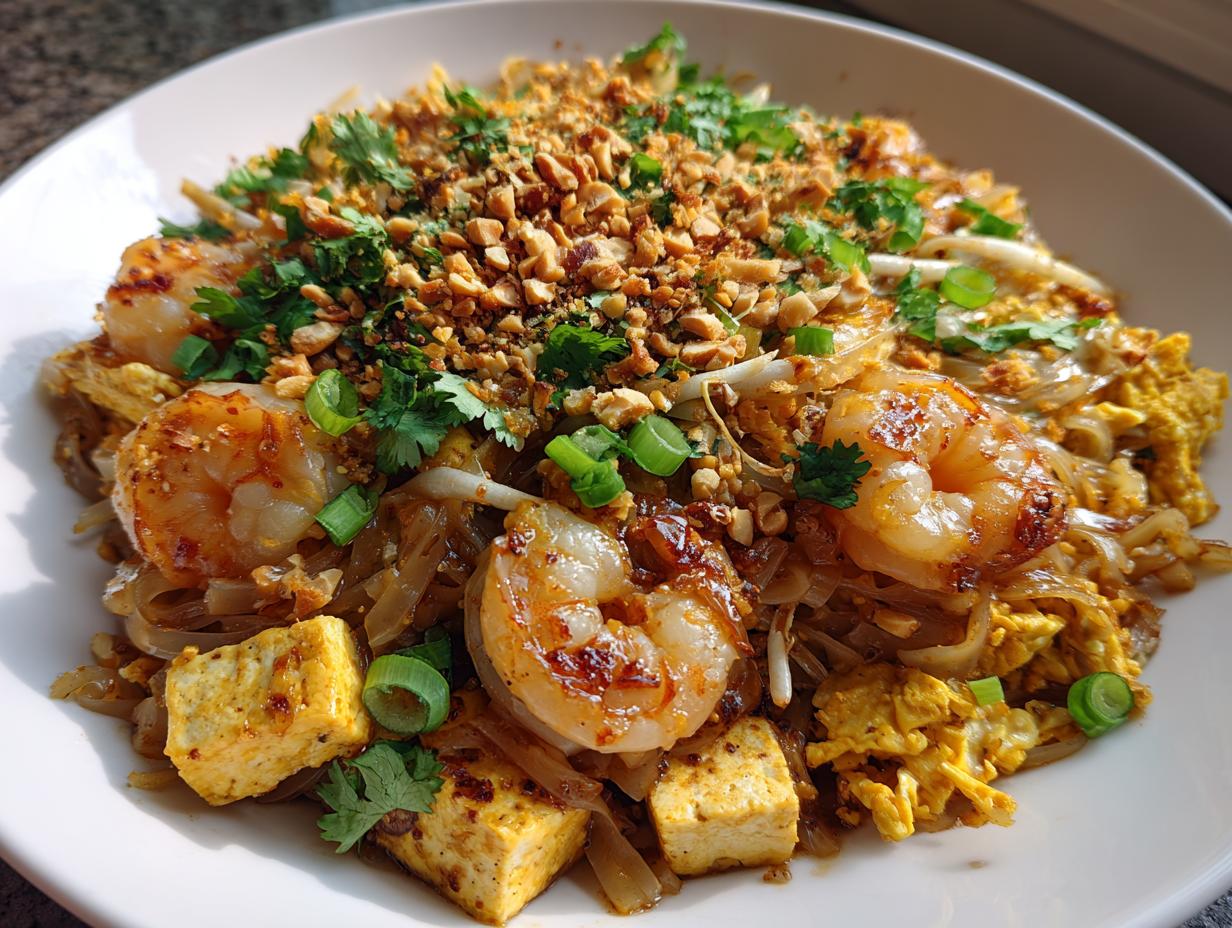
Oh, Pad Thai! Just saying the name makes my mouth water, doesn’t it? For the longest time, I thought getting that perfect, authentic balance of sweet, sour, and savory was some kind of culinary magic only found in my favorite Thai restaurant. I mean, those chewy noodles, the perfectly cooked shrimp, that little kick of spice… it all just *sings*! My first attempt at making Pad Thai at home was, let’s just say, an adventure. It tasted… fine. But it wasn’t *that* Pad Thai. It didn’t have that incredible depth of flavor that makes you close your eyes and just savor every single bite.
But you know me, I don’t back down from a kitchen challenge! I was determined to crack the code for truly delicious, restaurant-quality Pad Thai right in my own kitchen. After many (many!) batches, tweaking ingredients, experimenting with different noodle soaking times, and even bugging a few chef friends, I finally nailed it. And now, I’m absolutely bursting to share this incredible Pad Thai recipe with you!
This isn’t just *any* Pad Thai recipe; it’s the one that brings all those amazing flavors together in perfect harmony. It’s got that irresistible tang, a lovely sweetness, and just enough savory goodness to make it completely addictive. And the best part? It’s surprisingly quick to whip up, making it an absolute lifesaver for those busy weeknights when you still want something seriously satisfying. Trust me, once you try this homemade Pad Thai, you’ll be making it again and again!
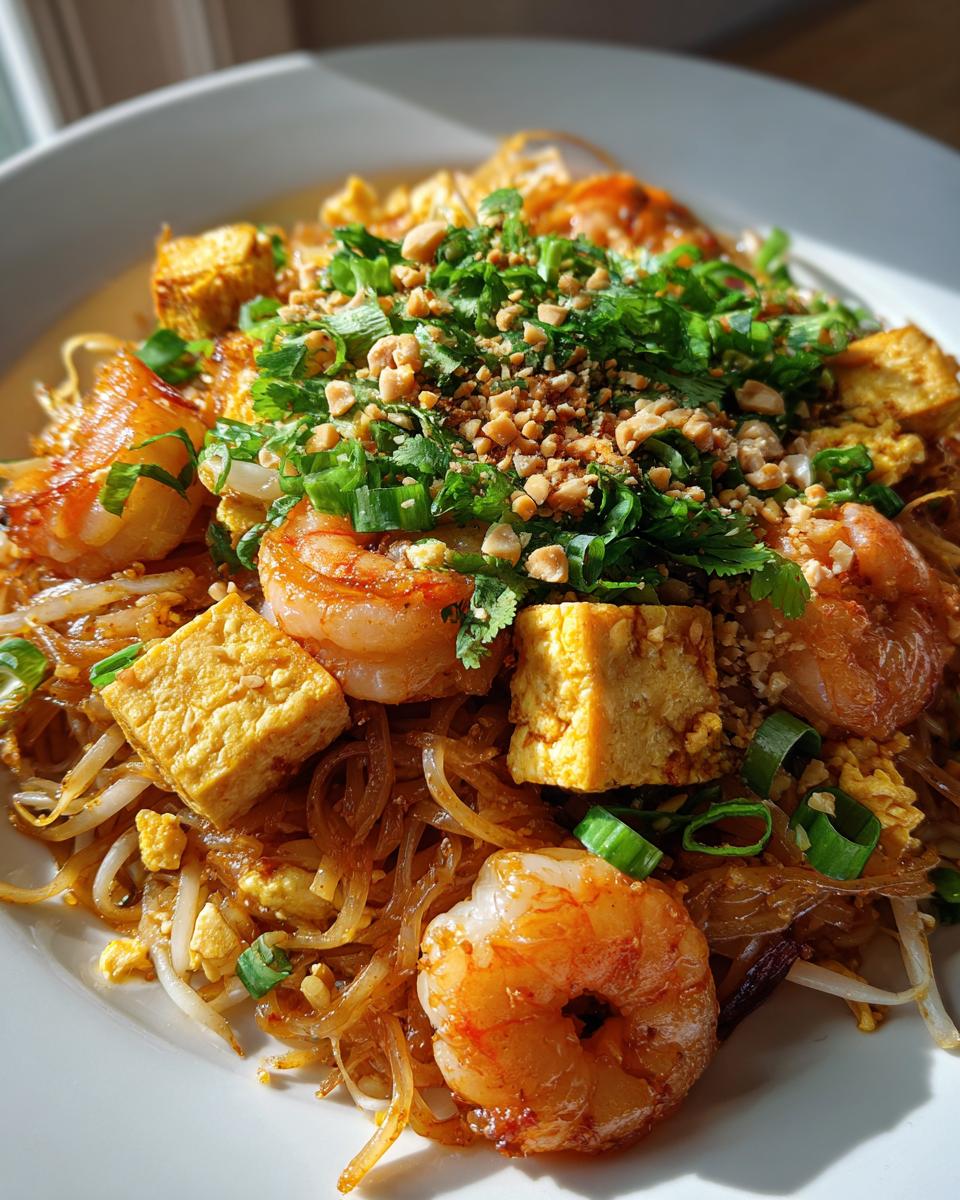
Why You’ll Love This Homemade Pad Thai
So, why should *you* dive into making this Pad Thai recipe? Seriously, there are so many reasons! It’s not just about getting dinner on the table; it’s about creating something truly special that tastes even better than takeout. Plus, you get to be the master of your own wok, which is pretty cool if you ask me!
- You control the ingredients and quality.
- It’s ridiculously satisfying to make yourself.
- Leftovers (if there are any!) are amazing.
The Perfect Pad Thai Balance of Flavors
This Pad Thai is all about that incredible flavor dance! We’re talking that perfect sweet from the brown sugar, a zesty punch from the lime, and that deep, savory goodness from the fish sauce and tamarind. It all just comes together in this symphony of taste that makes every bite an absolute delight. You’ll get hints of garlic, the fresh pop of cilantro, and that satisfying crunch from the peanuts. It’s seriously balanced, just like a great meal should be!
Quick and Easy Pad Thai Preparation
Okay, I know “quick and easy” can sometimes feel like a lie when it comes to cooking, but not here! This Pad Thai is genuinely fast. Once you’ve got your noodles soaking and your sauce whisked, the actual cooking part is a super speedy stir-fry. We’re talking minutes, not hours, for a truly impressive meal. It’s perfect for those nights when you want something homemade and delicious but just don’t have endless time.
Customizable Pad Thai for Every Taste
One of my favorite things about this Pad Thai is how flexible it is! Love a little extra heat? Go wild with those red pepper flakes. Not a fan of shrimp? You can totally swap in some sliced chicken, beef, or even just more tofu! Want more veggies? Throw ’em in! This recipe is a fantastic base, and you can tweak it to perfectly suit your taste buds or whatever you’ve got in the fridge. It’s *your* Pad Thai experience!
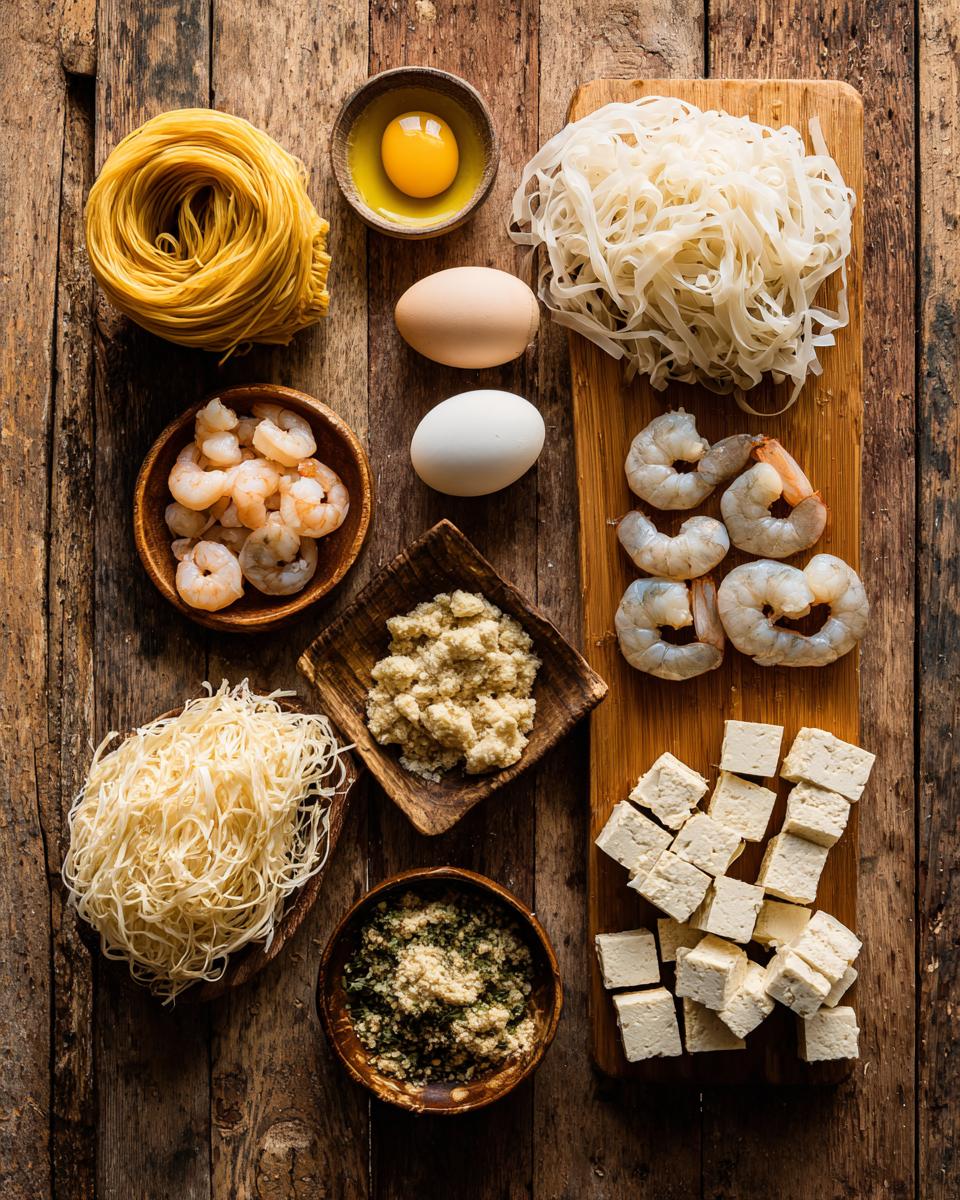
Essential Ingredients for Authentic Pad Thai
Alright, let’s talk ingredients! This is where the magic really starts for our Pad Thai. I’m a stickler for good quality, especially when it comes to a dish this flavorful. Don’t worry, nothing too exotic here, but paying attention to a few specifics will make all the difference in your homemade Pad Thai!
Noodle Selection for Your Pad Thai
For Pad Thai, you absolutely *have* to get flat rice noodles. Not the super thin vermicelli, and definitely not the wide, fresh ones you find for Pad See Ew. We’re looking for those medium-width, dried flat rice noodles, usually labeled “rice stick noodles” or “Pad Thai noodles.” They’re usually about 1/4 to 1/2 inch wide. The soaking process is key here – we want them pliable, but still a little firm. That’s how we get that perfect chewy texture in our Pad Thai!
Fresh Produce and Proteins for Pad Thai
Fresh is best, always! For our proteins, we’re using juicy shrimp (peeled and deveined, please!) and some firm tofu. Pressing the tofu is a must for me; it gets rid of excess water, making it soak up all that delicious Pad Thai sauce better and brown up beautifully. Then, we’ve got our fresh garlic, lovely green onions, and those crisp bean sprouts. Don’t forget the fresh lime for serving – it brightens everything up!
Crafting the Iconic Pad Thai Sauce
This sauce, oh my goodness, this sauce! It’s the heart and soul of our Pad Thai. We’re talking fresh lime juice for that essential sourness, good quality fish sauce for savory depth (don’t skimp here!), rich brown sugar for sweetness, and that incredible tamarind paste. Tamarind is non-negotiable if you want authentic flavor – it gives a unique fruity tang that nothing else can replicate. And a little red pepper flakes if you like a kick, of course!
How to Prepare Your Perfect Pad Thai
Okay, you’ve got your ingredients ready, your apron’s on, and maybe you’ve even got some fun music playing! Now for the exciting part: bringing it all together to create your amazing homemade Pad Thai. This might look like a lot of steps, but trust me, it moves super fast once you get going. Preparation is key, so make sure everything is chopped and measured before you even think about turning on that stove!
Preparing the Pad Thai Noodles
First things first, those noodles! This step is crucial for that perfect Pad Thai texture. You’ll want to get your flat rice noodles soaking in warm water. Not boiling hot, just warm enough that you can comfortably put your hand in it. Let them hang out for about 20-30 minutes. You’re looking for them to be pliable and bendy, but not soft and mushy like cooked pasta. They should still have a little bite to them, a bit firm even. They’ll finish cooking in the wok, so don’t over-soak them! Once they’re just right, drain them really well. We don’t want any extra water watering down our delicious sauce!
Assembling the Flavorful Pad Thai Sauce
While your noodles are soaking, let’s whip up that incredible Pad Thai sauce. Grab a small bowl and whisk together your fresh lime juice, fish sauce, brown sugar, and that all-important tamarind paste. If you’re feeling a little spicy like me, now’s the time to toss in those red pepper flakes! Give it a really good whisk until the sugar is dissolved and everything is beautifully combined. Take a little taste – it should be a delightful mix of sweet, sour, and savory. This is the heart of your Pad Thai, so make sure it tastes amazing!
Stir-Frying Your Pad Thai to Perfection
Now for the main event! Heat your large skillet or wok over medium-high heat. You want it nice and hot! Add your vegetable oil, and once it’s shimmering, toss in that minced garlic. Stir-fry for just about 30 seconds until it’s fragrant – we don’t want it to burn. Next, add your shrimp and stir-fry for 2-3 minutes until they’re pink and cooked through. Take them out of the pan and set them aside for a moment. Now, push the remaining ingredients to one side of the skillet. Pour your lightly beaten eggs into the empty side and scramble them until they’re just set. Add your pressed tofu cubes and cook for 2-3 minutes, stirring occasionally, until they’re lightly browned and looking delicious. The high heat is your friend here – it gives everything those lovely caramelized bits!
Finishing Touches for Your Pad Thai
Alright, almost there! Add your drained noodles and that amazing Pad Thai sauce to the skillet. Now, toss everything together like a pro! Keep tossing until those noodles are evenly coated in the sauce and have heated through, which usually takes about 3-5 minutes. This is where the magic happens and the noodles absorb all that flavor! Return your cooked shrimp to the skillet, then add your sliced green onions and bean sprouts. Give it one last toss for about a minute until the sprouts are just slightly softened but still have a nice crunch. And that’s it! Your perfect Pad Thai is ready to be devoured. Serve it up immediately, garnished with a generous sprinkle of chopped roasted peanuts and a fresh scattering of cilantro. Enjoy!
Tips for Pad Thai Success
Okay, so you’ve got the recipe, you’ve got the passion, but a few little insider tips can really take your Pad Thai from great to absolutely *unforgettable*. These are the things I’ve picked up over countless batches that have saved me from soggy noodles or burnt garlic. Trust me, these small adjustments make a huge difference in your final Pad Thai masterpiece!
Achieving the Ideal Noodle Texture for Pad Thai
This is probably the biggest hurdle for new Pad Thai makers! The secret to perfect, non-sticky, chewy noodles is all in the pre-soak. Remember, we want them pliable but still a bit firm. If they’re too soft before they hit the wok, they’ll turn to mush. If they’re too hard, they won’t absorb the sauce. So, stick to that warm (not hot!) water and drain them *really* well. Also, don’t overcrowd your pan when you’re stir-frying; that can steam them instead of frying, leading to stickiness. A little space means happy noodles!
Mastering the Heat for Your Pad Thai Stir-Fry
For stir-frying Pad Thai, high heat is your best friend! You want that wok or skillet screaming hot before anything goes in. This creates that beautiful char and prevents ingredients from stewing. But here’s the trick: don’t let it get *too* hot for too long, especially with garlic, which can burn quickly. Keep things moving! If you see smoke, it’s too high. Adjust as you go – don’t be afraid to pull the pan off the heat for a second if things are getting out of control. It’s all about quick, decisive movements!
Customizing Your Pad Thai Spice Level
I love a little kick, but not everyone does, and that’s totally fine! This Pad Thai recipe is super easy to adjust. If you like it mild, just skip the red pepper flakes entirely. If you’re like me and crave that fiery punch, feel free to add a little extra to the sauce. You can also sprinkle some on your individual serving at the end. That way, everyone at the table gets their Pad Thai exactly how they like it!
Pad Thai Variations and Serving Suggestions
One of the things I absolutely adore about this Pad Thai recipe is how easily you can make it your own! It’s such a fantastic base, and a few little tweaks can totally transform it to suit your mood or whatever you have on hand. Don’t be afraid to get creative in the kitchen – that’s half the fun of cooking, right?
Protein Swaps for Your Pad Thai
Not a fan of shrimp? No problem! This Pad Thai is incredibly versatile. I often swap the shrimp for thinly sliced chicken breast or even some tender beef. Just make sure to stir-fry them until they’re cooked through before adding the noodles. You could also use a mix of proteins, like chicken and shrimp, for an extra satisfying meal. And for my plant-based friends, feel free to just load up on more tofu or even add some tempeh!
Vegetable Additions to Pad Thai
Want to sneak in a few more veggies? I’m all for it! This Pad Thai welcomes extra greens with open arms. Thinly sliced bell peppers (red and yellow look so pretty!), shredded cabbage, or even some baby bok choy would be delicious additions. Just add them in with the green onions and bean sprouts, or a minute or two earlier if they need a bit more time to soften to your liking. It adds color, crunch, and extra nutrition!
What to Serve with Your Pad Thai
Honestly, this Pad Thai is a complete meal all on its own – it’s got protein, carbs, and veggies! But if you’re feeling fancy or feeding a crowd, a simple side salad with a light vinaigrette is always lovely. For drinks, I love a refreshing glass of iced tea or even some sparkling water with a squeeze of lime. Keep it light, so the amazing flavors of the Pad Thai can really shine!
Common Questions About Pad Thai
Okay, so you’ve got the lowdown on making amazing Pad Thai, but I know sometimes little questions pop up. Don’t worry, I’ve got answers! These are some of the things people often ask me when they’re tackling this delightful dish for the first time. Let’s clear them up so you can cook with confidence!
Can I make Pad Thai ahead of time?
You know, Pad Thai is really, *really* best enjoyed fresh, right out of the wok. Those noodles are at their chewiest, the veggies are at their crispiest, and the sauce is perfectly coating everything. If you make it too far ahead, the noodles can absorb too much sauce and get a bit mushy, and the fresh elements lose their vibrancy. My advice? Prep all your ingredients – chop your veggies, mince your garlic, make your sauce – but do the actual stir-frying just before you’re ready to eat! It only takes minutes to cook, so it’s super fast when everything else is ready.
What if I don’t have tamarind paste for Pad Thai?
Oh, this is a common one! Tamarind paste is truly the secret sauce (pun intended!) for that authentic Pad Thai tang. It has a unique fruity, sour, and slightly sweet flavor that’s hard to replicate exactly. But, if you’re in a pinch and can’t find it, don’t despair! You can try a mix of fresh lime juice and a little extra brown sugar. Some folks also use a tiny splash of rice vinegar. It won’t be *exactly* the same, but it’ll still give you a delicious, balanced flavor for your Pad Thai.
How do I prevent my Pad Thai from being too dry or too saucy?
This is all about balance, my friend! If your Pad Thai is too dry, it could be that your noodles absorbed too much moisture, or perhaps your heat was too high and evaporated the sauce too quickly. Make sure your noodles are only pliable, not fully soft, when they go into the wok. If it’s too saucy, you might have added too much liquid or didn’t let it cook down enough. The key is to keep tossing the noodles in the sauce over medium-high heat until they’re evenly coated and the sauce has thickened slightly. It should cling to the noodles, not pool at the bottom of the pan. Trust your eyes – you’ll see when it looks just right!
Storing and Reheating Your Pad Thai
So, you’ve somehow managed to have leftover Pad Thai? Wow, that’s a rare feat in my house! But if you do, don’t just toss it in any old container. A little care goes a long way to keep it tasting great for round two. We want to keep those flavors vibrant and those noodles happy!
Proper Storage for Leftover Pad Thai
To keep your amazing Pad Thai tasting its best, let it cool down a bit first, but not completely. Then, transfer it to an airtight container. This is key for keeping out any weird fridge smells and locking in all those delicious flavors. Pop it in the refrigerator, and it’ll be good for up to 2 days. Beyond that, the noodles can start to get a bit too soft, and we don’t want that!
Best Way to Reheat Pad Thai
Okay, reheating Pad Thai can be a little tricky because we want to avoid mushy noodles! My favorite way is to use a skillet or wok over medium heat with just a tiny splash of water or broth. Add your leftover Pad Thai and stir-fry it quickly, breaking up any clumps, until it’s heated through. This helps rehydrate the noodles and keeps that lovely stir-fried texture. The microwave works in a pinch, but it tends to make the noodles a bit softer, so I always prefer the stovetop method for the best results!
Estimated Nutritional Information for Pad Thai
Understanding Your Pad Thai Nutrition
Just a quick note on the numbers! While I’ve included an estimate for the nutritional information for this Pad Thai recipe, please remember these are just that – estimates! The actual values can totally vary based on the specific brands of ingredients you use, how much oil you add, or even the exact size of your shrimp. So, think of it as a helpful guide, not a precise scientific calculation!
Share Your Pad Thai Experience
Your Feedback on This Pad Thai Recipe
So, you’ve made it! You’ve cooked up a batch of this amazing Pad Thai, and I bet your kitchen smells incredible right now. I’d absolutely love to hear how it turned out for you! Drop a comment below, tell me your favorite part, or even better, snap a photo of your masterpiece and share it on social media! Don’t forget to tag me so I can see your delicious creations!
Print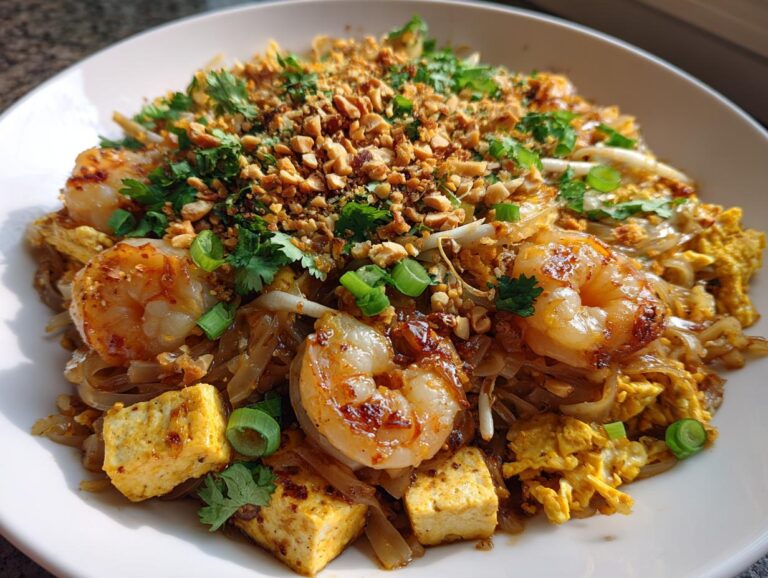
Pad Thai with Shrimp and Tofu
This Pad Thai recipe delivers a delicious and authentic experience. It balances sweet, sour, and savory flavors with a satisfying texture. This dish is perfect for a weeknight meal or a special occasion.
- Total Time: 40 minutes
- Yield: 4 servings 1x
Ingredients
- 8 ounces flat rice noodles
- 2 tablespoons vegetable oil
- 2 cloves garlic, minced
- 8 ounces shrimp, peeled and deveined
- 2 large eggs, lightly beaten
- 1/2 cup firm tofu, pressed and cut into 1/2-inch cubes
- 1/4 cup chopped roasted peanuts
- 1/4 cup chopped fresh cilantro
- 2 tablespoons fresh lime juice
- 1 tablespoon fish sauce
- 1 tablespoon brown sugar
- 1 teaspoon tamarind paste
- 1/2 teaspoon red pepper flakes (optional)
- 2 green onions, sliced
- 1 cup bean sprouts
Instructions
- Soak rice noodles in warm water for 20-30 minutes, or until pliable but still firm. Drain well.
- In a small bowl, whisk together lime juice, fish sauce, brown sugar, tamarind paste, and red pepper flakes (if using) to make the Pad Thai sauce.
- Heat vegetable oil in a large skillet or wok over medium-high heat. Add garlic and stir-fry for 30 seconds until fragrant.
- Add shrimp and stir-fry for 2-3 minutes until pink and cooked through. Remove shrimp from the skillet and set aside.
- Push the remaining ingredients to one side of the skillet. Pour beaten eggs into the empty side and scramble until just set.
- Add tofu to the skillet and cook for 2-3 minutes, stirring occasionally, until lightly browned.
- Add the drained noodles and Pad Thai sauce to the skillet. Toss everything together until the noodles are evenly coated and heated through, about 3-5 minutes.
- Return the cooked shrimp to the skillet. Add green onions and bean sprouts. Toss for another minute until the sprouts are slightly softened.
- Serve immediately, garnished with chopped roasted peanuts and fresh cilantro.
Notes
- Adjust the amount of red pepper flakes to your preferred spice level.
- For extra flavor, you can add a pinch of dried shrimp or a spoonful of fried shallots.
- If you don’t have tamarind paste, you can substitute with a mix of lime juice and a little extra brown sugar.
- Leftovers can be stored in an airtight container in the refrigerator for up to 2 days.
- Prep Time: 20 minutes
- Cook Time: 20 minutes
- Category: Main Dish
- Method: Stir-fry
- Cuisine: Thai
- Diet: Low Fat
Nutrition
- Serving Size: 1 bowl
- Calories: 450
- Sugar: 15g
- Sodium: 700mg
- Fat: 18g
- Saturated Fat: 3g
- Unsaturated Fat: 12g
- Trans Fat: 0g
- Carbohydrates: 50g
- Fiber: 4g
- Protein: 25g
- Cholesterol: 150mg