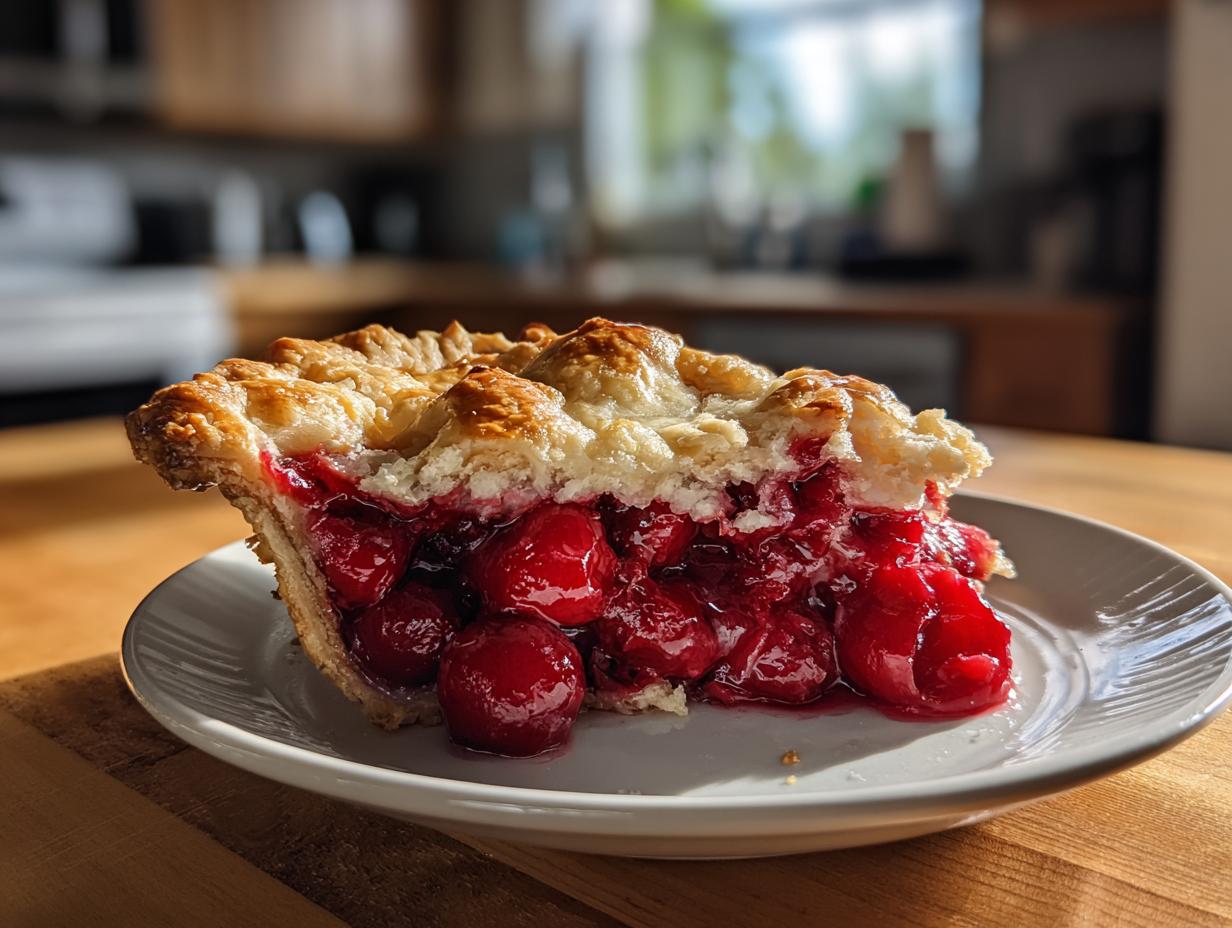
Okay, so picture this: a warm slice of homemade cherry pie, the crust perfectly flaky, the filling bubbling with sweet-tart cherries. Doesn’t that just sound like pure comfort? For me, cherry pie isn’t just a dessert; it’s a hug in a dish, a taste of nostalgia that always brings me back to my grandmother’s kitchen on a lazy Sunday afternoon. I swear, the smell of cherries and butter baking is one of the best things in the world!
I’ve been making pies for what feels like forever – seriously, years and years! From apple to pecan, I’ve tackled them all. But there’s something truly special about a classic cherry pie that just hits differently. Maybe it’s the vibrant color, or that incredible balance of sweet and tart that makes your tastebuds sing. Whatever it is, I’m obsessed, and I’ve poured all my pie-making love and learning into this recipe for you.
This isn’t just *another* cherry pie recipe. This is the one I’ve perfected over countless batches, the one that guarantees a delicious outcome every single time. It’s reliable, it’s straightforward, and trust me, it’s going to make you feel like a pie-baking superstar. Get ready to impress everyone (including yourself!) with the best cherry pie you’ve ever made!
Why You’ll Love This Cherry Pie
Oh, where do I even begin?! This cherry pie recipe isn’t just good; it’s a game-changer. You’re going to fall head over heels for it because:
- It’s surprisingly straightforward: Don’t let pie-making intimidate you! I’ve broken it down so anyone can get that perfect, flaky crust and bubbling, delicious filling.
- The flavor is out of this world: That sweet-tart cherry goodness, perfectly balanced, is truly addictive. It’s the kind of dessert that makes everyone ask for seconds (and the recipe!).
- It’s a total crowd-pleaser: Seriously, who doesn’t love a classic cherry pie? It brings smiles to faces and happy sighs all around.
The Perfect Cherry Pie for Any Occasion
Whether you’re hosting a big holiday dinner, bringing a dish to a potluck, or just craving something sweet on a Tuesday night, this cherry pie fits right in. It’s elegant enough for a special celebration but comforting enough for a cozy family meal. It’s truly a dessert for all seasons and reasons!
Essential Equipment for Your Cherry Pie
Okay, before we dive into the deliciousness, let’s talk tools! You don’t need a fancy chef’s kitchen to make an amazing cherry pie, but having the right essentials makes all the difference. These are the trusty sidekicks I rely on every time I bake a pie.
Tools for a Flaky Cherry Pie Crust
For that dreamy, flaky crust, a good rolling pin is a must-have – I prefer a heavy wooden one. You’ll also want a sturdy 9-inch pie plate (glass or ceramic works great for even baking!), a large mixing bowl, and maybe a pastry blender or even just your fingertips for cutting in the butter. Oh, and some plastic wrap for chilling that dough!
Ingredients for a Delicious Cherry Pie
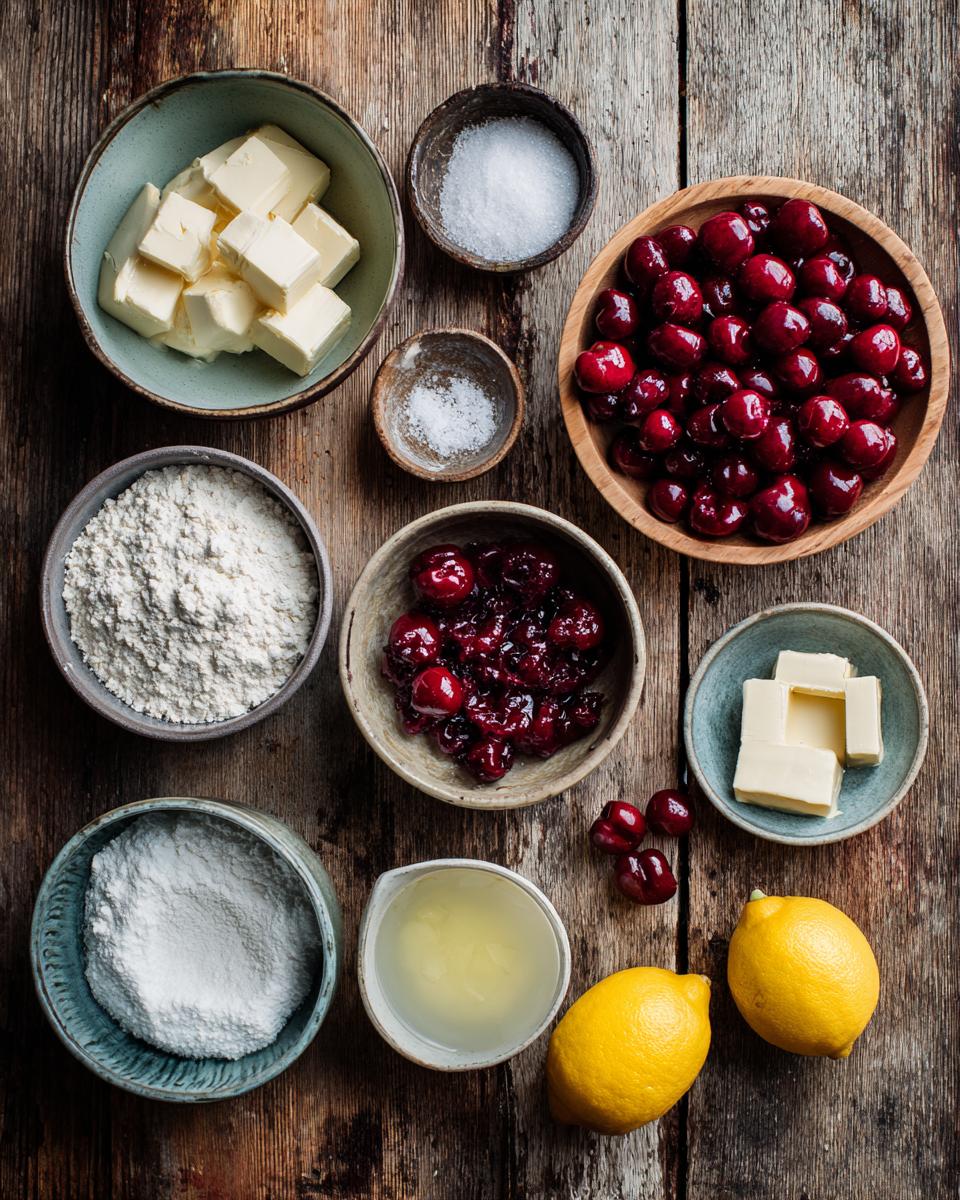
Alright, let’s get down to the good stuff – the ingredients! Just like with any recipe, starting with quality ingredients is half the battle won. Here’s what you’ll need to gather to make this incredible cherry pie. Don’t worry, it’s all pretty standard stuff, but those little details in preparation make a *huge* difference, trust me!
- 2 1/2 cups all-purpose flour
- 1 teaspoon salt
- 1 cup (that’s 2 sticks!) unsalted butter, super chilled and cut into small pieces
- 1/2 cup ice water (keep it cold!)
- 6 cups fresh or frozen pitted cherries (no pits allowed!)
- 1 cup granulated sugar
- 1/4 cup cornstarch
- 1 teaspoon alcohol-free almond extract
- 1 tablespoon fresh lemon juice
- 1 large egg, lightly beaten (for that gorgeous egg wash)
- 1 tablespoon turbinado sugar (for a lovely sparkly crunch on top)
Key Ingredients for the Best Cherry Pie Filling
The filling is where the magic really happens, right? Those beautiful, juicy cherries are obviously the star, but the granulated sugar balances out their tartness perfectly. And that cornstarch? It’s our secret weapon for a thick, luscious filling that holds its shape, not a watery mess. The alcohol-free almond extract adds a little something extra, a subtle depth that just sings with the cherries, and a splash of fresh lemon juice brightens everything up! It’s all about that sweet-tart symphony!
How to Make Cherry Pie: Step-by-Step Instructions
Okay, deep breaths! Making a homemade cherry pie from scratch might sound a little daunting, but I promise you, it’s totally achievable and so, so rewarding. I’m going to walk you through each step, just like I’d teach a friend right here in my kitchen. We’ll take our time, and you’ll end up with a pie that tastes like pure love!
Preparing Your Flaky Cherry Pie Crust
First things first, that amazing, flaky crust! This is where the magic begins. Grab your large bowl and toss in the flour and salt. Now for the butter—make sure it’s super cold and cut into small pieces. You can use a pastry blender, two knives, or even your fingertips (my preferred method!) to cut the butter into the flour. You’re looking for a mixture that looks like coarse crumbs, but with some pea-sized pieces of butter still visible. Those little butter bits are what make the crust so flaky as they steam in the oven!
Next, slowly, *slowly* add the ice water, about a tablespoon at a time. Mix gently with a fork until the dough just barely comes together. The key here is not to overmix! Seriously, stop as soon as it forms a shaggy ball. Divide that beautiful dough in half, flatten each piece into a disc, wrap them snugly in plastic wrap, and pop them into the fridge for at least 30 minutes. This chilling time is non-negotiable; it lets the gluten relax and makes the dough easier to roll out later.
Assembling and Baking Your Cherry Pie
While your dough is chilling, let’s get that filling ready! In a big bowl, gently combine your pitted cherries, granulated sugar, cornstarch, alcohol-free almond extract, and that splash of fresh lemon juice. Give it a good, gentle stir to make sure every cherry is coated. Don’t worry if you’re using frozen cherries; just toss them right in, no need to thaw!
Now, preheat your oven to 400°F (200°C). Grab one of your chilled dough discs and, on a lightly floured surface, roll it out into a 12-inch circle. Carefully transfer it to your 9-inch pie plate. Trim the edges, leaving about a 1/2-inch overhang. Pour that gorgeous cherry filling right into the crust. Roll out your second dough disc. You can lay it over the top and cut a few vents, or if you’re feeling fancy, cut it into strips for a beautiful lattice top!
Place the top crust over the filling, trim, and crimp the edges to seal everything in. If you did a full top crust, don’t forget those slits for steam! Brush the top with your beaten egg wash and sprinkle with turbinado sugar for that extra sparkle and crunch. Bake for 20 minutes at 400°F (200°C), then reduce the oven temperature to 375°F (190°C) and bake for another 35-45 minutes. Keep an eye on it! If the crust starts getting too brown, just loosely tent it with some aluminum foil. You want that crust golden and the filling bubbly. The hardest part? Letting it cool completely on a wire rack for at least 2-3 hours. Trust me, it needs this time for the filling to set properly. Patience, my friend, patience!
Tips for the Perfect Cherry Pie
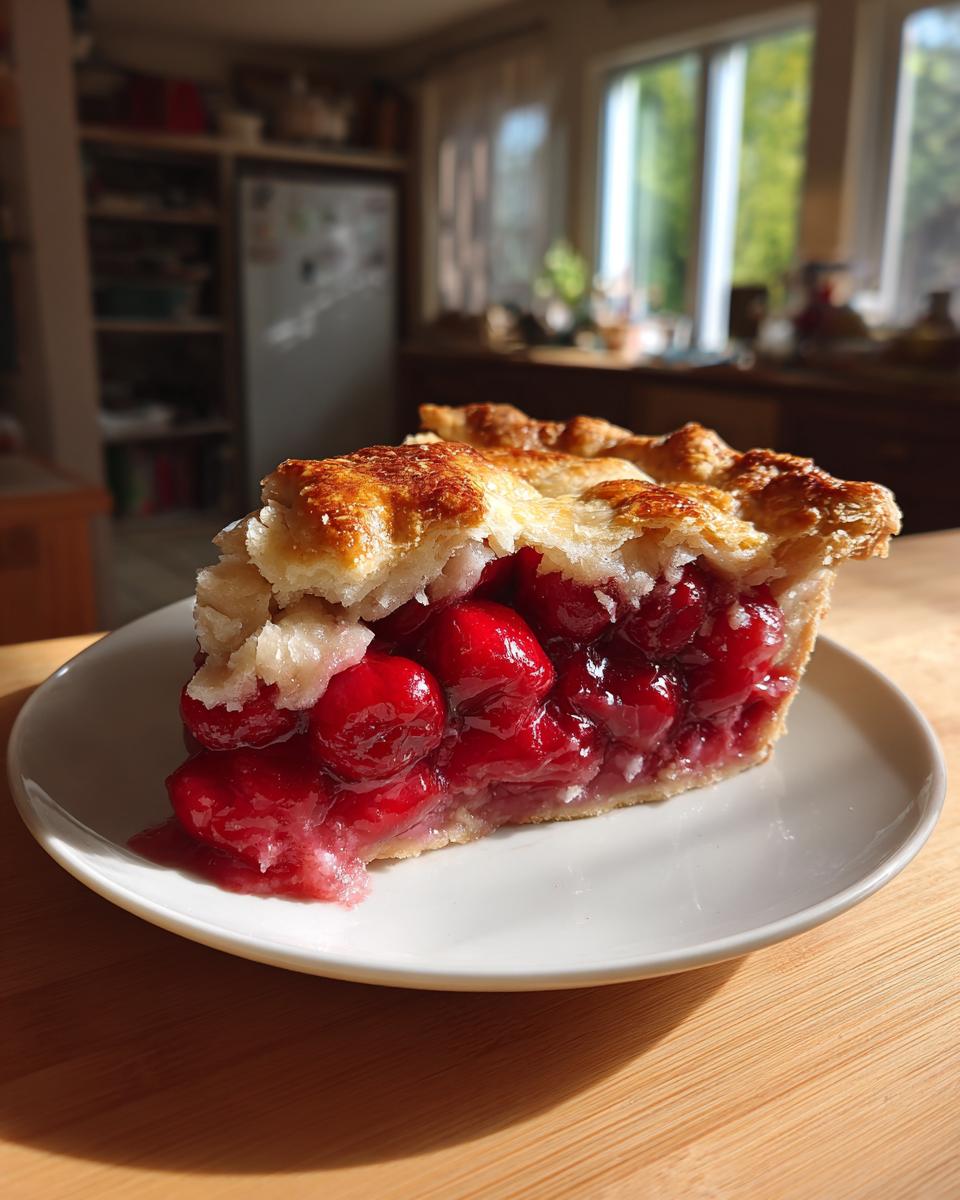
Making a truly show-stopping cherry pie isn’t just about following the steps; it’s about a few little tricks that elevate it from good to absolutely amazing! First, if you can, use a mix of sweet and tart cherries. That balance is just *chef’s kiss*! For the crust, don’t skimp on the chilling time for your dough – that’s crucial for flakiness. And please, please, *please* let your pie cool completely before slicing. I know it’s hard, but it lets the filling set and prevents a runny mess. Trust me on this one!
Achieving a Golden Brown Cherry Pie Crust
A beautiful golden-brown crust is the crowning glory of any cherry pie! To get there, make sure you use that egg wash – it gives it a lovely sheen and helps with browning. The turbinado sugar on top adds a fantastic sparkle and a bit of crunch, plus it aids in that gorgeous golden color. Keep an eye on your pie during the final baking stage. If you notice the edges browning too quickly, just grab a piece of aluminum foil and gently tent it over the pie. This protects the edges while the center finishes baking and the filling bubbles up perfectly.
Cherry Pie Variations and Serving Suggestions
Once you’ve mastered the classic, don’t be afraid to get a little creative with your cherry pie! This recipe is super forgiving, and there are so many fun ways to put your own spin on it. And of course, thinking about what to serve *with* your pie is almost as fun as baking it!
Creative Twists on Your Cherry Pie
While the classic cherry pie is divine, you can totally jazz it up! For an extra layer of warmth, try adding a pinch of ground cinnamon or a tiny dash of cardamom to your cherry filling – it really complements the fruit beautifully. Want a little texture surprise? A handful of chopped toasted pecans or walnuts mixed into the filling can be absolutely delightful. You could even swap out a quarter of the cherries for some fresh raspberries or blueberries for a mixed berry-cherry vibe. Just play around and see what you love!
Best Pairings for Your Homemade Cherry Pie
Oh, the pairings! A warm slice of cherry pie practically *begs* for a scoop of something cold and creamy. My absolute favorite is a generous dollop of vanilla bean ice cream – the way it slowly melts into the warm filling is just heavenly. But if you’re not an ice cream person, a cloud of freshly whipped cream is always a winner. Or, for a slightly more grown-up touch, a small drizzle of a good quality balsamic glaze can really make those cherry flavors pop! Don’t be afraid to experiment!
Common Questions About Cherry Pie
I get a lot of questions about making cherry pie, and that’s totally normal! Pie-making can feel like a mystery sometimes, but I’m here to clear things up. Here are some of the most common things people ask me when they’re tackling a delicious homemade cherry pie.
Can I Use Frozen Cherries for Cherry Pie?
Absolutely, yes! You can definitely use frozen cherries for your cherry pie, and it’s a fantastic option, especially when fresh cherries aren’t in season. The trick is *not* to thaw them before you mix them into the filling. Just toss those icy cherries right into your bowl with the sugar, cornstarch, and other ingredients. This helps keep the filling from getting too watery. You might find your pie needs a few extra minutes in the oven if you’re using frozen cherries, but just keep an eye on that beautiful golden crust and bubbling filling!
How Do I Prevent a Soggy Bottom Cherry Pie Crust?
Ah, the dreaded soggy bottom! It’s every pie baker’s nemesis, but totally preventable. My top tip is to blind bake your bottom pie crust for about 10-15 minutes before you add the filling. This pre-baking step helps create a little barrier against the juicy cherry filling. Another thing that helps is making sure your oven is nice and hot when the pie first goes in, which helps the crust set quickly. And remember, letting the pie cool completely, as hard as it is, is key to giving that filling time to set and not make your bottom crust mushy.
How Long Does Homemade Cherry Pie Last?
Good news! Your delicious homemade cherry pie holds up pretty well. You can usually leave it out at room temperature, loosely covered, for up to 2 days. If you want it to last longer, pop it in the refrigerator. There, it’ll stay fresh for about 3-4 days. Just make sure it’s covered to prevent it from drying out. When you’re ready for another slice, you can enjoy it cold, or gently warm it up in a low oven for that fresh-baked, gooey goodness again!
Estimated Cherry Pie Nutritional Information
Okay, so you’ve made this amazing cherry pie, and maybe you’re wondering about the nitty-gritty nutritional stuff. I totally get it! But here’s the thing you absolutely *have* to remember: these numbers are just estimates, my friends!
Every single ingredient you use – from the brand of flour to the kind of butter, even the sweetness of your cherries – can nudge these values up or down. So, think of these as a helpful guide, not a strict rulebook. They’re based on general calculations for one serving, but your pie might be a little different, and that’s perfectly okay!
- Serving Size: 1 slice
- Calories: 450
- Sugar: 50g
- Sodium: 250mg
- Fat: 22g
- Saturated Fat: 13g
- Unsaturated Fat: 7g
- Trans Fat: 0.5g
- Carbohydrates: 60g
- Fiber: 3g
- Protein: 5g
- Cholesterol: 50mg
Share Your Cherry Pie Experience
So, you’ve baked the pie, you’ve tasted the magic! Now it’s your turn to tell me all about it! Did you love it? Did you make any fun changes? I absolutely adore hearing from you, so please, drop a comment below and let me know how your cherry pie turned out. Did you use fresh or frozen cherries? What did your family think? Don’t be shy – share your tips, your triumphs, and maybe even a photo! Happy baking, and happy sharing! For more delicious recipes, check out RecipeTin Eats.
Print
Homemade Cherry Pie
This recipe guides you through making a classic cherry pie with a flaky crust and sweet-tart cherry filling. It’s a comforting dessert for any occasion.
- Total Time: 3 hours 50 minutes
- Yield: 8 servings 1x
Ingredients
- 2 1/2 cups all-purpose flour
- 1 teaspoon salt
- 1 cup (2 sticks) unsalted butter, chilled and cut into small pieces
- 1/2 cup ice water
- 6 cups fresh or frozen pitted cherries
- 1 cup granulated sugar
- 1/4 cup cornstarch
- 1 teaspoon almond extract (alcohol-free)
- 1 tablespoon fresh lemon juice
- 1 large egg, beaten (for egg wash)
- 1 tablespoon turbinado sugar (for sprinkling)
Instructions
- To make the pie crust, combine flour and salt in a large bowl. Cut in the cold butter until the mixture resembles coarse crumbs with some pea-sized pieces of butter remaining. Gradually add ice water, 1 tablespoon at a time, mixing until the dough just comes together. Do not overmix. Divide the dough in half, flatten into discs, wrap in plastic wrap, and refrigerate for at least 30 minutes.
- Preheat oven to 400°F (200°C).
- In a large bowl, combine cherries, granulated sugar, cornstarch, almond extract, and lemon juice. Mix gently to coat the cherries.
- On a lightly floured surface, roll out one disc of pie dough into a 12-inch circle. Carefully transfer it to a 9-inch pie plate. Trim the edges, leaving a 1/2-inch overhang.
- Pour the cherry filling into the pie crust.
- Roll out the second disc of pie dough. You can either place it whole over the filling, cut vents, or cut it into strips for a lattice top.
- Place the top crust over the filling. Trim and crimp the edges to seal. If using a full top crust, cut several slits in the top for steam to escape.
- Brush the top crust with the beaten egg and sprinkle with turbinado sugar.
- Bake for 20 minutes at 400°F (200°C). Reduce oven temperature to 375°F (190°C) and continue baking for another 35-45 minutes, or until the crust is golden brown and the filling is bubbly. If the crust starts to brown too quickly, loosely tent with aluminum foil.
- Let the pie cool completely on a wire rack for at least 2-3 hours before slicing and serving. This allows the filling to set properly.
Notes
- For a richer flavor, use a mix of sweet and tart cherries.
- If using frozen cherries, do not thaw them before mixing with other ingredients; add them directly to the filling.
- To prevent a soggy bottom crust, you can blind bake the bottom crust for 10-15 minutes before adding the filling.
- Leftover pie can be stored at room temperature for up to 2 days or in the refrigerator for up to 4 days.
- Prep Time: 45 minutes
- Cook Time: 65 minutes
- Category: Dessert
- Method: Baking
- Cuisine: American
- Diet: Vegetarian
Nutrition
- Serving Size: 1 slice
- Calories: 450
- Sugar: 50g
- Sodium: 250mg
- Fat: 22g
- Saturated Fat: 13g
- Unsaturated Fat: 7g
- Trans Fat: 0.5g
- Carbohydrates: 60g
- Fiber: 3g
- Protein: 5g
- Cholesterol: 50mg