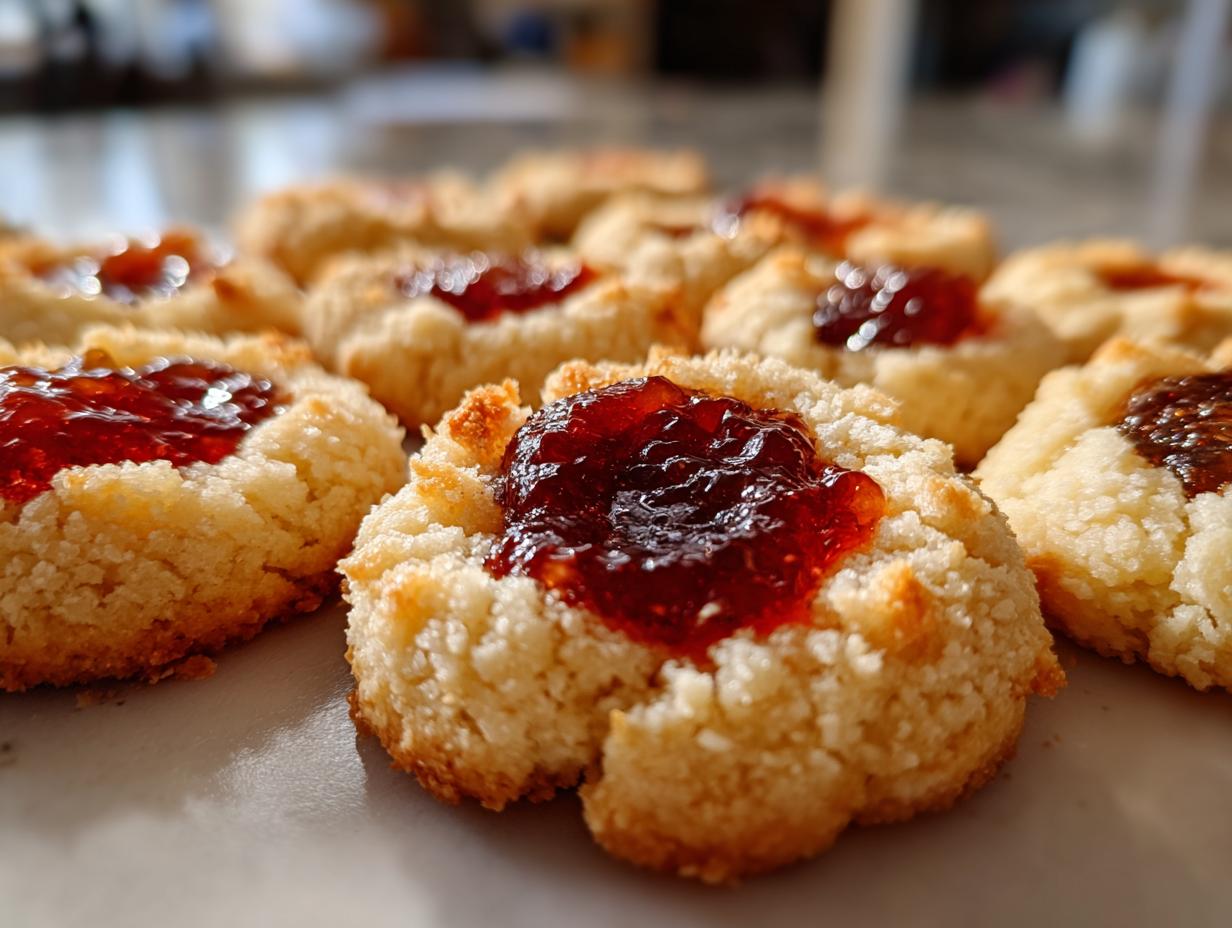
There’s something magical about classic homemade thumbprint cookies, isn’t there? I still remember standing on a stool in my grandma’s kitchen, flour dusting my nose as I pressed my tiny thumb into each buttery dough ball. She’d let me pick the jam flavors – strawberry for her, raspberry for me – and we’d watch them turn golden through the oven door. These cookies aren’t just treats; they’re edible memories. My version keeps things simple with just seven ingredients, letting that rich butter flavor and sweet jam filling shine. Whether you’re baking with kids or craving a nostalgic bite, these thumbprints deliver pure comfort in every crumbly, jammy bite.
Why You’ll Love These Classic Homemade Thumbprint Cookies
These cookies are my go-to for a reason! Here’s why they’ll become your favorite too:
- Buttery perfection: That melt-in-your-mouth texture comes from real butter – no shortcuts!
- Easy-peasy prep: Just mix, roll, thumbprint, and bake. Even my 6-year-old can help.
- Jam-packed with options: Use whatever jam you love – I’ve tried everything from apricot to blackberry.
- Nostalgia in every bite: They taste like childhood, but fancy enough for cookie swaps.
- Quick bake time: From bowl to table in under 30 minutes – perfect for last-minute cravings.
Ingredients for Classic Homemade Thumbprint Cookies
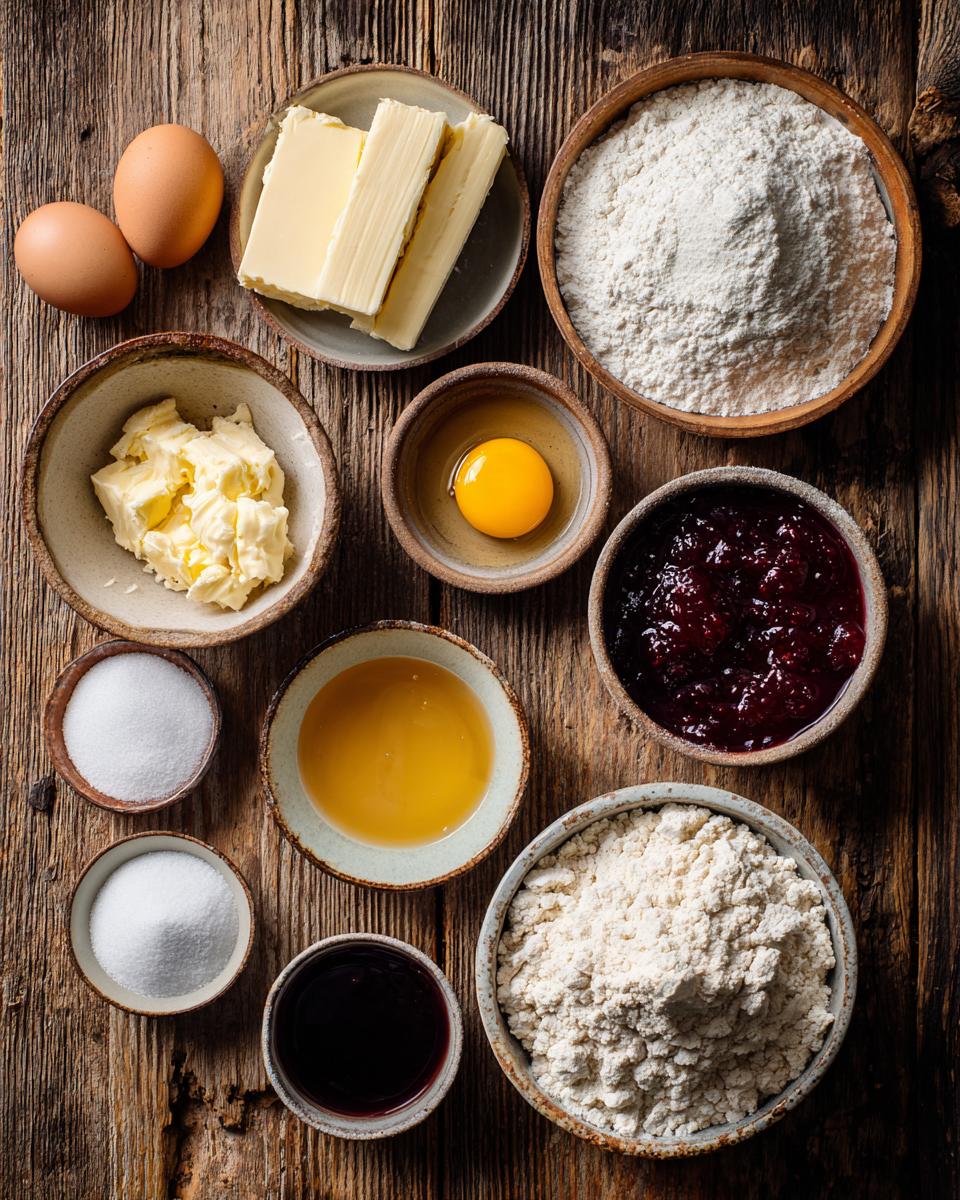
Grab these simple ingredients – I bet you have most in your pantry already! The magic happens when these basics come together:
- Wet Ingredients: 1 cup unsalted butter (softened – trust me, room temp matters!), 2/3 cup granulated sugar, 1 large egg yolk (save the white for an omelet!), 1 teaspoon vanilla extract
- Dry Ingredients: 2 cups all-purpose flour (spooned and leveled, please!), 1/4 teaspoon salt (just a pinch to balance the sweetness)
- The Fun Part: 1/2 cup jam (any flavor – my current obsession is sour cherry, but Grandma always used strawberry)
See? Nothing fancy – just honest ingredients that make magic together. Now let’s get mixing!
How to Make Classic Homemade Thumbprint Cookies
Ready for the fun part? Let’s turn those simple ingredients into little pockets of jammy joy. I’ll walk you through each step just like Grandma taught me – with patience and plenty of butter!
Step 1: Prepare the Dough
First things first: preheat that oven to 350°F (175°C) and line your baking sheets with parchment paper. Now grab your mixing bowl and let’s cream together that softened butter and sugar until it’s light and fluffy – about 2 minutes should do it. This step is crucial for tender cookies! Add the egg yolk and vanilla, mixing until everything’s cozy and combined.
Here’s where I always remind folks: add the flour and salt gradually, mixing just until the dough comes together. Overmixing makes tough cookies, and nobody wants that! The dough should look like playdough – soft but not sticky.
Step 2: Shape and Fill the Cookies
Time to get hands-on! Roll tablespoon-sized portions of dough between your palms into smooth balls (about 1-inch diameter). Pro tip: if the dough feels too soft, pop it in the fridge for 15 minutes – warm butter is tricky to work with.
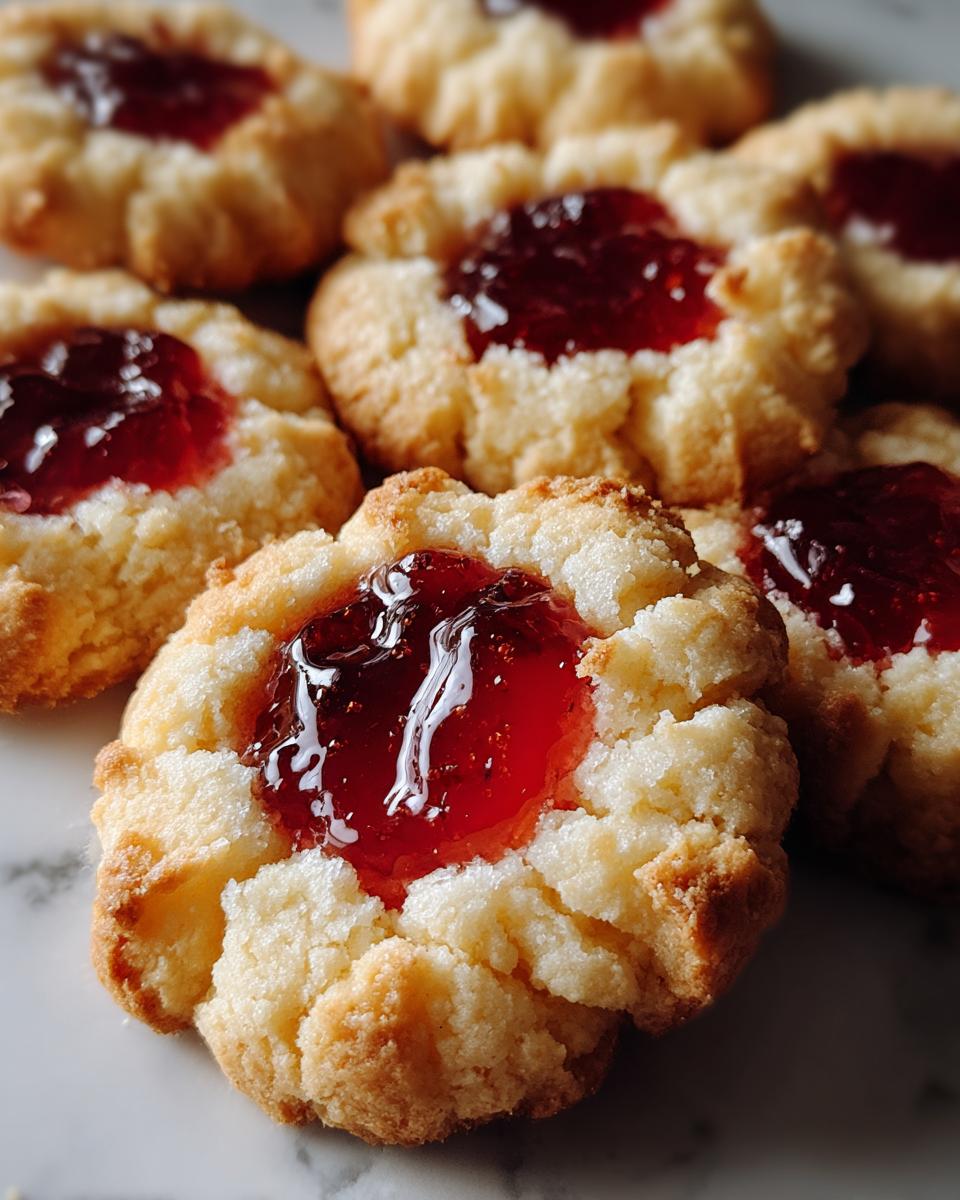
Now comes the signature move: press your thumb firmly (but gently!) into each ball to create a deep well. Don’t be shy – you want enough room for plenty of jam! Fill each indent with about 1/2 teaspoon of your favorite jam. I like using a small spoon or piping bag for neatness, but licking your fingers is half the fun.
Step 3: Bake to Perfection
Slide those beauties into your preheated oven and bake for 12-15 minutes. You’ll know they’re done when the edges turn lightly golden and the jam starts bubbling happily. Watch closely after the 10-minute mark – ovens vary!
Here’s Grandma’s golden rule: let the cookies cool on the baking sheets for 5 minutes before transferring them to wire racks. This prevents jam disasters and lets them set up perfectly. The hardest part? Waiting until they’re cool enough to eat!
Tips for Perfect Classic Homemade Thumbprint Cookies
After making these cookies more times than I can count, here are my foolproof tricks for thumbprint success:
- Butter temperature matters: Too cold won’t cream right, too warm makes sticky dough. It should dent slightly when pressed – like the texture of softened ice cream.
- Chill when needed: If your kitchen’s warm or dough feels sticky, refrigerate for 15-20 minutes. Cold dough holds its shape better when thumbprinting!
- Get creative with fillings: Out of jam? Lemon curd, Nutella, or even caramel work beautifully. For holidays, I love using different colored jams in one batch.
- Thumbprint hack: Dip your thumb in flour first to prevent sticking. Or use the back of a teaspoon for perfectly round wells.
- Prevent jam spills: Don’t overfill! That 1/2 teaspoon measurement keeps things tidy. Thicker jams like raspberry work best if spills worry you.
Follow these tips, and you’ll have bakery-worthy thumbprints every time. Promise!
Variations for Classic Homemade Thumbprint Cookies
Oh, the possibilities with these little gems! Once you’ve mastered the basic recipe, try these fun twists – I’ve tested them all:
- Citrus lovers: Swap vanilla for almond extract and fill with lemon curd (my springtime favorite!)
- Nutty crunch: Roll dough balls in finely chopped pecans or walnuts before thumbprinting
- Chocolate dream: Replace half the flour with cocoa powder and fill with peanut butter
- Festive sparkle: Dip cooled cookies halfway in melted chocolate and sprinkle with sea salt
- Savory surprise: Skip the sugar, add rosemary, and fill with fig jam for a cheese board pairing
The best part? Every variation still gives you that perfect buttery bite with a sweet (or savory!) surprise center.
Storing and Freezing Classic Homemade Thumbprint Cookies
These cookies disappear fast at my house, but when we miraculously have leftovers (rare, I know!), here’s how to keep them fresh. Store cooled cookies in an airtight container at room temperature for up to 5 days – layer them with parchment paper to prevent sticking. Want to get ahead? Freeze unbaked dough balls on a tray, then transfer to a freezer bag for 3 months. Bake straight from frozen, adding an extra minute or two. Already baked? They freeze beautifully too! Just thaw at room temperature when that cookie craving hits.
Nutritional Information for Classic Homemade Thumbprint Cookies
Now, I’m no nutritionist (just a cookie enthusiast!), but here’s a rough estimate per cookie based on my recipe: about 110 calories, 6g fat (3.5g saturated), and 7g sugar. Keep in mind – these numbers might wiggle a bit depending on your jam choice or if you sneak an extra pinch of dough (no judgment here!). They’re treats, after all – meant to be enjoyed!
FAQs About Classic Homemade Thumbprint Cookies
You’ve got questions, I’ve got answers! Here are the most common things folks ask me about these little jammy wonders:
Can I use salted butter? You bet – just skip the added salt in the recipe. But I really prefer unsalted so I can control the flavor perfectly.
How do I stop the jam from spilling? Two tricks: 1) Make deep wells (I press almost to the bottom), and 2) Thicker jams like raspberry behave better than runny ones. A quick 10-minute freeze before baking helps too!
Can I make these dairy-free? Absolutely! I’ve had great results with plant-based butter. The texture changes slightly, but they’re still delicious.
Why just the egg yolk? It gives richness without making the dough too wet. Save the white for meringues – waste not, want not!
Help! My dough is too crumbly! No panic – just knead in a teaspoon of cold water at a time until it comes together. Better than adding more butter!
Share Your Classic Homemade Thumbprint Cookies
I’d love to see your jam-filled creations! Snap a photo of your thumbprint cookies and tag me – did you go classic strawberry or try something wild? Leave a comment below telling me your favorite variation (I’m always hunting for new ideas!). Happy baking, friends! For more delicious recipes and cooking inspiration, check out BBC Good Food Middle East.
Print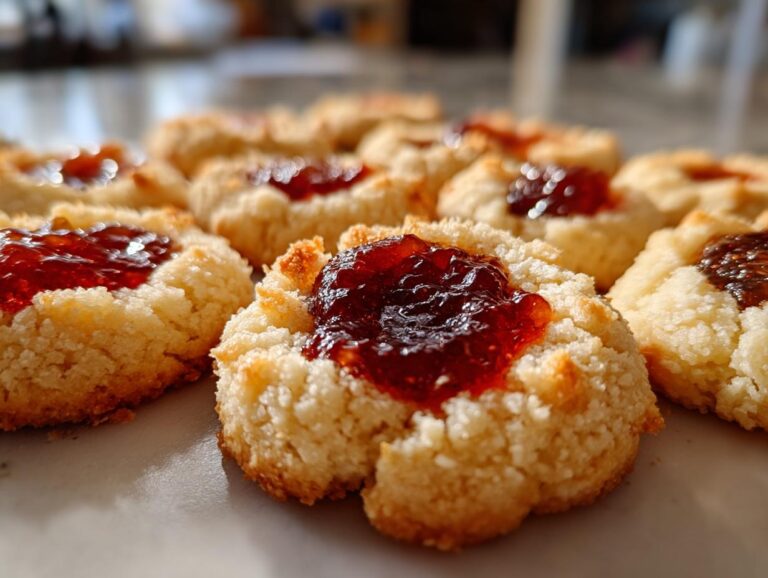
Classic Homemade Thumbprint Cookies with Jam
Classic homemade thumbprint cookies are buttery, tender, and filled with your favorite jam. Perfect for holidays or everyday treats.
- Total Time: 30 minutes
- Yield: 24 cookies 1x
Ingredients
- 1 cup unsalted butter, softened
- 2/3 cup granulated sugar
- 1 large egg yolk
- 1 teaspoon vanilla extract
- 2 cups all-purpose flour
- 1/4 teaspoon salt
- 1/2 cup jam (any flavor)
Instructions
- Preheat oven to 350°F (175°C). Line baking sheets with parchment paper.
- Beat butter and sugar until light and fluffy. Add egg yolk and vanilla, mixing well.
- Gradually add flour and salt, mixing until dough forms.
- Roll dough into 1-inch balls and place on baking sheets.
- Press your thumb into the center of each ball to make an indentation.
- Fill each indentation with 1/2 teaspoon of jam.
- Bake for 12-15 minutes or until edges are lightly golden.
- Cool on baking sheets for 5 minutes, then transfer to wire racks.
Notes
- Use room-temperature butter for easier mixing.
- Chill dough for 30 minutes if too soft to handle.
- Store in an airtight container for up to 5 days.
- Prep Time: 15 minutes
- Cook Time: 15 minutes
- Category: Dessert
- Method: Baking
- Cuisine: American
- Diet: Vegetarian
Nutrition
- Serving Size: 1 cookie
- Calories: 110
- Sugar: 7g
- Sodium: 15mg
- Fat: 6g
- Saturated Fat: 3.5g
- Unsaturated Fat: 2g
- Trans Fat: 0g
- Carbohydrates: 13g
- Fiber: 0g
- Protein: 1g
- Cholesterol: 25mg