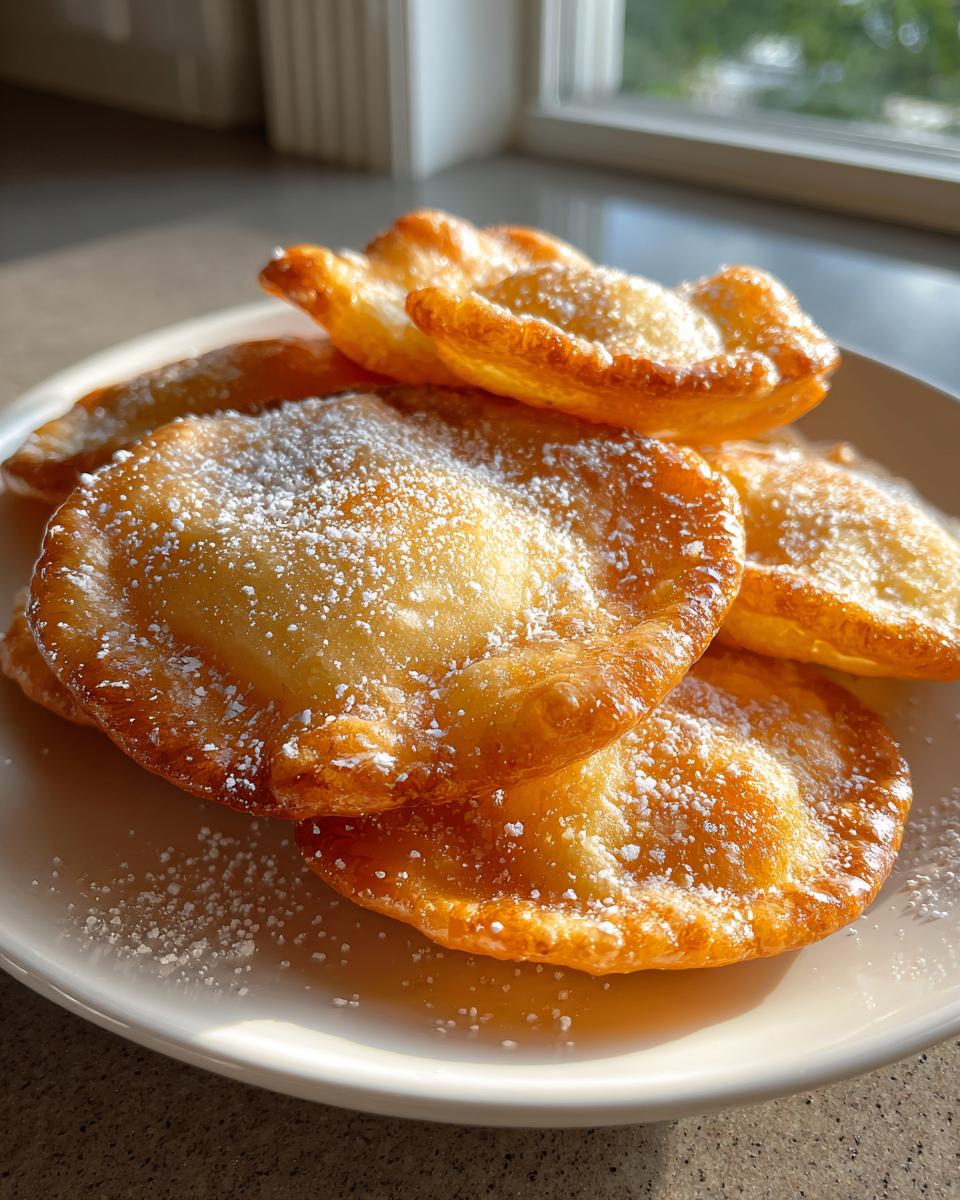
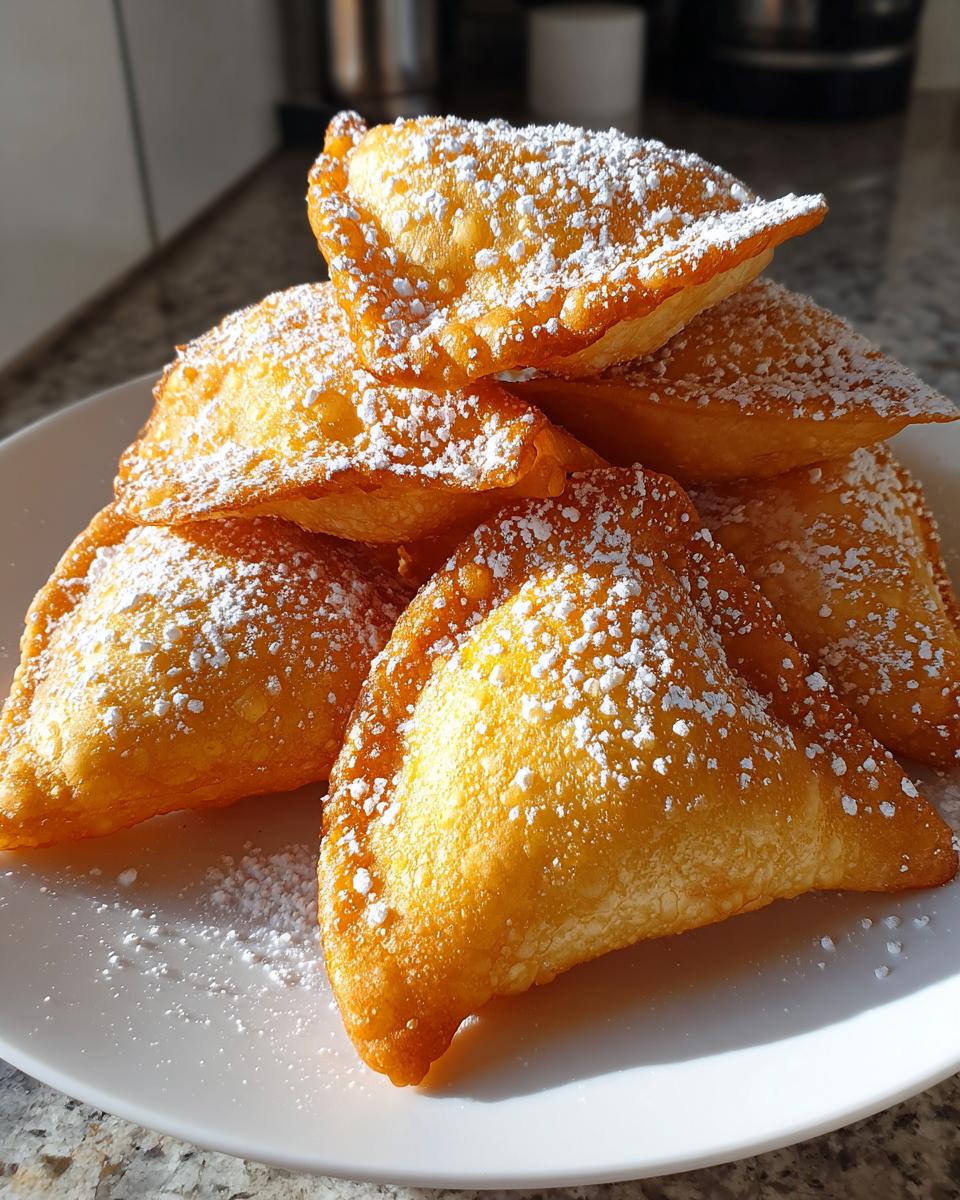
There’s something magical about biting into a warm, golden sopaipilla, its light and fluffy interior giving way to a crisp exterior. I’ll never forget the first time I tried them at a little family-run restaurant in New Mexico—they were dusted with powdered sugar and drizzled with honey, and I couldn’t stop reaching for more. That’s when I decided I needed to learn how to make the perfect sopaipillas recipe for home cooks. Turns out, it’s way easier than you’d think! With just a handful of simple ingredients and a little patience, you can whip up these heavenly pastries in no time. Trust me, once you’ve made them at home, you’ll understand why they’re such a beloved treat.
Why You’ll Love The Perfect Sopaipillas Recipe for Home Cooks
Listen, I know what you’re thinking—deep-fried dough sounds complicated, right? Wrong! This recipe is my go-to when I want something impressive but secretly easy. Here’s why you’ll adore it:
- Faster than takeout: From bowl to plate in under 30 minutes—no fancy equipment needed, just your hands and a rolling pin.
- Pantry magic: Flour, baking powder, salt… you probably have everything right now (yes, even that half-used jar of honey in your cabinet counts!).
- Sweet or savory genius: Dust them with sugar for dessert, or stuff them with beans and cheese for an epic snack—they’re the ultimate shape-shifter.
- Forgiving AF: Over-knead the dough? No problem. Oil not *exactly* 375°F? They’ll still puff up and taste amazing. (I’ve tested this more times than I’d like to admit.)
Seriously, these little pillows of joy are the culinary equivalent of a happy accident—impossible to mess up and guaranteed to disappear fast!
Ingredients for The Perfect Sopaipillas Recipe for Home Cooks
Okay, let’s gather our simple but mighty team of ingredients! The beauty of sopaipillas is that they don’t need anything fancy—just honest, basic pantry staples. Here’s what you’ll need (and why each one matters):
- 2 cups all-purpose flour (I like to sift mine first—it makes the dough lighter, but I won’t judge if you skip this step when you’re in a hurry)
- 1 1/2 teaspoons baking powder (This is your puff-maker—check the date on the can, because old baking powder equals sad, flat sopaipillas)
- 1/2 teaspoon salt (Just enough to balance the sweetness without making them taste salty)
- 2 tablespoons vegetable shortening (Room temperature is key here—if it’s too cold, you’ll fight with the dough. Too soft? It’ll disappear into the flour)
- 3/4 cup warm water (Not hot, not cold—think “baby bathwater” warm. This wakes up the gluten just right)
- Vegetable oil for frying (You’ll need enough to fill your pan about 2 inches deep—I use canola, but any neutral oil works)
- Honey or powdered sugar for serving (No measurements here—drizzle or dust with reckless abandon!)
See? Nothing weird or hard-to-find. In fact, if you’re anything like me, you might already have everything waiting in your kitchen right this second. (P.S. If you’re out of shortening, butter can work in a pinch—just know it’ll change the texture slightly. Still delicious though!)
How to Make The Perfect Sopaipillas Recipe for Home Cooks
Alright, let’s get our hands dirty—literally! Making sopaipillas is like a little kitchen dance: mix, roll, fry, repeat. Follow these steps, and you’ll be rewarded with golden puffs of happiness. Just promise me one thing—don’t rush the oil heating part. I learned that lesson the hard way (let’s just say my first batch resembled sad little tortillas).
Preparing the Dough
First things first—let’s make that dough come together like magic:
- Dry team assemble: Grab a big mixing bowl and whisk together your flour, baking powder, and salt. Really get in there—you want those ingredients to become best friends.
- Shortening time: Add your room-temperature shortening in little chunks. Now comes the fun part—use your fingers or a pastry cutter to work it in until the mixture looks like coarse sand with some pea-sized bits remaining. (This is when I always pretend I’m a fancy pastry chef.)
- Water works: Here’s the secret—add warm water gradually, while stirring with a fork. Start with half, mix, then add the rest as needed. The dough should come together but not stick to your hands—kind of like Play-Doh’s well-behaved cousin.
- Knead lightly: Turn it onto a floured surface and knead gently for about 2 minutes—just until smooth. Overworking makes tough sopaipillas, and nobody wants that. Let the dough rest under a towel while you heat the oil.
Shaping and Frying
Now for the transformation—watch that flat dough become puffy wonders!
- Oil check: Pour about 2 inches of oil into your deepest skillet or pot. Heat it over medium until it reaches 375°F—use a thermometer if you’ve got one. No thermometer? Test with a tiny dough scrap—it should sizzle immediately and float to the top.
- Roll it out: On a floured surface, roll your dough to about 1/4-inch thickness—think sturdy tortilla thickness. Cut into squares or triangles (I use a pizza cutter—so satisfying!). Don’t worry about perfection—rustic is charming!
- Fry party: Carefully slide a few pieces into the hot oil (don’t crowd them!). Within seconds, they’ll puff up like little pillows. Flip after about 1-2 minutes when golden brown—the second side cooks faster, so keep an eagle eye!
- Drain and devour: Use tongs or a slotted spoon to transfer them to paper towels—they’ll deflate slightly, which is normal. Resist eating immediately (oil’s hot!), but don’t wait too long—they’re best warm!
Pro tip from my many “oops” moments: Keep adjusting your burner—oil temperature likes to creep up or drop suddenly. And whatever you do, don’t walk away during frying! Those golden beauties go from perfect to “well-done” in seconds.
Tips for The Perfect Sopaipillas Recipe for Home Cooks
After countless batches (some glorious, some… let’s call them “learning experiences”), I’ve gathered all my hard-earned sopaipilla wisdom. These tips will save you from the mistakes I made so you can nail these golden puffs on your first try!
- Thermometer is your BFF: I know, I know—it’s one more thing to wash. But trust me, keeping that oil at 375°F makes ALL the difference. Too cold? Greasy sopaipillas. Too hot? Burnt outside, doughy inside. A $10 candy thermometer changed my life.
- Give them space to puff: Crowding the pan is like putting socks on a cat—it never ends well. Fry in small batches so each sopaipilla has room to expand and float freely. They’ll cook evenly and stay crisp.
- Timing is everything: Set a timer for 1 minute when you flip them—the second side cooks faster! When they’re golden brown with some lighter bubbles, they’re done. Any darker and they’ll taste bitter.
- Drain properly: Lay them single-layer on paper towels, not piled up. That steam will make them soggy if trapped. For extra crispness, I sometimes use a cooling rack over a baking sheet.
- Serve immediately: Sopaipillas wait for no one! They’re at their absolute best within 10 minutes of frying. The honey drizzle should make that first bite a messy, glorious affair—no apologies needed.
- Dough too sticky? Dust your hands and surface with flour, but go easy—too much flour makes tough sopaipillas. If it’s sticking badly, let the dough rest 5 minutes—the gluten will relax.
Remember: Even “imperfect” sopaipillas still taste amazing. If your shapes are odd or some puff more than others, just call them “artisanal” and keep frying! The real test? That moment when you break one open and see all those steamy little pockets ready to soak up honey. Pure magic.
Serving Suggestions for The Perfect Sopaipillas
Oh, the possibilities! Sopaipillas are like a blank canvas—sweet or savory, they’re ready to shine. My personal favorite? Drizzling them with warm honey and watching it pool into all those little pockets. But let’s get creative—here are some of my go-to ways to serve these golden beauties:
- Classic Sweet: A generous drizzle of honey and a dusting of powdered sugar—simple, timeless, and always a crowd-pleaser. Bonus points if you warm the honey slightly for extra decadence.
- Cinnamon Sugar Bliss: Mix equal parts cinnamon and sugar, then toss the warm sopaipillas in the mixture. It’s like churros’ fluffier, more elegant cousin.
- Dessert Dip: Serve with a side of dulce de leche or chocolate sauce for dipping. Kids (and let’s be honest, adults too) go wild for this one.
- Fruity Fun: Add a dollop of whipped cream and fresh berries for a dessert that feels fancy but takes zero effort.
- Savory Twist: Skip the sugar and stuff them with shredded chicken, beans, and cheese for a quick and satisfying meal. A drizzle of hot sauce? Chef’s kiss.
- Breakfast Upgrade: Split them open and fill with scrambled eggs, avocado, and a sprinkle of cheese. Brunch game = strong.
The beauty of sopaipillas is their versatility. Whether you’re in the mood for something sweet or savory, they’ve got you covered. And let’s be real—there’s no wrong way to enjoy them. Just grab your favorite toppings, dig in, and let the magic happen!
Storing and Reheating The Perfect Sopaipillas
Okay, let’s be real—leftover sopaipillas are about as common as leftover birthday cake at a kid’s party (which is to say, rare). But just in case you somehow resist eating them all in one sitting, here’s how to keep them tasting fresh and delicious:
Storing Like a Pro
First rule of sopaipilla club: let them cool completely before storing. I learned this the hard way when I sealed warm ones in a container and ended up with a sad, soggy mess. Now I spread them out on a cooling rack until they’re room temperature—about 30 minutes.
Then, tuck them into an airtight container with:
- A paper towel liner to absorb any lingering oil
- Parchment paper between layers if stacking
They’ll keep at room temperature for up to 2 days this way. For longer storage (though I can’t imagine why you’d need it), freeze them in a single layer first, then transfer to a freezer bag with as much air removed as possible. They’ll last about a month in the freezer—just be prepared for slightly less crisp results.
Bringing Them Back to Life
Reheating sopaipillas is all about restoring that magical crispness. Here’s my go-to method:
- Oven method: Preheat to 350°F, place sopaipillas on a baking sheet, and warm for 5-7 minutes. For extra crispness, I sometimes give them a quick 30-second blast under the broiler at the end—just watch closely!
- Air fryer magic: 3 minutes at 350°F works perfectly. No need to preheat—just pop them in and let that circulating air work its crispy wonders.
Whatever you do, avoid the microwave unless you enjoy chewing on floppy, sad pastries (been there, not doing that again). And here’s a pro tip—if you stored them with honey already drizzled, the reheating process will make that honey wonderfully warm and gooey again. Just saying.
Now, full disclosure—reheated sopaipillas will never be quite as glorious as fresh ones. But with these tricks, they’ll come pretty darn close. And honestly? Even a slightly less perfect sopaipilla is still a pretty great snack in my book!
Nutritional Information for The Perfect Sopaipillas Recipe
Okay, let’s be real—we’re not eating fried dough for its health benefits. But hey, knowledge is power! Here’s the scoop on what you’re getting in each heavenly bite (and remember, these are estimates—your actual numbers might vary depending on exactly how much honey you drown them in… not that I’d know anything about that).
- Calories: About 120 per sopaipilla (but really, who stops at one?)
- Total Fat: 5g (mostly from that magical frying oil)
- Saturated Fat: 1g (thank you, vegetable shortening)
- Carbohydrates: 16g (hello, fluffy deliciousness)
- Sugar: 2g (before you add that waterfall of honey)
- Protein: 2g (surprise! There’s actually some in flour)
- Sodium: 100mg (just enough to balance all that sweetness)
Important note: These numbers are for plain sopaipillas—once you start adding honey, powdered sugar, or other toppings, all bets are off (but totally worth it in my opinion). Also, your exact values will change based on frying time, oil absorption, and whether you use every last drop of that honey bear bottle like I do.
My philosophy? Everything in moderation—including moderation! Sopaipillas are meant to be enjoyed as an occasional treat, not an everyday health food. But when you do indulge, do it right—with zero guilt and maximum honey application.
FAQs About The Perfect Sopaipillas Recipe for Home Cooks
I’ve gotten so many questions about these golden puffs over the years—here are the ones that pop up most often (along with my honest, tried-and-true answers):
Can I use butter instead of shortening?
Absolutely! The texture will be slightly different—butter makes them crispier while shortening gives that classic fluffy interior. Use cold butter cut into small cubes, and don’t melt it. Just know they might brown faster, so keep an eye on them!
How do I know when the oil is hot enough without a thermometer?
My grandma taught me the wooden spoon trick: Dip the handle in the oil—if bubbles form around it immediately, you’re golden (pun intended). Or drop in a tiny dough scrap—it should sizzle and float to the top within 3 seconds.
Can I bake these instead of frying?
Technically yes, but… they won’t puff up as dramatically or get that signature crispness. If you must bake, brush them with oil and bake at 400°F until lightly golden—but I’ll always recommend frying for the real deal!
Why didn’t my sopaipillas puff up?
Usually this means your oil wasn’t hot enough, or you overworked the dough. Also check that your baking powder is fresh—old baking powder loses its oomph. And don’t skip letting the dough rest—those 5 minutes make a difference!
Can I make the dough ahead of time?
Yes! Wrap it tightly and refrigerate for up to 24 hours—just let it come to room temperature before rolling. The dough might need a sprinkle of water when kneading again if it dried out.
What’s the best oil for frying?
I swear by vegetable or canola oil—neutral flavor and high smoke point. Peanut oil works great too if you’ve got it. Avoid olive oil (too strong a flavor) or butter (burns too easily).
How thin should I roll the dough?
About 1/4 inch is perfect—like a sturdy tortilla. Too thick and they won’t cook through, too thin and they’ll get too crispy. Pro tip: Roll a test piece first to check your thickness before cutting the whole batch.
For more delicious recipes and cooking tips, check out Simply Recipes.
Print
Perfect Sopaipillas Recipe: 30-Minute Fluffy Bliss
A simple recipe for making light and fluffy sopaipillas at home. Perfect for desserts or snacks.
- Total Time: 25 minutes
- Yield: 12 sopaipillas 1x
Ingredients
- 2 cups all-purpose flour
- 1 1/2 tsp baking powder
- 1/2 tsp salt
- 2 tbsp vegetable shortening
- 3/4 cup warm water
- Vegetable oil for frying
- Honey or powdered sugar for serving
Instructions
- Mix flour, baking powder, and salt in a bowl.
- Cut in shortening until mixture resembles coarse crumbs.
- Gradually add warm water to form a soft dough.
- Knead dough lightly on a floured surface for 2 minutes.
- Roll out dough to 1/4-inch thickness and cut into squares or triangles.
- Heat oil to 375°F and fry sopaipillas until puffed and golden, about 1-2 minutes per side.
- Drain on paper towels and serve warm with honey or powdered sugar.
Notes
- Make sure oil is hot enough for frying to prevent greasy sopaipillas.
- Work in small batches to avoid overcrowding the pan.
- Store leftovers in an airtight container for up to 2 days.
- Prep Time: 15 minutes
- Cook Time: 10 minutes
- Category: Dessert
- Method: Frying
- Cuisine: Mexican
- Diet: Vegetarian
Nutrition
- Serving Size: 1 sopaipilla
- Calories: 120
- Sugar: 2g
- Sodium: 100mg
- Fat: 5g
- Saturated Fat: 1g
- Unsaturated Fat: 3g
- Trans Fat: 0g
- Carbohydrates: 16g
- Fiber: 1g
- Protein: 2g
- Cholesterol: 0mg