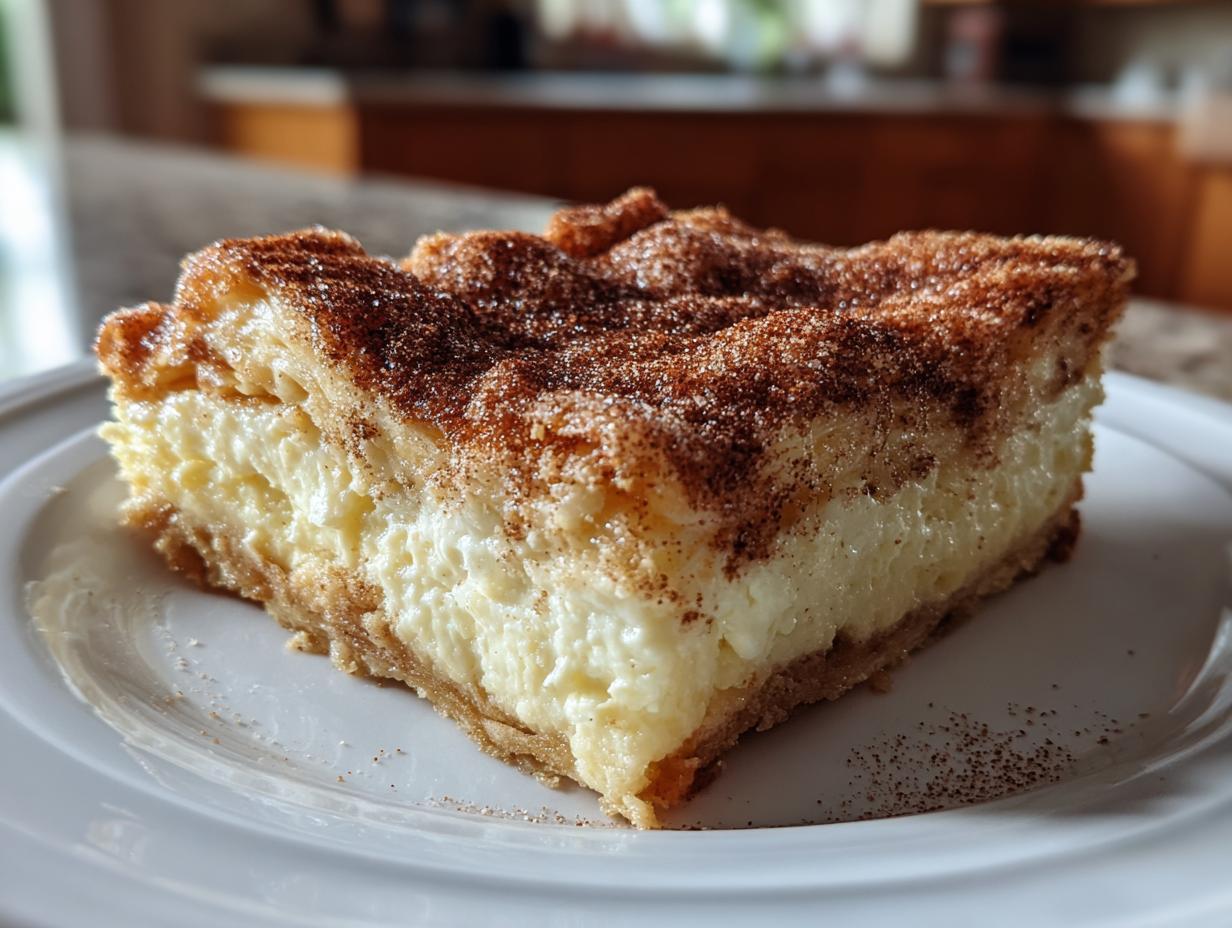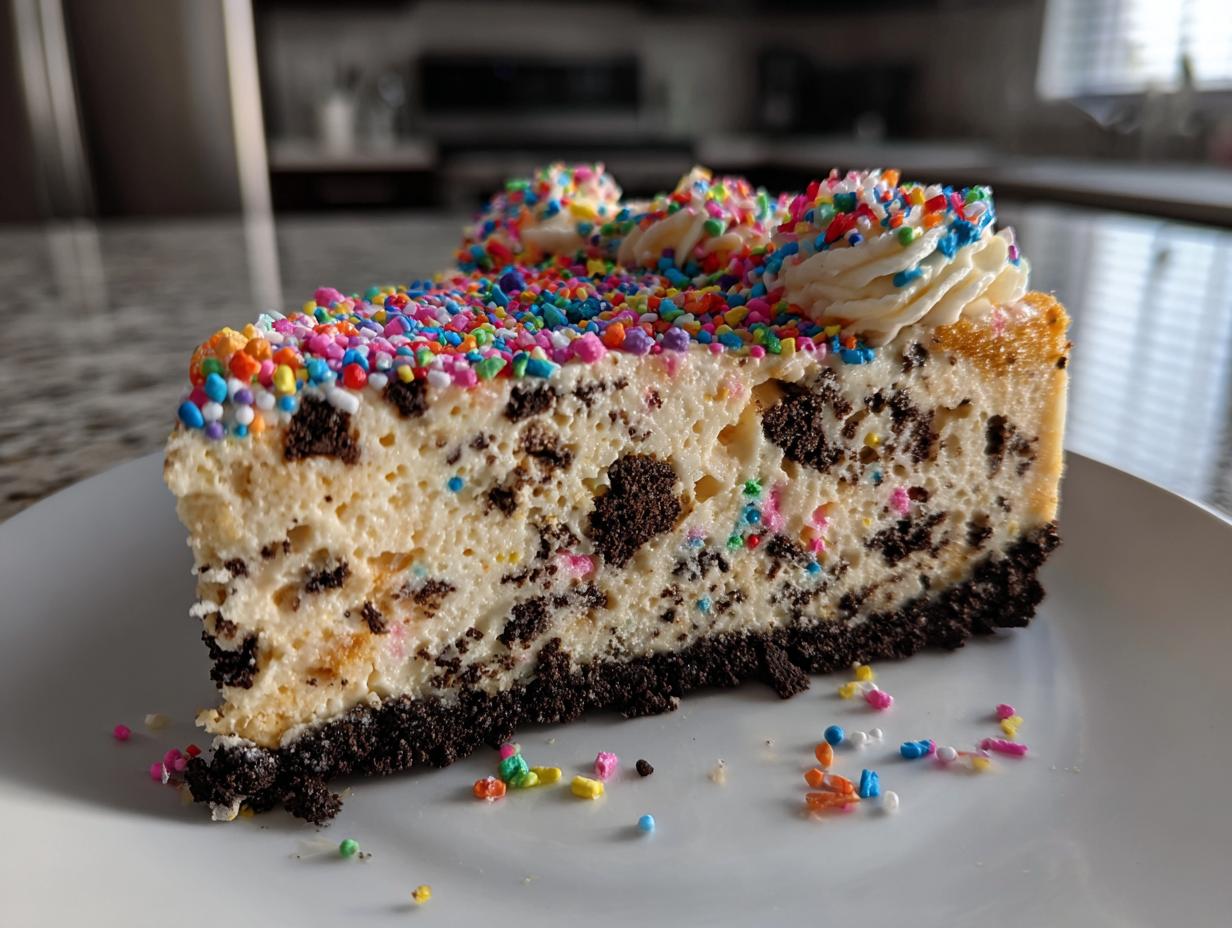
Picture this: it’s the Fourth of July, your kitchen is sweltering, and the last thing you want to do is turn on the oven. That’s when this No Bake Fireworks Oreo Cheesecake became my hero! I remember frantically throwing it together last summer when my niece begged for a “patriotic dessert” an hour before guests arrived. The look on her face when I pulled out this red, white, and blue stunner – let’s just say it upstaged the actual fireworks that night.
What makes this no-bake wonder so special? It’s ridiculously easy (we’re talking 20 minutes of active work), impossible to mess up, and looks like you spent hours crafting a masterpiece. The crushed Oreo crust gives that satisfying crunch, while the creamy filling studded with more Oreo chunks is pure bliss. And those festive sprinkles? They’re not just for show – that pop of color makes every slice feel like a celebration.
Whether it’s Memorial Day, a birthday, or just a Tuesday that needs brightening, this dessert never fails to impress. The best part? You’ll be out of the kitchen before your guests even arrive, leaving you time to actually enjoy the party.
Why You’ll Love This No Bake Fireworks Oreo Cheesecake
Let me count the ways this dessert will become your new go-to for every celebration:
- No oven required – Perfect for hot summer days when baking sounds like torture
- Instant wow factor – Those colorful sprinkles make it look like you slaved for hours
- Crowd-pleasing magic – Who can resist Oreos and cheesecake combined?
- Almost impossible to mess up – Unlike traditional cheesecakes that crack, this one’s foolproof
- Minimal cleanup – One bowl, one pan, and you’re done
- Make-ahead dream – Tastes even better after chilling overnight
Trust me, after one bite of that creamy, crunchy perfection, you’ll be making excuses to celebrate just so you can whip this up again!
Ingredients for No Bake Fireworks Oreo Cheesecake
Gathering your ingredients is the first step to cheesecake bliss! Here’s what you’ll need to create this showstopper:
- 25 Oreos (red velvet work best for color, but regular double-stuffed are perfect too – just add a drop of red gel food coloring if you want that firework pop)
- 6 tbsp butter (melted but not hot – you don’t want soggy crumbs!)
- 32 oz cream cheese (softened to room temperature – this is non-negotiable for smooth mixing)
- 3/4 cup sugar (granulated works great, but you can reduce to 1/2 cup if you prefer less sweet)
- 1 tsp vanilla extract (the good stuff – it makes a difference!)
- 8 oz Cool Whip (thawed overnight in the fridge)
- 16 additional Oreos (chopped into chunks – some big, some small for texture)
- Sprinkles or pop rocks (optional but oh-so-fun for that fireworks effect)
Pro tip: Set your cream cheese out about 2 hours before you start – cold cream cheese will leave lumps no matter how long you mix it. And don’t skimp on the Oreos – those extra chunks folded in are what make every bite magical!
Equipment You’ll Need
Here’s the short and sweet list of tools that’ll make creating this no-bake masterpiece a breeze:
- Food processor (or a zip-top bag and rolling pin for crushing Oreos the old-school way)
- 8×8 inch baking dish (glass or metal both work perfectly)
- Electric mixer (stand or hand-held – your biceps will thank you)
- Spatula (for that final smooth finish)
That’s it – no fancy gadgets needed!
How to Make No Bake Fireworks Oreo Cheesecake
Now for the fun part – let’s transform those simple ingredients into a showstopping dessert! Follow these steps carefully, and you’ll have the creamiest, dreamiest cheesecake that’ll have everyone begging for seconds.
Step 1: Prepare the Oreo Crust
First, let’s make that irresistible Oreo base. Toss your 25 Oreos (cream filling and all!) into the food processor and pulse until they’re fine crumbs. No processor? No problem! Throw them in a zip-top bag and channel your frustration with a rolling pin – therapeutic AND effective.
Drizzle in the melted butter and pulse (or mix by hand) until it resembles wet sand. If you’re using regular Oreos and want that patriotic red hue, now’s the time to add a drop or two of red gel food coloring – mix until the color is uniform. Press this heavenly mixture firmly into your 8×8 dish, making sure to get it into all the corners. I like to use the bottom of a measuring cup to really compact it. Pop this in the fridge to set for at least an hour – trust me, this chilling time makes all the difference!
Step 2: Make the Cheesecake Filling
While your crust chills, let’s whip up that luscious filling. In your mixing bowl, beat the softened cream cheese for a good 4-5 minutes until it’s completely smooth and fluffy. This is crucial – any lumps now will stay lumps forever, and nobody wants chunk cheesecake! Scrape down the sides occasionally to make sure everything gets incorporated.
With the mixer on low, gradually add the sugar and vanilla, then crank it up to medium until everything’s well combined. Now comes the magic – gently fold in the Cool Whip using a spatula. I do this in three additions to keep it light and airy. Finally, fold in most of those chopped Oreo pieces (save about ½ cup for topping), being careful not to overmix. You want to see those beautiful cookie chunks throughout!
Step 3: Assemble and Chill
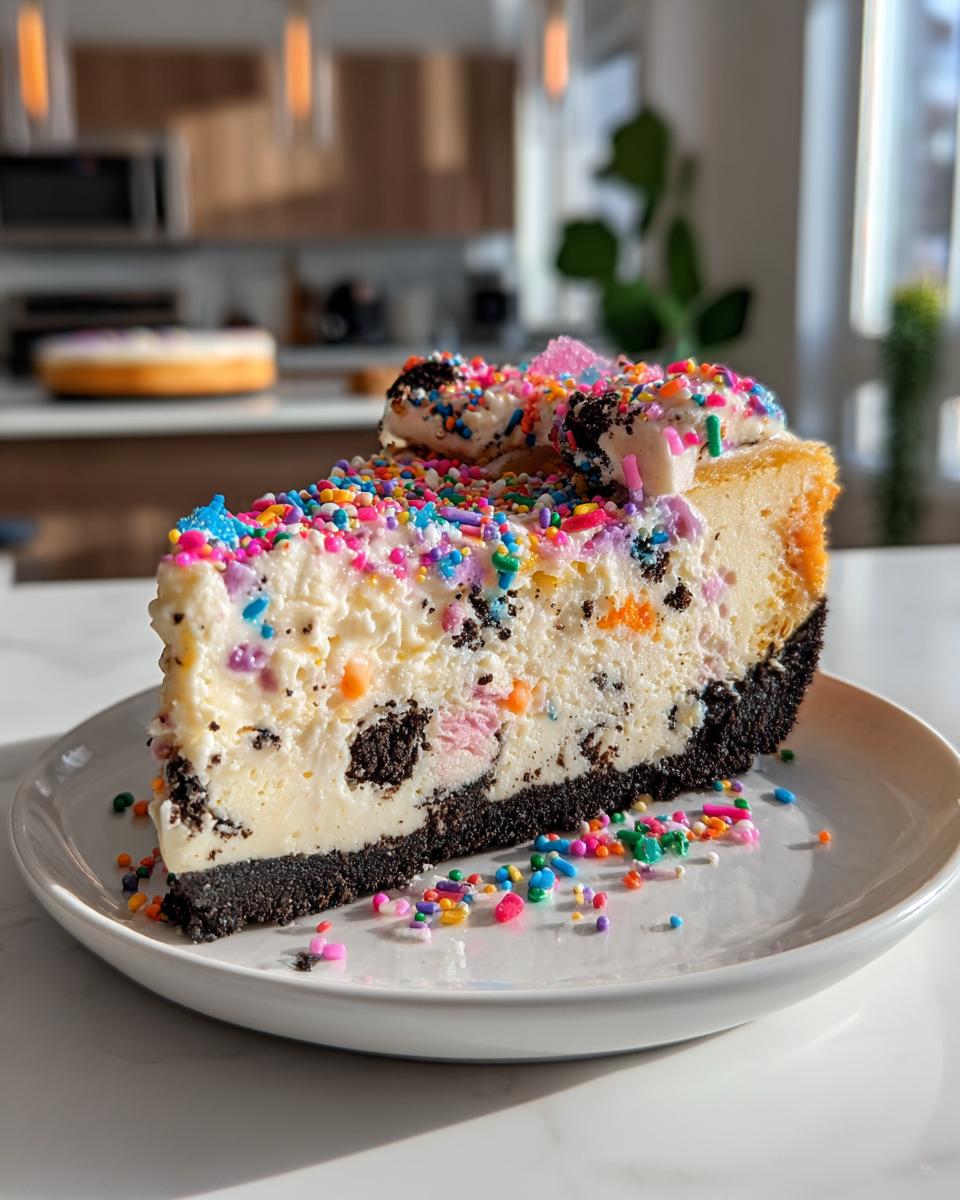
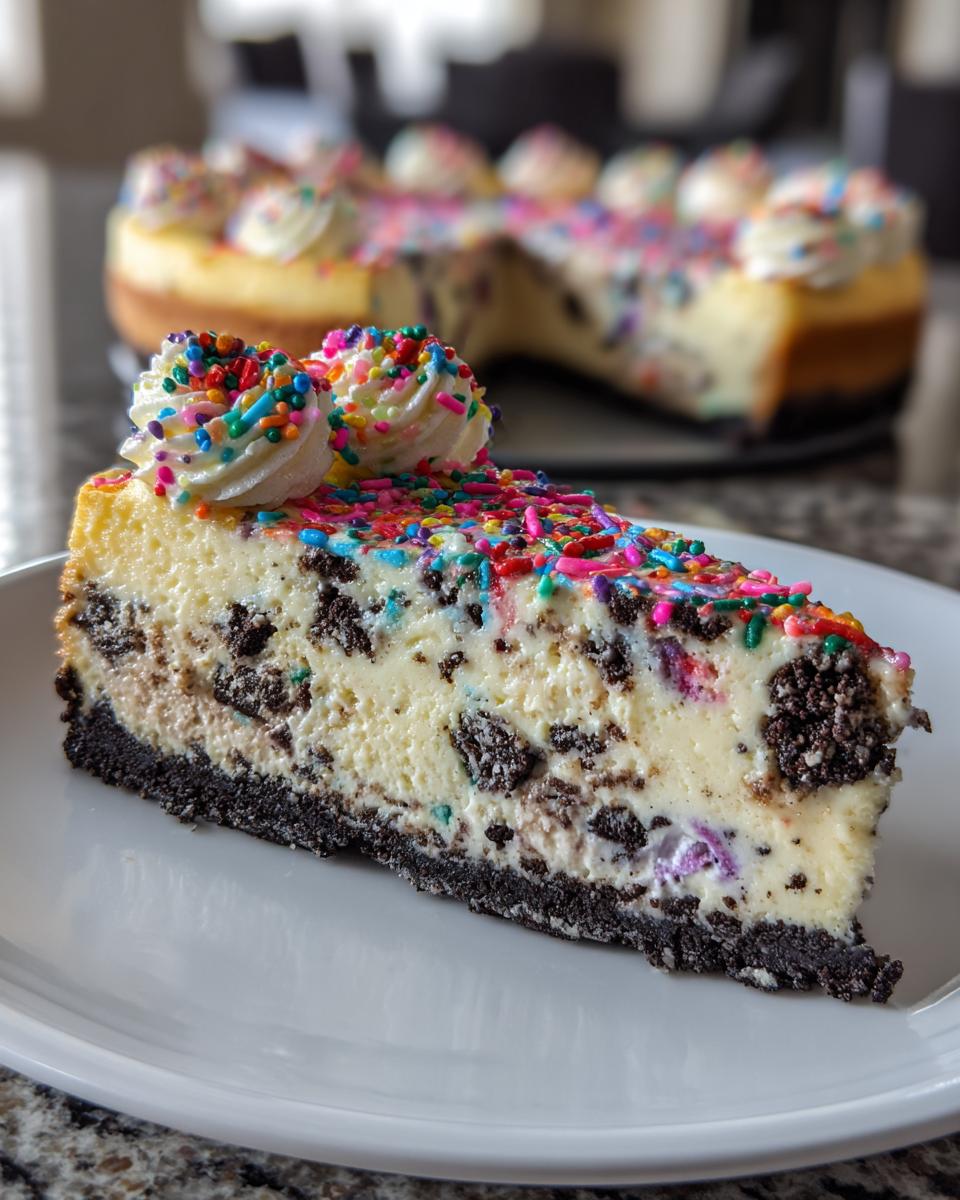
Time to bring it all together! Pull your chilled crust from the fridge and spread the creamy filling evenly over the top. Here’s where the fireworks come in – sprinkle those remaining Oreo chunks over the surface, then go wild with your sprinkles or pop rocks. Want that patriotic look? Make stripes with red, white, and blue sprinkles!
Now for the hardest part – patience. Cover your masterpiece with plastic wrap and refrigerate for at least 4 hours, though overnight is even better. I know it’s tempting, but don’t skip this step! The chilling time allows the flavors to develop and the texture to set properly. When you’re ready to serve, run a knife under hot water, dry it, and make clean slices. Watch as everyone oohs and aahs over your No Bake Fireworks Oreo Cheesecake – you kitchen wizard, you!
Tips for the Perfect No Bake Fireworks Oreo Cheesecake
After making this cheesecake more times than I can count (okay fine, it’s my secret addiction), I’ve learned a few tricks that take it from good to “Oh my god, give me the recipe!” good:
- Patience is key – That 4-hour chill time? Make it overnight if you can. The flavors meld beautifully and the texture becomes gloriously firm.
- Room temp everything – Cold cream cheese equals lumpy filling. I leave mine out for 2 full hours before mixing.
- Red velvet Oreos are magic – They give that perfect red hue without food coloring. My grocery store always runs out before holidays, so I stock up!
- Don’t overmix – Once you add the Cool Whip, gentle folds keep it light and airy instead of dense.
- Warm knife trick – Dip your knife in hot water and dry it between cuts for picture-perfect slices every time.
Follow these simple tips, and you’ll have a dessert that disappears faster than fireworks on the Fourth!
Variations and Substitutions
Listen, I’m all about sticking to the original – it’s perfection – but sometimes you gotta improvise! Here are my favorite twists on this No Bake Fireworks Oreo Cheesecake:
- Oreo flavors galore – Try mint for St. Patrick’s Day, golden for a vanilla twist, or peanut butter for serious indulgence
- Dairy-free dream – Use vegan cream cheese and coconut whipped topping – just check those Oreos are vegan too!
- Sprinkle-free zone – Skip the toppings or drizzle with melted chocolate for an elegant look
- Fruit explosion – Fold in crushed strawberries (drained well!) for a fruity surprise
- Mini version – Make individual cheesecakes in muffin tins – perfect for parties!
The beauty of this recipe? It’s like a blank canvas for your dessert creativity. Just don’t tell my niece I messed with “her” patriotic version!
Serving and Storing No Bake Fireworks Oreo Cheesecake
Here’s how to keep your cheesecake looking and tasting its best! When it’s time to serve, grab a sharp knife and dip it in hot water for about 10 seconds – wipe it dry, then slice. Repeat between cuts for those picture-perfect wedges. Leftovers (if you’re lucky enough to have any!) keep beautifully in an airtight container for up to 3 days in the fridge. No reheating needed – this beauty tastes best cold straight from the fridge. Pro tip: The crust actually gets better on day two as the flavors meld!
Nutritional Information
Okay, let’s be real – we’re not eating cheesecake for its health benefits! But for those who like to know, here’s the scoop on one indulgent slice (based on 8 servings):
- Calories: 673 (worth every single one!)
- Fat: 42g (mostly from that glorious cream cheese and butter)
- Sugar: 45g (thank the Oreos and that sweet, sweet filling)
- Protein: 8g (surprising bonus!)
Remember, these are estimates – your actual numbers might vary based on specific ingredients. My advice? Enjoy every creamy bite guilt-free – life’s too short to skip dessert!
Frequently Asked Questions
Over the years, I’ve gotten tons of questions about this No Bake Fireworks Oreo Cheesecake. Here are the answers to the ones that pop up most often:

Can I freeze this cheesecake?
Absolutely! Wrap it tightly in plastic wrap, then foil, and freeze for up to 1 month. Thaw overnight in the fridge before serving. The texture might be slightly denser, but still delicious.
Can I use homemade whipped cream instead of Cool Whip?
I don’t recommend it – homemade whipped cream doesn’t hold up as well. Cool Whip’s stabilizers keep the cheesecake firm. If you must substitute, add 1/4 tsp cream of tartar when whipping your cream.
How do I prevent cracks in my cheesecake?
Luckily, this no-bake version rarely cracks! Just avoid overmixing the filling after adding the Cool Whip, and always use room temperature cream cheese to prevent lumps.
Can I make this in a springform pan?
You bet! A 9-inch springform pan works great – just press the crust slightly up the sides. The presentation is stunning when you release the sides!
Why did my crust turn out soggy?
Probably from using hot melted butter – let it cool slightly first. Also, make sure to really compact those crumbs – I use the bottom of a measuring cup to press them down firmly.
Share Your Creation!
Did you make this No Bake Fireworks Oreo Cheesecake? I’d love to see your masterpiece! Snap a pic and tag me on Instagram – watching your creations always makes my day. Who knows, your version might inspire someone else’s celebration!
Print
20-Minute No Bake Fireworks Oreo Cheesecake Delight
A delicious no-bake Oreo cheesecake with a festive firework twist, perfect for any celebration.
- Total Time: 5 hours 20 minutes (including chilling)
- Yield: 8 servings 1x
Ingredients
- 25 Oreos (red velvet or regular, double stuffed)
- 6 tbsp butter, melted
- 1/4 tsp gel food coloring (if using regular Oreos)
- 32 oz cream cheese, softened
- 3/4 cup sugar
- 1 tsp vanilla extract
- 8 oz Cool Whip
- 16 Oreos, chopped
- Sprinkles or pop rocks (optional)
Instructions
- Crush Oreos in a food processor, then add melted butter and food coloring (if using regular Oreos).
- Chop 16 Oreo cookies and set aside.
- Press the Oreo mixture into an 8×8 dish and smooth it down.
- Refrigerate the crust for 1 hour to set.
- In a mixer, beat softened cream cheese for 4-5 minutes until creamy.
- Slowly add sugar and vanilla extract, mixing until combined.
- Fold in all but 1/2 cup of the chopped Oreos and Cool Whip.
- Spread the filling over the chilled crust.
- Sprinkle the remaining chopped Oreos on top, along with sprinkles or pop rocks if desired.
- Cover and refrigerate for 4 hours before slicing and serving.
Notes
- For a firmer cheesecake, refrigerate overnight.
- Use room-temperature cream cheese for smoother mixing.
- Customize with different Oreo flavors for variety.
- Prep Time: 20 minutes
- Cook Time: 0 minutes (no-bake)
- Category: Dessert
- Method: No-bake
- Cuisine: American
- Diet: Vegetarian
Nutrition
- Serving Size: 1 slice
- Calories: 673 kcal
- Sugar: 45g
- Sodium: 480mg
- Fat: 42g
- Saturated Fat: 22g
- Unsaturated Fat: 15g
- Trans Fat: 1g
- Carbohydrates: 65g
- Fiber: 2g
- Protein: 8g
- Cholesterol: 95mg