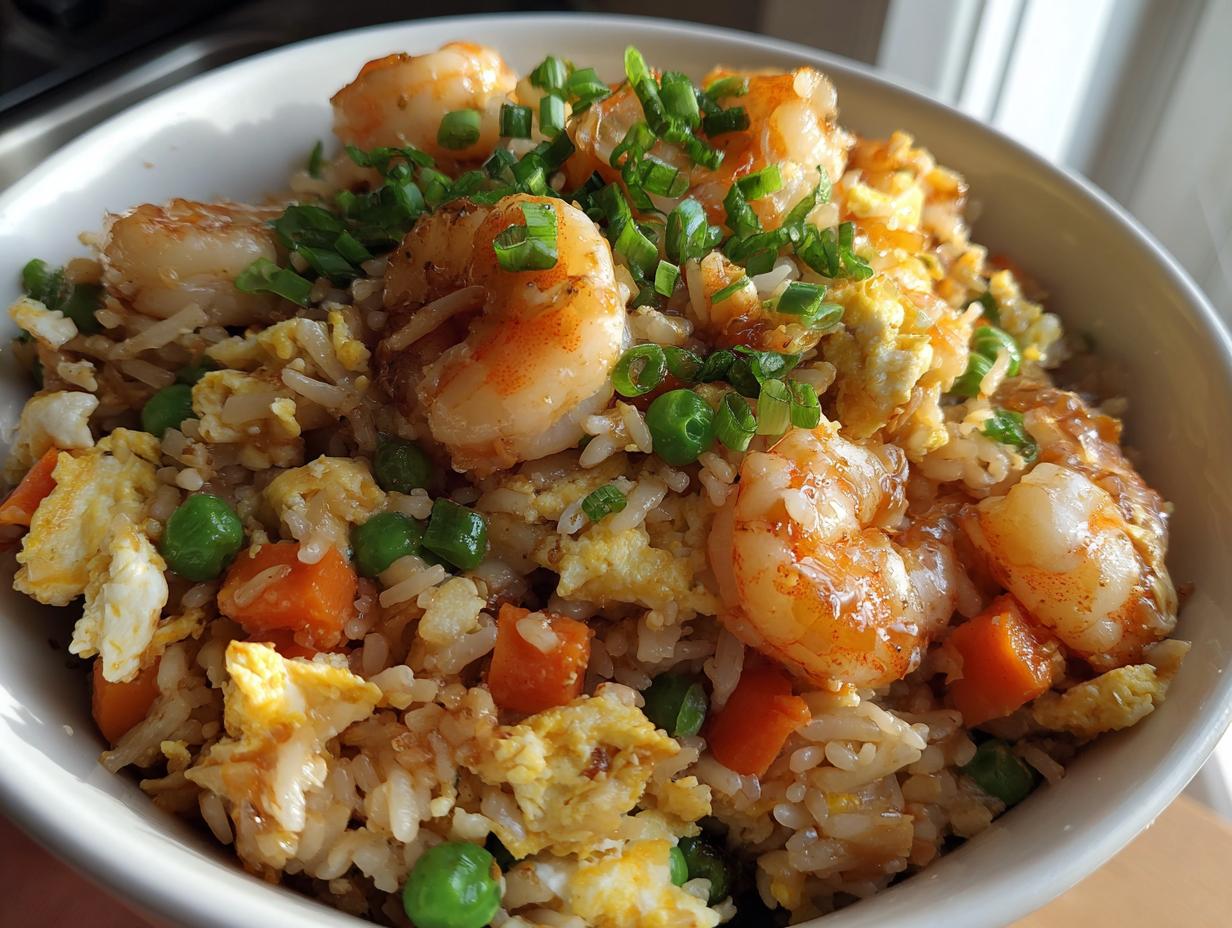
Let me tell you about my little victory over soggy takeout containers! After one too many disappointing deliveries, I cracked the code for Easy Better-Than-Takeout Shrimp Fried Rice that’s ready faster than DoorDash can say “estimated arrival time.” The secret? A screaming hot pan, day-old rice (that mysteriously clings to flavor better), and plump shrimp that actually taste like shrimp – not rubber bands. My college roommate still begs me to make this weekly, swearing it beats her favorite Chinese spot. And here’s the kicker: no mysterious “house special sauce” needed, just stuff from your fridge. Twenty minutes, one pan, and boom – you’re eating golden grains with the perfect crisp-tender bite that takeout joints charge $15 for.
Why You’ll Love This Easy Better-Than-Takeout Shrimp Fried Rice
Listen, I know what you’re thinking – “Why bother making fried rice when I can just order it?” Oh honey, let me count the ways this homemade version will ruin takeout for you forever:
- Faster than delivery: By the time you’d be waiting for your Uber Eats driver to find parking, you’re already sitting down to eat. Twenty minutes flat – I timed it!
- Shrimp that actually taste like shrimp: No more mystery seafood bits hiding in the rice. These plump babies get that perfect snap when you bite into them.
- Customizable to your cravings: Extra garlic? Double the eggs? Want it spicy? You’re the boss here, not some rushed takeout cook.
- That magical crispy-chewy rice texture: Day-old rice fries up with just the right amount of crunch while staying fluffy inside – something most restaurants mess up.
- Half the price of delivery: For what you’d spend on one takeout order, you can make this three times!
The best part? No sad, soggy container surprises when you open the bag. Just piping hot perfection straight from the pan to your plate.
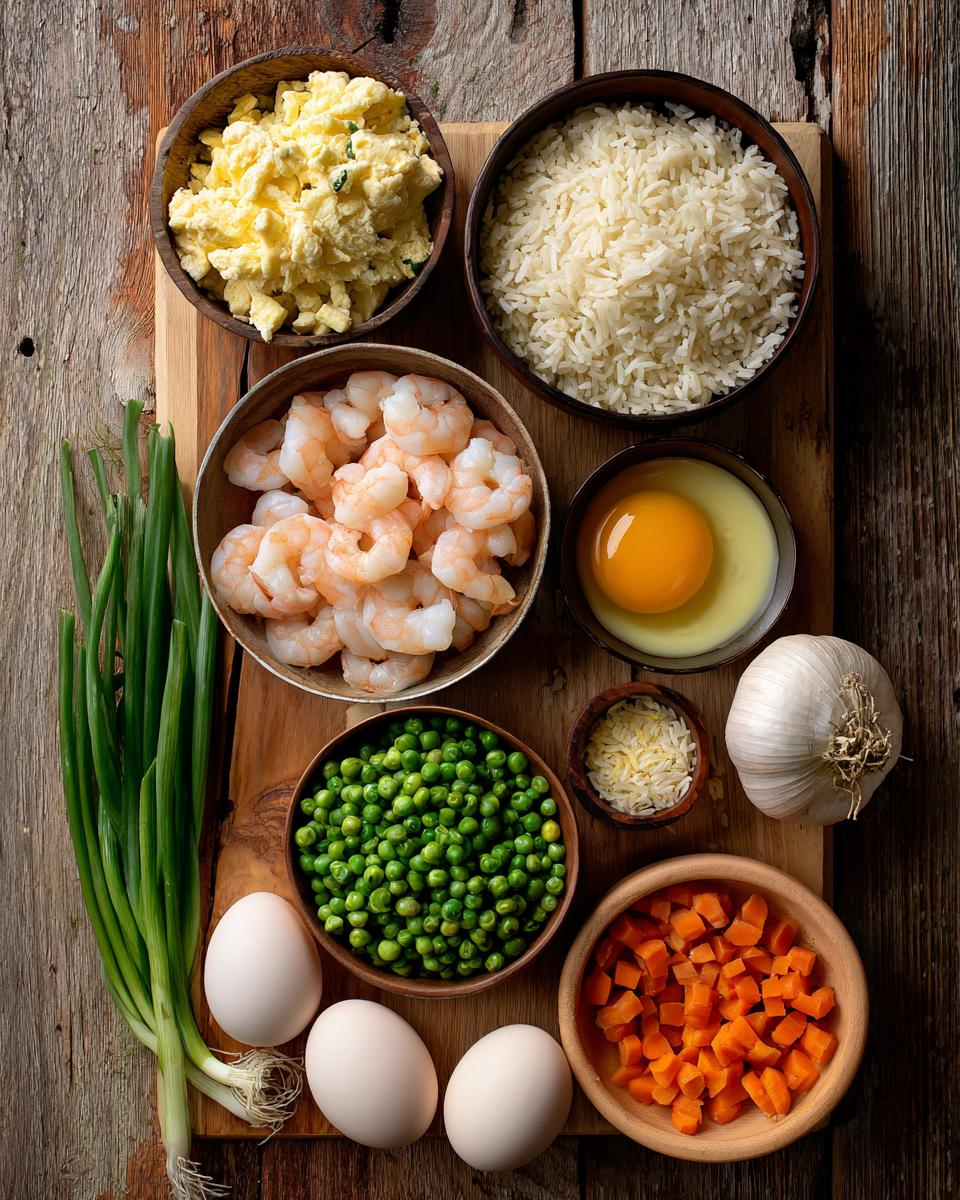
Ingredients for Easy Better-Than-Takeout Shrimp Fried Rice
Here’s the beauty of this recipe – you probably have most of this already! But let me walk you through the exact ingredients that make this taste like it came from your favorite Chinese restaurant (but better). I’ve learned the hard way that small details matter – like using cold rice instead of fresh – so pay attention to those little notes!
The Protein Power
- ½ lb medium shrimp (26/30 count): Look for “peeled and deveined” to save time. I like keeping the tails on for extra flavor, but that’s totally optional.
- 2 large eggs: Beaten with a fork just before cooking – no fancy whisking needed!
The Rice & Veggie Base
- 2 cups day-old cooked white rice: This is non-negotiable! Fresh rice turns mushy, but cold rice fries up perfectly. Leftover Chinese takeout rice works great too.
- ½ cup frozen peas and carrots: No need to thaw – they’ll cook right in the pan. I keep a bag in my freezer just for fried rice emergencies.
- 2 green onions: Thinly sliced, keeping the white and green parts separate – we’ll use them at different times.
- 2 garlic cloves: Minced fine. Pro tip: smash them with your knife first to make peeling easier!
The Flavor Boosters
- 2 tbsp soy sauce: Use regular or low-sodium – adjust to your taste.
- 1 tbsp oyster sauce: The secret weapon! Find it in the Asian aisle – it adds that takeout-style umami.
- 1 tsp sesame oil: Added at the end for maximum aroma. Don’t skip this – it makes all the difference!
- 2 tbsp vegetable oil: For stir-frying. Peanut oil works great too if you have it.
- Salt and pepper: To taste. Go easy on the salt – the soy sauce adds plenty.
See? Nothing weird or fancy – just pantry staples that come together like magic in your pan. Now let’s make some magic happen!
How to Make Easy Better-Than-Takeout Shrimp Fried Rice
Okay, here’s where the magic happens! I’ll walk you through each step like I’m right there in your kitchen – because honestly, this is so easy you’ll wonder why you ever ordered takeout. Just grab your biggest pan or wok (I use my trusty 12-inch nonstick skillet when I’m too lazy to pull out the wok) and let’s get sizzling!
Step 1: Cook the Shrimp
First, heat 1 tablespoon of vegetable oil in your pan over medium-high heat – you want it nice and hot but not smoking. Test it by flicking a tiny drop of water in – if it sizzles immediately, you’re golden. Now toss in your shrimp in a single layer (don’t crowd them!) and sprinkle with a pinch of salt. They’ll cook FAST – about 1-2 minutes per side until they turn that perfect pink color and curl into little “C” shapes. As soon as they’re opaque, scoop them out onto a plate. They’ll keep cooking a bit from residual heat, so undercooking slightly is better than rubbery shrimp!
Step 2: Scramble the Eggs
Same pan, lower the heat to medium, and add another teaspoon of oil. Pour in your beaten eggs and let them set for about 10 seconds before gently pushing them around with your spatula. You want big, fluffy curds – not tiny bits. As soon as they’re just set but still slightly glossy (about 30 seconds total), transfer them to the plate with the shrimp. They’ll finish cooking from the residual heat, and this prevents that weird gray overcooked egg texture nobody likes in their fried rice.
Step 3: Stir-Fry Vegetables and Rice
Now the fun part! Crank the heat back up to medium-high and add the remaining oil. Toss in the white parts of your green onions and that minced garlic – stand back because it’ll sizzle! Stir constantly for about 30 seconds until fragrant (don’t let the garlic brown!). Dump in the frozen peas and carrots – they’ll defrost almost instantly in the hot pan. Now add your cold rice, breaking up any big clumps with your spatula or fingers. Let it sit undisturbed for 30-second intervals to get those glorious crispy bits – this is KEY for authentic texture!
After about 2 minutes, drizzle the soy sauce and oyster sauce over everything. Toss like your life depends on it to coat every grain. Now return the shrimp and eggs to the pan along with the green onion tops. Give it another minute of stirring to heat everything through. Finally, remove from heat and drizzle with that magical sesame oil – the aroma will hit you like a wave of takeout nostalgia (but better!). Taste and add pepper or a tiny bit more soy sauce if needed.
See? I told you it was easy! Now grab a fork – this stuff is best eaten straight from the pan while it’s piping hot and the rice is at peak crispiness. Don’t say I didn’t warn you when you start craving this weekly!
Pro Tips for Perfect Easy Better-Than-Takeout Shrimp Fried Rice
After making this weekly for years (and eating all my mistakes), here are my hard-earned tricks for shrimp fried rice that’ll make your takeout guy jealous:
- Dry those shrimp! Pat them thoroughly with paper towels before cooking – wet shrimp steam instead of sear. That crispy edge makes all the difference.
- Break up rice clumps with clean fingers before adding to the pan. Those little pebbles fry more evenly than big chunks.
- High heat is your friend – but don’t burn the garlic! Medium-high gives you that perfect wok hei (breath of the wok) flavor without smoking out your kitchen.
- Prep everything before heating the pan – fried rice moves FAST once you start. I arrange ingredients in little bowls like cooking show chefs do.
- Undercook the eggs slightly – they’ll finish cooking when you mix everything back together. Scrambled eggs should still glisten when you remove them.
Bonus secret? Leftovers taste even better – the flavors meld overnight. Not that there’s ever leftovers in my house…
Ingredient Substitutions and Variations
Listen, I know we all have those nights when we’re missing an ingredient or craving something different. The beauty of this recipe is how easily you can swap things around! Here are all my favorite tweaks – tested and approved by my picky nephew and my foodie best friend alike.
Protein Swaps
- Chicken: Swap the shrimp for 1 cup diced chicken breast or thighs. Cook until no pink remains (about 4-5 minutes). Pro tip: marinate in 1 tsp soy sauce and 1 tsp cornstarch first for extra tenderness.
- Pork: Thinly sliced pork loin or even chopped bacon (because everything’s better with bacon) works great. Render the fat first and use it instead of some oil!
- Tofu: For vegetarians, press and cube extra-firm tofu. Pan-fry until golden before adding to the rice.
Sauce Adjustments
- Tamari or coconut aminos work perfectly if you need gluten-free soy sauce alternatives. They’re slightly sweeter, so you might use less.
- No oyster sauce? Mix ½ tbsp hoisin sauce with ½ tbsp soy sauce. Not quite the same, but still delicious!
- Spicy lovers: Add 1 tsp sriracha or chili garlic sauce when you add the soy sauce. My husband always does this – just warn your family first!
Veggie Variations
- Fresh veggies: Swap the frozen mix for ½ cup each diced bell peppers, carrots, and snap peas. Just stir-fry them a minute longer.
- Bok choy: Chop the stalks and add with the garlic, then toss in the leaves at the very end. So good!
- No peas? Edamame or even corn kernels make great substitutes. Frozen or canned (drained) both work.
The moral of the story? Fried rice forgives. As long as you’ve got rice, some protein, and a dream, you’re golden. I’ve even made “clean out the fridge” versions with broccoli florets and deli ham that turned out shockingly delicious. That’s the magic of this recipe – it’s your canvas to play with!
Serving Suggestions for Easy Better-Than-Takeout Shrimp Fried Rice
Now that you’ve made this glorious shrimp fried rice, let’s talk about how to serve it up like a pro! I’ve had way too many lonely takeout containers of rice in my life – let’s make this a proper meal with some perfect pairings and pretty garnishes.
Perfect Sidekicks
- Egg rolls or spring rolls: The crunch contrasts beautifully with the soft rice. I keep frozen ones on hand for emergencies – just pop them in the air fryer while the rice cooks!
- Steamed broccoli or bok choy: For when you want to feel virtuous. Drizzle with a bit of oyster sauce for extra flavor.
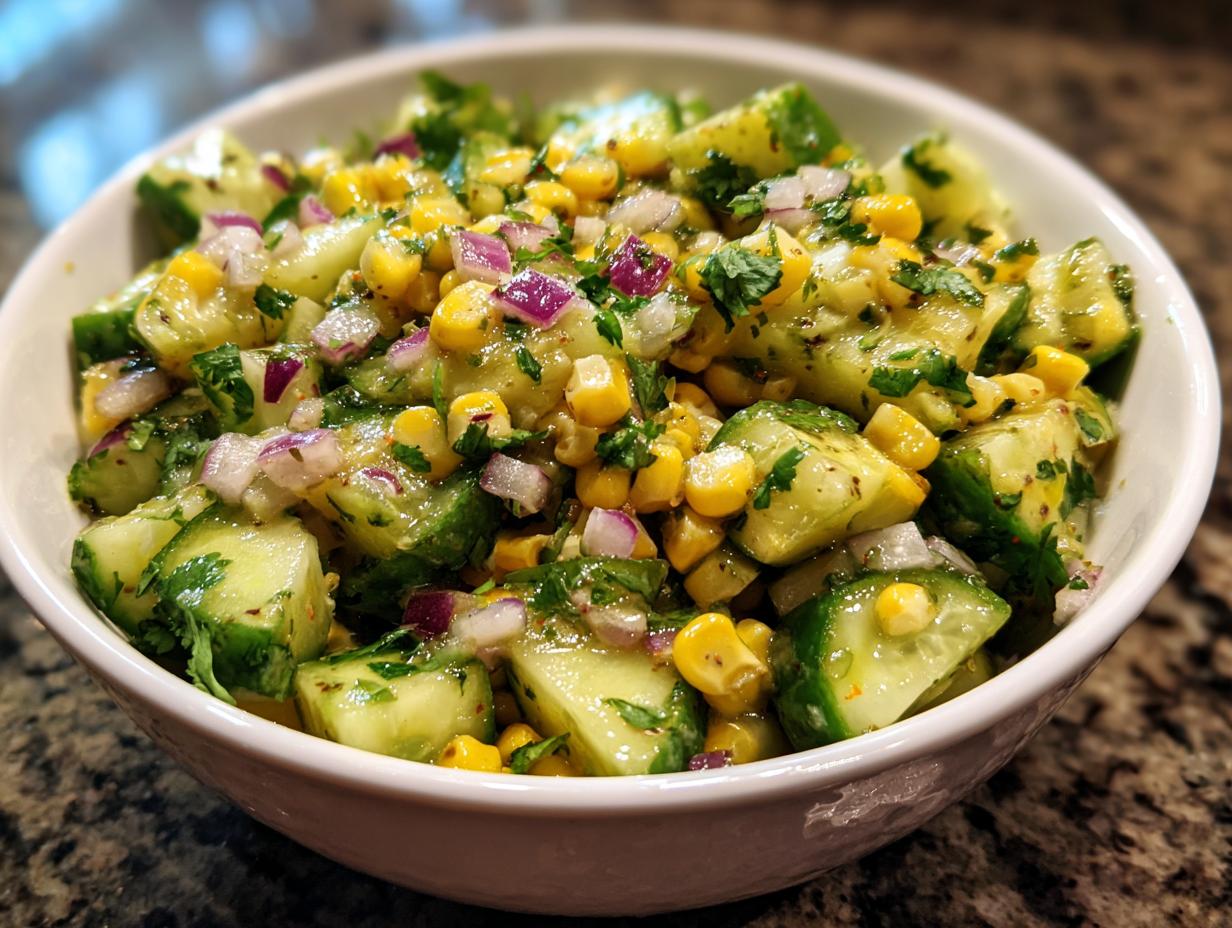
- Cucumber salad: The cool, vinegary crunch cuts through the richness. My quick version? Thinly sliced cukes with rice vinegar, sesame seeds, and a pinch of sugar.
Garnish Like a Boss
- Extra green onions: Because you can never have too many! I like cutting them on the diagonal for fancy points.
- Toasted sesame seeds: A sprinkle adds nuttiness and makes it look restaurant-worthy. Keep some pre-toasted in your pantry – they last forever.
- Chili oil or sriracha: For heat lovers. Let everyone drizzle their own to avoid spice disasters.
- Lime wedges: A squeeze brightens everything up. My mom taught me this trick – it’s a game changer!
Pro tip: Serve the rice in a big bowl family-style with all the garnishes on the side. Watching everyone customize their bowl is half the fun – and saves you from the “I don’t like onions!” complaints from picky eaters. Trust me, I’ve hosted enough dinner parties to know this matters!
Storage and Reheating
Okay, confession time – I rarely have leftovers of this shrimp fried rice (it’s that good), but when I do, here’s exactly how I handle them to keep that just-cooked magic alive. Because let’s be real – nobody wants sad, dried-out rice the next day!
Fridge Storage (The Smart Way)
First rule: cool it fast! Spread the rice in a thin layer on a plate or baking sheet before transferring to an airtight container. This prevents condensation from making it soggy. Store it in the fridge for up to 3 days – any longer and the shrimp starts getting weird textures. Pro tip: leave the sesame oil drizzle until after reheating for maximum freshness.
Freezer-Friendly? You Bet!
For longer storage, portion the cooled rice into freezer bags (I use 1-cup portions for easy single servings). Squeeze out all the air, label with the date, and it’ll keep for 1 month. The peas and carrots actually freeze great, though the shrimp might get slightly softer upon thawing. Still totally edible though!
Reheating Like a Pro
Here’s where most people mess up – the microwave is NOT your friend here! For that just-fried crispiness, always reheat in a pan:
- Heat a splash of oil in a skillet over medium heat
- Add the cold rice and break up any clumps
- Sprinkle with 1-2 teaspoons of water (this creates steam to revive the texture)
- Stir occasionally until piping hot all the way through – about 5 minutes
If you’re reheating frozen rice, thaw it in the fridge overnight first. Emergency method? Microwave the frozen block for 1 minute to loosen it before the pan step. And whatever you do – no more microwave than absolutely necessary unless you enjoy rubbery shrimp and mushy rice!
Nutrition Information
Now, I’m no dietitian, but I know you’re probably wondering – just how “better” is this homemade version compared to takeout? Here’s the scoop on what’s in each delicious serving (based on my exact ingredient list, but remember – estimates vary based on your specific ingredients and portions):
- Serving Size: 1 generous cup (because who measures fried rice precisely?)
- Calories: About 320 – way less than most restaurant versions drowning in oil
- Protein: 18g from all that plump shrimp and eggs
- Carbs: 40g (mostly from the rice – use cauliflower rice if you’re watching this)
- Fat: 10g (the good kind! Mostly from healthy oils and shrimp)
- Sodium: Around 800mg (use low-sodium soy sauce if you’re concerned)
Bonus? You control exactly what goes in – no mystery oils or MSG if that’s your preference. My nutritionist friend always says homemade versions beat restaurants because you can adjust everything to your needs. Though let’s be real – we’re eating fried rice here, not salad! Treat yo’self.
FAQ
Q1. Can I use fresh rice instead of day-old rice?
Oh honey, I’ve made this mistake so you don’t have to! Fresh rice turns into a mushy disaster because it’s too moist. The starch needs time to firm up overnight in the fridge. In a pinch? Spread freshly cooked rice on a baking sheet and pop it in the freezer for 30 minutes to dry it out fast. Still not quite the same texture though!
Q2. How can I make this shrimp fried rice spicier?
Now we’re talking! My favorite ways to kick up the heat:
– Add 1 tsp chili garlic sauce or sriracha when you mix in the soy sauce
– Toss in some diced fresh jalapeños with the garlic
– Finish with a drizzle of chili oil or sprinkle of crushed red pepper flakes
Just warn your dinner guests first – I learned that lesson the hard way!
Q3. What size shrimp works best?
I swear by medium shrimp (26/30 count) – big enough to actually taste but small enough to distribute evenly. Those jumbo shrimp look fancy but end up dominating every bite. Pro tip: if using frozen shrimp, thaw them in cold water first and pat SUPER dry.
Q4. Can I make this vegetarian?
Absolutely! Swap the shrimp for extra-firm tofu (press and cube it first) or just double up on the eggs. Use vegetarian oyster sauce or more soy sauce instead. My vegan friend adds edamame and mushrooms – says it’s even better than the shrimp version!
Q5. Why does my fried rice turn out soggy?
Three likely culprits:
1) Using fresh rice (see question 1 – I told you it’s important!)
2) Not enough heat – you need that pan SCREAMING hot to evaporate moisture fast
3) Overcrowding the pan – cook in batches if doubling the recipe
Bonus tip: Make sure your frozen veggies aren’t icy when they hit the pan!

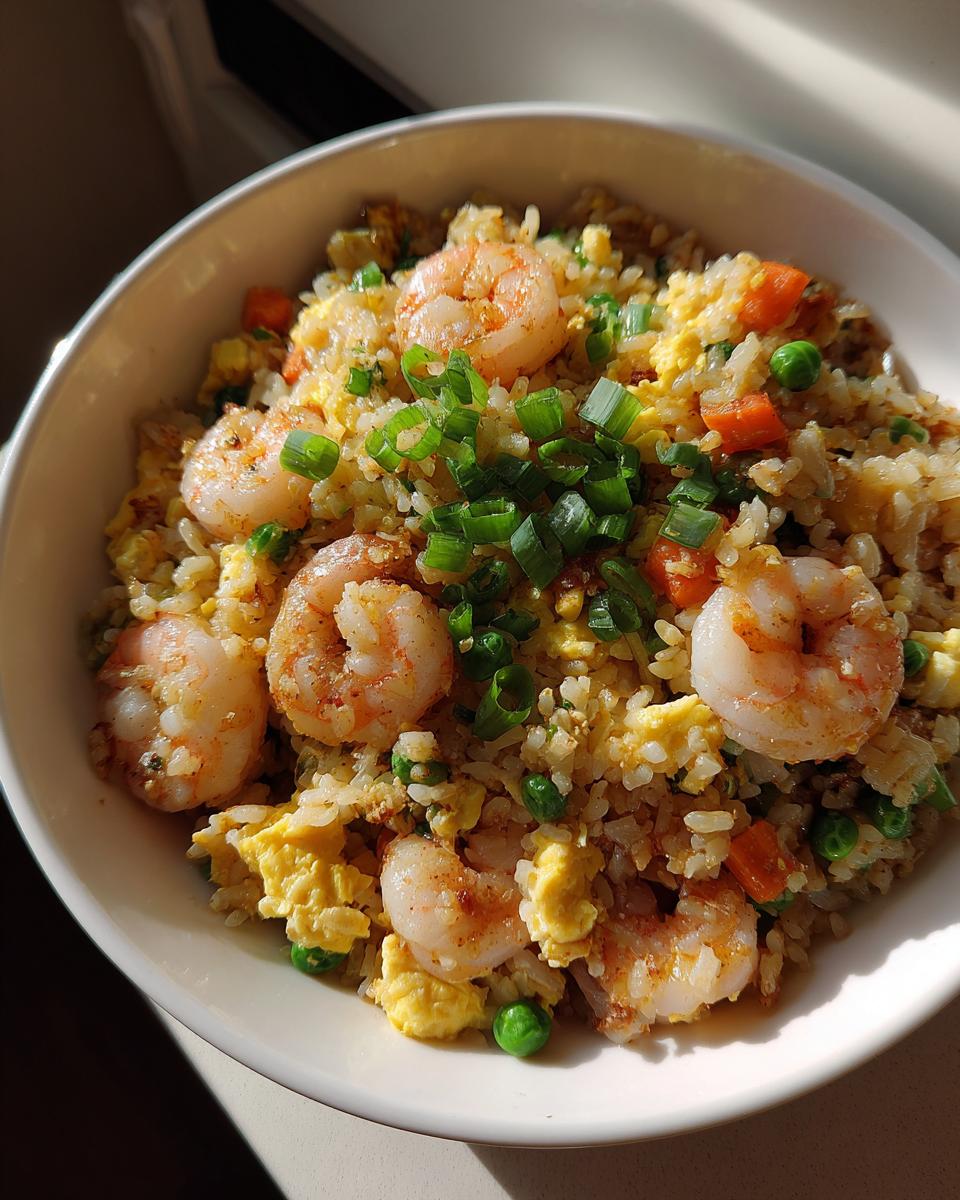
Easy Shrimp Fried Rice
A quick and delicious shrimp fried rice recipe that’s better than takeout.
- Total Time: 20 minutes
- Yield: 4 servings 1x
Ingredients
- 2 cups cooked rice (preferably day-old)
- 1/2 lb shrimp, peeled and deveined
- 2 eggs, beaten
- 1/2 cup frozen peas and carrots
- 2 cloves garlic, minced
- 2 green onions, chopped
- 2 tbsp soy sauce
- 1 tbsp oyster sauce
- 1 tsp sesame oil
- 2 tbsp vegetable oil
- Salt and pepper to taste
Instructions
- Heat vegetable oil in a large pan or wok over medium-high heat.
- Add shrimp and cook until pink, about 2 minutes. Remove and set aside.
- In the same pan, scramble the eggs. Remove and set aside.
- Add garlic and green onions to the pan. Cook for 30 seconds.
- Add frozen peas and carrots. Stir-fry for 1 minute.
- Add cooked rice, soy sauce, oyster sauce, and sesame oil. Mix well.
- Return shrimp and eggs to the pan. Stir-fry for 2 minutes.
- Season with salt and pepper. Serve hot.
Notes
- Use cold rice for best texture.
- Adjust soy sauce to taste.
- Add more vegetables if desired.
- Prep Time: 10 minutes
- Cook Time: 10 minutes
- Category: Main Dish
- Method: Stir-fry
- Cuisine: Chinese
- Diet: Low Calorie
Nutrition
- Serving Size: 1 cup
- Calories: 320
- Sugar: 2g
- Sodium: 800mg
- Fat: 10g
- Saturated Fat: 2g
- Unsaturated Fat: 6g
- Trans Fat: 0g
- Carbohydrates: 40g
- Fiber: 2g
- Protein: 18g
- Cholesterol: 150mg