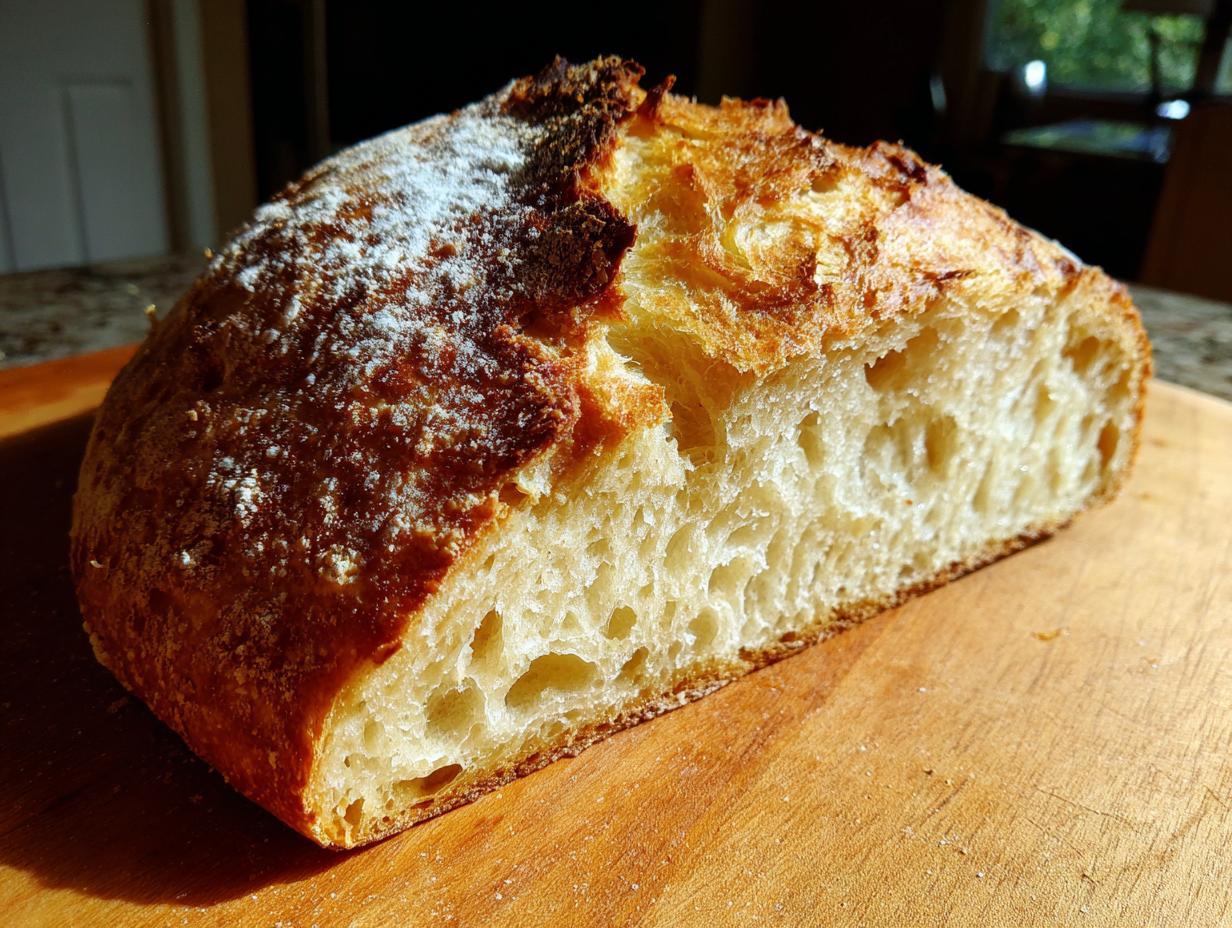
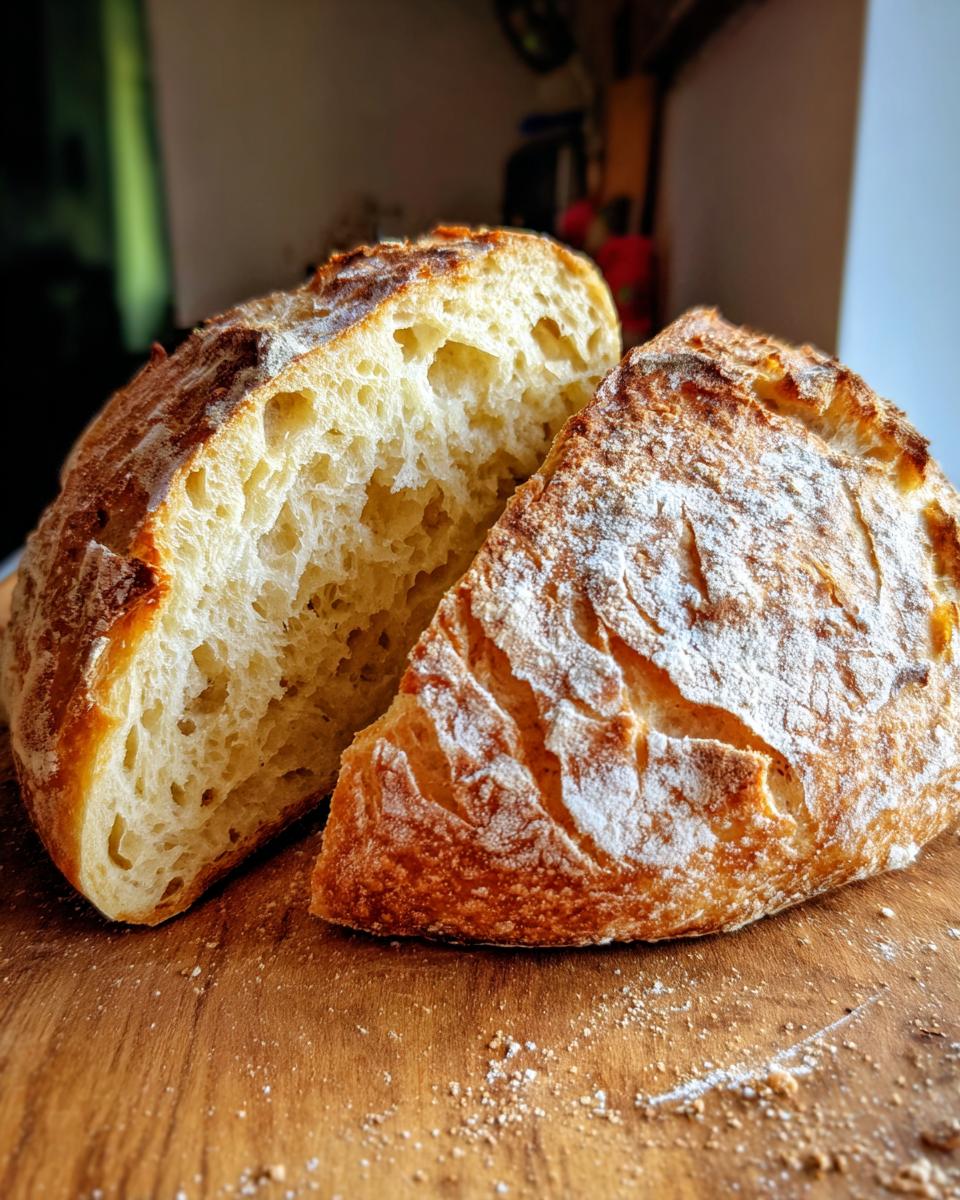
I still remember the first time I made no-knead bread in my Dutch oven – that magical moment when I lifted the lid to reveal a golden, crackling crust that sounded like autumn leaves crunching underfoot. This method turns four simple ingredients into bakery-worthy bread with practically zero effort. The Dutch oven works its magic by trapping steam, creating that perfect crispy exterior while keeping the inside soft and chewy. Honestly, if you’ve ever been intimidated by bread-making (like I was for years!), this recipe will change everything. There’s something almost miraculous about mixing flour, water, yeast and salt one evening, then waking up to bubbly dough ready to transform into the most impressive loaf.
Why You’ll Love This No Knead Bread Dutch Oven Recipe
Trust me, this recipe is a game-changer for anyone who loves fresh bread but doesn’t want to spend hours kneading or babysitting dough. Here’s why you’ll be obsessed:
- Almost zero effort: Just mix, let it sit, and bake – the long rise does all the work for you while you sleep!
- No fancy equipment: Your basic Dutch oven (even that old one hiding in your cabinet) creates bakery-quality crust.
- That perfect crackle: The steam trapped inside gives you that professional “singing” crust we all crave.
- Foolproof: Even my first attempt turned out better than any loaf I’d ever bought.
Seriously, if I can make this bread (and I once burned toast three times in a row), you absolutely can too.
Ingredients for No Knead Bread Dutch Oven
This recipe proves that fewer ingredients often mean better results. Here’s everything you’ll need for that perfect loaf:
- 3 cups (360g) all-purpose flour: I always scoop and level (no packing!) for consistent results. Bread flour works too for extra chew.
- 1/2 teaspoon (3g) active dry yeast: That tiny packet lasts forever in your fridge!
- 1 1/4 teaspoons (8g) salt: I use fine sea salt – it dissolves evenly into the dough.
- 1 1/2 cups (360ml) warm water: Think baby bottle warm – about 100°F (38°C). Too hot kills the yeast!
Ingredient Notes & Substitutions
Baking is science, but I’ve played with this recipe enough to know where you can tweak it:
- Yeast alternatives: Instant yeast works 1:1 (no proofing needed). For sourdough lovers, use 1/2 cup starter and reduce water by 1/4 cup.
- Flour swaps: Substitute up to 1 cup whole wheat flour for nuttier flavor (add 1-2 tbsp extra water). Gluten-free blends work but yield denser bread.
- Salt adjustments: I’ve cut it to 1 tsp when watching sodium – still delicious! For fancy salts like Himalayan pink, grind them fine first.
The beauty? You likely have everything in your pantry right now. Time to get baking!
How to Make No Knead Bread in a Dutch Oven
Okay, here’s where the magic happens! This process is so simple you’ll laugh when you see your gorgeous loaf. Just follow these steps:
- Mix it up: Dump all the dry ingredients in a big bowl (I use my favorite wooden salad bowl because it makes me feel rustic). Pour in the warm water and stir with a wooden spoon until you’ve got a shaggy, sticky mess – that’s exactly what you want!
- Let it snooze: Cover the bowl with plastic wrap or a damp towel. Find a cozy spot (room temp is perfect) and walk away for 12-18 hours. Yes, overnight counts! I usually mix mine at 8pm for next-day baking. You’ll know it’s ready when the dough looks bubbly and has doubled in size.
- Wake up the oven: About 30 minutes before baking, preheat your oven to 450°F (230°C) with the Dutch oven inside. This gets everything screaming hot for that perfect crust.
Shaping and Baking the Dough
Now for the fun (and slightly messy) part:
- Shape with wet hands: Sprinkle your counter with flour, then scrape the sticky dough out. Here’s my trick – wet your hands instead of using more flour! Gently fold the edges toward the center about 4-5 times to form a loose ball. Don’t overwork it – rustic is beautiful.
- Into the fire: Carefully remove the piping hot Dutch oven (I use oven mitts and say a little prayer). Plop your dough right in – it’ll sizzle a bit! Cover with the lid and bake for 30 minutes. Your kitchen will smell heavenly.
- The big reveal: Remove the lid and bake another 15 minutes until golden brown. That last uncovered bake gives you that signature crackly crust. Wait until you hear it “sing” as it cools!
Pro tip: If your dough feels extra sticky when shaping (happens to me in humid weather), just wet your hands more. Resist adding flour – trust me, it’ll bake up perfectly!
Tips for Perfect No Knead Bread Dutch Oven Results
After making this bread more times than I can count (okay fine, I counted—it’s 47 loaves), here are my hard-earned secrets for foolproof results every time:
- Weigh your flour: My biggest early mistake? Scooping flour straight from the bag. Now I always use my $10 kitchen scale—360g flour makes ALL the difference in texture. (P.S. It also means fewer measuring cups to wash!)
- Room temp matters: That 12-18 hour rise works best around 70°F (21°C). In winter, I put my dough near the radiator; in summer, a cooler spot avoids over-proofing. Your dough should look like a bubbly science experiment when ready!
- Wet hands > extra flour: The first time I made this, I created a flour avalanche trying to handle the sticky dough. Now I keep a bowl of water nearby to wet my hands and spatula—the dough releases perfectly without toughening the bread.
- Preheat like you mean it: That full 30-minute Dutch oven preheat isn’t optional! I set a timer because impatient me learned the hard way—a properly scorching pot gives you those dramatic “bread ears” and crackly crust.
- Listen to your loaf: The bread will literally “sing” (make crackling sounds) as it cools—that’s steam escaping the perfect crust. If you don’t hear it, no worries, but it’s my favorite baking victory song!
Bonus tip from my last loaf disaster: If your Dutch oven handle isn’t oven-safe past 400°F, wrap it in foil. (RIP my favorite wooden knob that now lives in bread-heaven.)
Storing and Reheating No Knead Bread
Here’s the thing about this bread – it never lasts long in my house! But when you miraculously have leftovers (or want to bake ahead), here’s how to keep it tasting fresh-from-the-oven amazing:
Room temp storage: I just tuck the cooled loaf into a paper bag – the crust stays crisp for 2 days this way. Plastic bags make it soggy fast, but if you must use one, leave it slightly open. Pro tip: Store it cut-side down on a wooden board to prevent drying out.
Freezing like a pro: For longer storage, I slice the loaf before freezing. That way I can pop single slices straight into the toaster! Wrap slices in parchment paper, then foil, and freeze for up to 3 months. The whole loaf freezes well too – just double-wrap in foil first.
Reheating magic: My favorite trick? Sprinkle a few drops of water on the bread and reheat at 350°F (175°C) for 10 minutes. The steam brings back that fresh-baked crispness! For single slices, the toaster works wonders – I use the “defrost” setting for frozen slices. And if you’re impatient like me, 30 seconds in the microwave with a cup of water nearby does the job in a pinch (though the crust won’t be as crisp).
Confession: I’ve been known to “store” the whole loaf in my belly within hours. No judgment if you do the same!
No Knead Bread Dutch Oven Variations
Once you’ve mastered the basic recipe (which, let’s be honest, is perfect as-is), it’s time to play with flavors! I’ve experimented with countless add-ins over the years—some winners, some… interesting learning experiences. Here are my favorite ways to jazz up this no-knead wonder:
Herb & Garlic Love
My absolute favorite variation starts with smashing 3 garlic cloves and chopping 2 tablespoons of fresh rosemary. I mix these into the dry ingredients before adding water—the aroma while baking is insane! For extra garlic punch, I’ll rub the warm loaf with a cut garlic clove after baking. (Pro tip: Add 1/4 cup grated parmesan for the ultimate savory bread!)
Seeded & Nutty Goodness
For extra crunch and nutrition, try this combo I use every Thanksgiving: 2 tablespoons each of sunflower seeds, pumpkin seeds, and flaxseeds mixed into the flour. Sometimes I’ll toast them first for deeper flavor. If adding nuts (I’m partial to walnuts), chop them roughly so they distribute evenly. These additions may need 1-2 extra tablespoons of water to balance the dough.
Sweet & Spiced Twists
When I’m craving something sweeter, I reduce the salt to 1 teaspoon and add 2 tablespoons honey or maple syrup with the water. My autumn favorite? 1 teaspoon cinnamon + 1/2 teaspoon nutmeg + 1/2 cup dried cranberries. For a festive touch, orange zest brightens up the flavor beautifully. (Watch these loaves closely—sugary additions brown faster!)
Important note: Any mix-ins should total no more than 1 cup per loaf, or the structure suffers. With wet additions (like olives or roasted garlic), pat them dry first and reduce water by a tablespoon. And remember—every new variation is an adventure. My “everything bagel” spice experiment may have looked questionable, but oh man, was it delicious!
Nutritional Information
Here’s the scoop on what’s in each delicious slice of this no-knead bread – because let’s be real, we’re all going to eat more than one piece! (I won’t judge if you eat half the loaf fresh from the oven like I do.) These estimates can vary slightly based on your specific ingredients, but here’s the general breakdown per slice (assuming you slice the loaf into 12 reasonable portions – good luck with that!):
- Calories: About 120 – perfect for that extra-thick smear of butter
- Carbohydrates: 25g (it’s bread, people – embrace the carbs!)
- Protein: 4g – not bad for something that requires zero effort
- Fiber: 1g (use whole wheat flour to bump this up)
- Sugar: Basically 0g – unless you added honey like in my sweet variation
- Sodium: 195mg (reduce salt slightly if watching this)
- Fat: Just 0.5g – which means more room for that fancy olive oil dip
Full disclosure: I’m not a nutritionist – I’m just a bread enthusiast who’s done the math (while eating warm bread, naturally). The exact numbers will dance around a bit depending on whether you use all-purpose or whole wheat flour, add mix-ins, or – let’s be honest – how thick you slice it. My “slice” measurements assume you’ll actually let the bread cool before cutting… unlike someone I know who digs in while it’s still steaming!
Common Questions About No Knead Bread Dutch Oven
I’ve gotten so many great questions from friends trying this recipe – let me share the ones that come up constantly! These are the bread-making mysteries that had me scratching my head too when I first started.
Can I use instant yeast instead of active dry? Absolutely! I keep both in my fridge and use them interchangeably in this recipe. With instant yeast, you can skip the proofing step – just mix it right in with the dry ingredients. Use the same amount (1/2 teaspoon). The rise time might be slightly shorter, so keep an eye on your dough after 10 hours.
Why do we preheat the Dutch oven? Oh, this is my favorite science-y part! That screaming hot pot creates an instant steam bath when you add the dough – which gives you that gorgeous, crackly artisan crust. I learned the hard way that skipping this step makes for sad, pale bread. The preheat also ensures even heat distribution so your loaf doesn’t end up lopsided.
Can I halve the recipe? You bet! I do this all the time when I want a smaller loaf. Just halve all the ingredients exactly (180g flour, 1/4 tsp yeast, etc.). The bake time stays the same – though your loaf will be shorter, so maybe check it 5 minutes early. My tiny cast iron combo cooker works perfectly for half batches.
My dough is super sticky – did I mess up? Nope! Stickier dough = better bread. I promise. The first time I made this, I panicked and added way too much flour – resulting in a dense brick. Now I embrace the mess! Wet hands and a flexible dough scraper are your best friends here. That high hydration is what gives you those gorgeous air pockets inside.
Can I bake this without a Dutch oven? While not ideal, you can! I’ve had decent results using a baking sheet with a metal bowl inverted over the dough to trap steam. The crust isn’t quite as magical though. If you bake bread regularly, the Dutch oven is worth the investment – I found mine at a thrift store for $15!
Got more questions? I could talk bread all day – leave them in the comments and I’ll help troubleshoot! Every loaf teaches me something new.
Alright, bread lovers – it’s your turn! After reading all my tips (and probably smelling imaginary fresh bread), I know you’re itching to try this recipe. Don’t let that bag of flour sit lonely in your pantry any longer! Mix up that shaggy dough tonight, and tomorrow you’ll be tearing into the most satisfying homemade bread you’ve ever made. I want to hear all about your baking adventures – did your crust “sing”? Did you add any fun mix-ins? Snap a photo of that gorgeous loaf and share your results below! There’s nothing I love more than seeing fellow bakers fall in love with this no-knead magic. Happy baking!
Print
Effortless No Knead Bread Dutch Oven in 3 Steps
Easy no-knead bread baked in a Dutch oven for a crispy crust and soft interior.
- Total Time: 13 hours
- Yield: 1 loaf 1x
Ingredients
- 3 cups (360g) all-purpose flour
- 1/2 teaspoon (3g) active dry yeast
- 1 1/4 teaspoons (8g) salt
- 1 1/2 cups (360ml) warm water
Instructions
- Mix flour, yeast, and salt in a large bowl.
- Add warm water and stir until a shaggy dough forms.
- Cover with plastic wrap and let rise at room temperature for 12-18 hours.
- Preheat oven to 450°F (230°C) with Dutch oven inside for 30 minutes.
- Shape dough into a ball on a floured surface.
- Place dough in the hot Dutch oven, cover, and bake for 30 minutes.
- Remove lid and bake for another 15 minutes until golden brown.
- Cool on a wire rack before slicing.
Notes
- Use a kitchen scale for accurate measurements.
- Longer rise time improves flavor.
- Handling the dough with wet hands prevents sticking.
- Prep Time: 15 minutes
- Cook Time: 45 minutes
- Category: Bread
- Method: Baking
- Cuisine: American
- Diet: Vegetarian
Nutrition
- Serving Size: 1 slice (1/12 of loaf)
- Calories: 120
- Sugar: 0g
- Sodium: 195mg
- Fat: 0.5g
- Saturated Fat: 0g
- Unsaturated Fat: 0g
- Trans Fat: 0g
- Carbohydrates: 25g
- Fiber: 1g
- Protein: 4g
- Cholesterol: 0mg