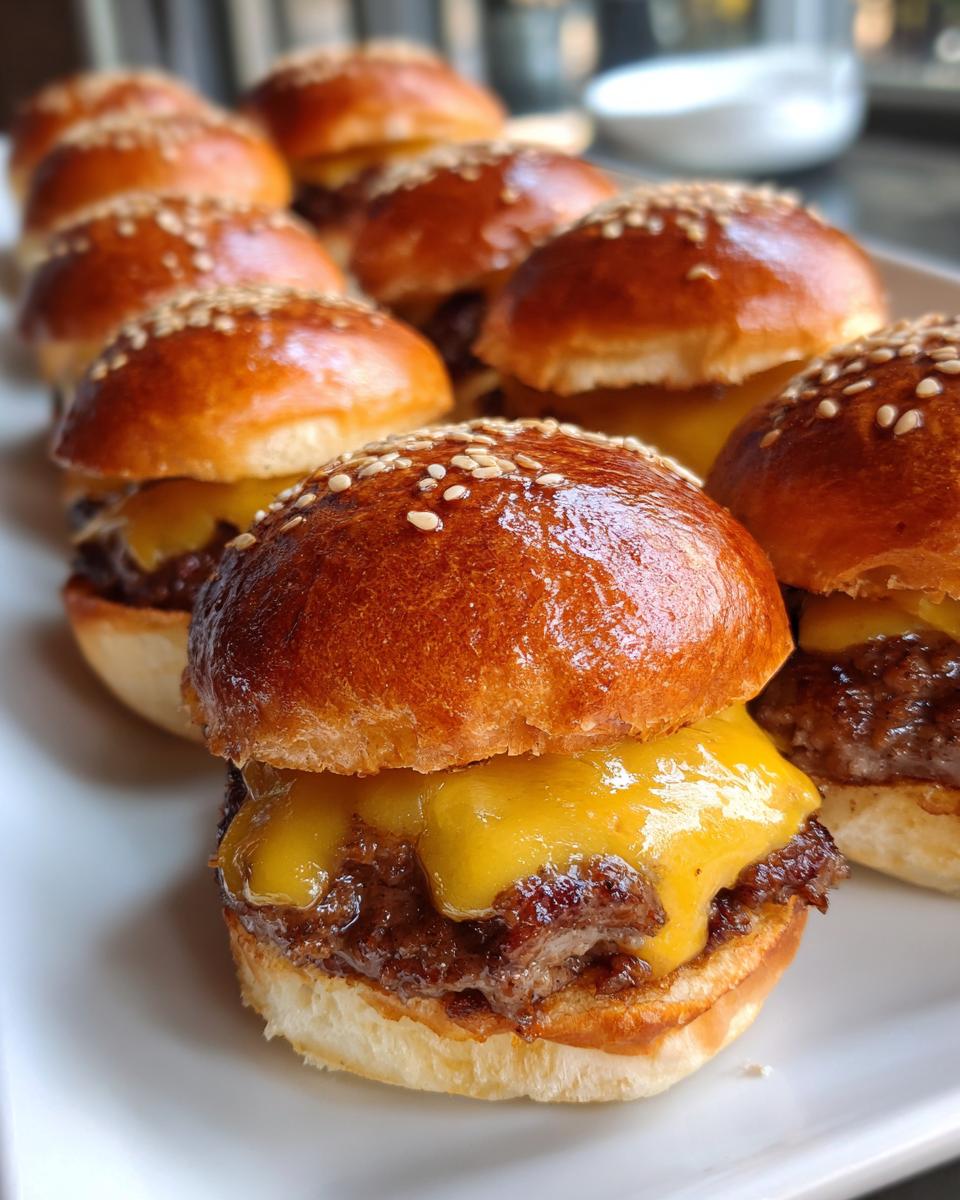
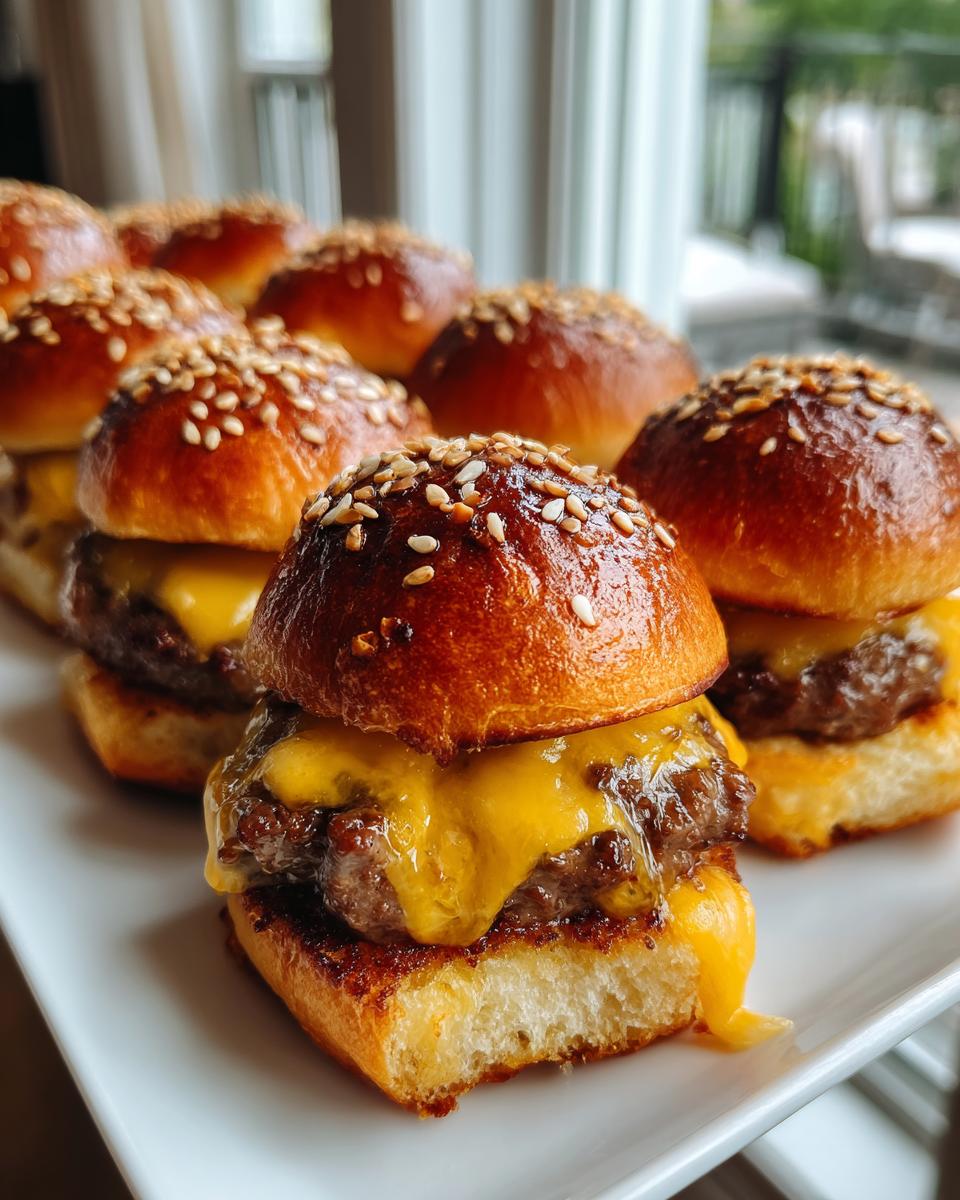
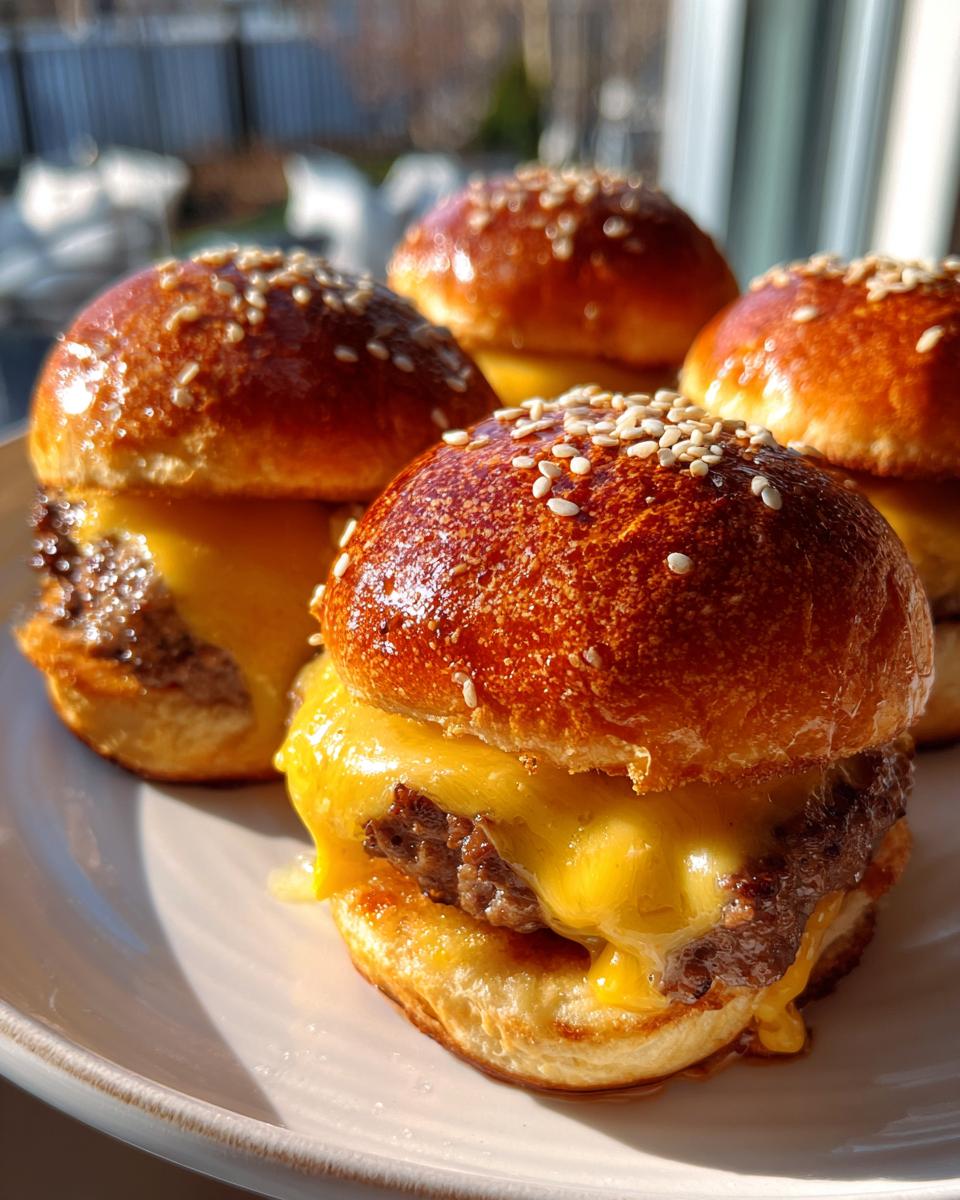
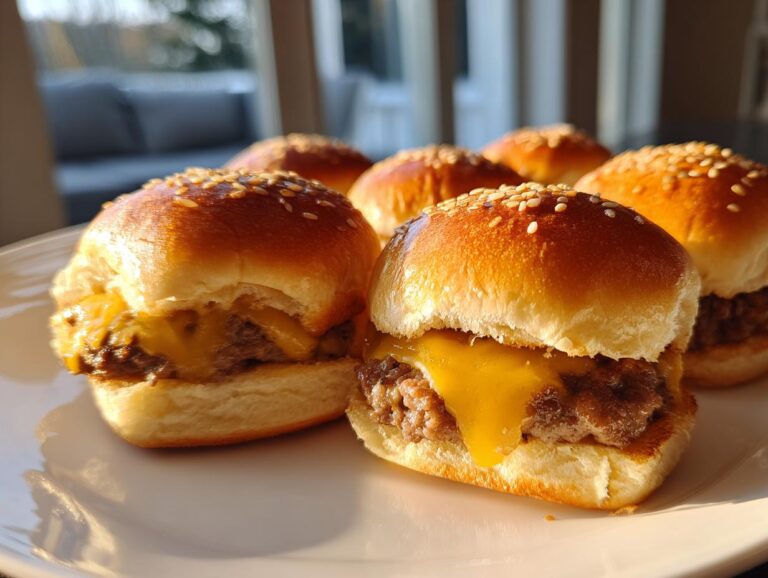
Nothing screams “game day!” quite like a tray of steaming hot cheeseburgers fresh off the skillet. My Classic Cheeseburger Game Day Sliders have become legendary in our friend group – the first thing to disappear at every party. I still remember the time my husband accidentally ate six before realizing he was supposed to share!
These mini flavor bombs pack all the satisfaction of a full-sized burger into perfect two-bite portions. The secret? Keeping things simple. Good beef, melty cheese, soft buns – that’s it. No fancy ingredients, no complicated steps. Just pure, crowd-pleasing deliciousness ready in 20 minutes flat. Trust me, once you serve these at your next gathering, you’ll be making them for every game day (and honestly, just random Tuesdays) from now on.
Classic Cheeseburger Game Day Sliders Ingredients
Here’s what you’ll need to create these irresistible mini burgers – every ingredient plays a specific role in making them perfect:
- 1 lb ground beef (80/20 lean-to-fat ratio) – This ratio gives you juicy burgers without being too greasy
- 1/2 tsp kosher salt – I prefer kosher for even distribution
- 1/4 tsp freshly ground black pepper – Freshly ground makes all the difference!
- 12 slider buns (split horizontally) – The soft, slightly sweet ones work best
- 6 slices American cheese (each cut in half) – That classic melty goodness
- 1 tbsp vegetable oil – For greasing your skillet
Ingredient Substitutions & Notes
Don’t stress if you need to swap things out – here are my tried-and-true alternatives:
- Ground turkey works if you’re going lighter, just add 1 tbsp Worcestershire sauce for extra flavor
- Swap American cheese for cheddar, pepper jack, or even Swiss if you prefer
- No slider buns? Dinner rolls or Hawaiian rolls make great stand-ins
- For extra crunch, add pickles or caramelized onions between the patty and bun
- Pro tip: Keep your meat cold until ready to use – it’ll hold together better when forming patties!
How to Make Classic Cheeseburger Game Day Sliders
Now for the fun part – turning these simple ingredients into the most irresistible little cheeseburgers you’ve ever tasted! I’ve made these so many times I could probably do it in my sleep, but don’t worry – I’ll walk you through every step so yours come out perfect too.
Step 1: Prepare the Patties
First things first – grab that cold ground beef from the fridge. Cold meat handles better, trust me! In a large bowl, gently mix the beef with salt and pepper. I like to use my hands (clean, of course) for this – you want everything just combined, not overworked. Overmixing makes tough sliders, and nobody wants that!
Divide the mixture into 12 equal portions – about the size of a golf ball each. Gently flatten them into thin patties, slightly wider than your buns since they’ll shrink a bit during cooking. Pro tip: Press your thumb lightly into the center of each patty to prevent puffing up during cooking. Set them on a plate and pop back in the fridge while you prep everything else.
Step 2: Cook the Sliders
Heat your skillet over medium heat for about 2 minutes – you want it nice and hot but not smoking. Add that tablespoon of oil and swirl it around. Now here comes the sizzle! Working in batches if needed, add your patties to the skillet without crowding them. Listen for that satisfying hiss as they hit the pan!
Cook for exactly 3 minutes on the first side – you’ll see the edges start to brown and juices rising to the top. Flip them over (I like to use a thin spatula for this) and cook for another 2 minutes. Now here’s the magic moment – place half a slice of American cheese on each patty during the last minute of cooking. Watch how it melts into gooey perfection right before your eyes!
Step 3: Assemble & Serve
While the patties are cooking, lightly toast your slider buns if you like them that way (I usually just do the cut sides in the skillet for about 30 seconds). Now for the best part – assembly! Place a cheesy patty on each bun bottom. If you’re adding pickles or onions, now’s the time.
Here’s a game day hack: Stick a toothpick through each assembled slider to keep everything together when serving. Arrange them on a platter – they’ll look so cute all lined up! These are absolute best served immediately while the cheese is still oozy and the buns are warm. Watch them disappear faster than your team can score a touchdown!
Why You’ll Love These Classic Cheeseburger Game Day Sliders
I can practically guarantee these will become your new go-to party food – here’s why everyone goes crazy for them:
- 20 minutes from fridge to table – No complicated prep, no waiting around. When hunger strikes during the big game, these sliders deliver FAST.
- That nostalgic cheeseburger flavor we all crave – Simple, classic, and impossible to resist. Even picky eaters can’t say no to these!
- Endlessly customizable – Dress them up or keep them basic. Add bacon, special sauces, or whatever toppings make your taste buds happy.
- Perfect party portion size – No messy plates, no awkward half-eaten burgers. Just grab-and-go mini deliciousness that lets everyone sample other snacks too.
- Kid-friendly and adult-approved – The universal language of melty cheese and juicy beef speaks to all ages at your gathering.
- Leftovers? What leftovers? – Let’s be real – these never last long enough to worry about storing them!
Honestly, the hardest part about this recipe is remembering to save some for yourself once your friends and family get a taste!
Equipment Needed
One of the best things about these Classic Cheeseburger Game Day Sliders? You don’t need any fancy gadgets to make them shine. Here’s my simple must-have list – chances are you’ve already got everything in your kitchen right now!
- Large skillet (10-12 inches) – Cast iron works great for that perfect sear, but any heavy-bottomed pan will do
- Thin metal spatula – Makes flipping those delicate little patties a breeze
- Mixing bowl – For combining your beef with those simple seasonings
- Measuring spoons – Just the basics – 1/2 tsp and 1/4 tsp will cover all your seasoning needs
That’s seriously it! No special burger presses, no expensive tools – just good old-fashioned cooking with everyday equipment. I’ve even made these camping with just a cast iron pan over the fire (talk about game day spirit!). The simpler the tools, the more fun the cooking – and the more time you get to spend actually enjoying the game with your guests!
Serving Suggestions for Classic Cheeseburger Game Day Sliders
Now that you’ve got these irresistible little cheeseburgers ready to go, let’s talk about how to turn them into the ultimate game day spread! I’ve hosted enough football Sundays to know it’s all about creating that perfect balance of flavors and textures around your star player – these sliders.
First up, classic french fries are my go-to sidekick. Whether you go crispy shoestring or thick steak fries, that salty crunch is the ideal partner for melty cheeseburgers. For something different, try sweet potato fries with a spicy mayo dip – the sweet and savory combo is unreal!
No game day is complete without cold drinks flowing freely. I always set out an ice bucket with:
- Ice-cold beer – A light lager or pale ale cuts through the richness perfectly
- Soda options – Root beer is weirdly amazing with these sliders
- Signature cocktail – Try a spicy Bloody Mary bar for the adults
Want to balance out all that indulgence? Throw together a simple crudité platter with ranch dip. The fresh veggies give everyone something to munch on during commercial breaks. My secret weapon? Fried pickles – they bridge that gap between healthy(ish) and totally decadent.
For the full stadium experience, set up a condiment bar with:
- Classic burger sauce (just mix mayo, ketchup, and relish)
- Spicy brown mustard
- Pickle spears and pepperoncini
- Sliced tomatoes and red onions
- Different hot sauces for the adventurous eaters
Pro tip: Arrange everything on a folding table with team-colored napkins for that authentic tailgate vibe right in your living room. The best part? When the game gets intense, nobody has to miss a play to assemble their perfect bite – just grab and go!
Storage & Reheating
Okay, let’s be real – these Classic Cheeseburger Game Day Sliders rarely last long enough to need storing, but just in case you miraculously have leftovers (or want to prep ahead), here’s how to keep them tasting fresh:
For storing: Keep the cooked patties separate from the buns in airtight containers. The cheese-topped patties will stay good in the fridge for up to 3 days, but the buns are best used within 24 hours to prevent them from getting stale. Trust me, I learned this the hard way after one sad, soggy bun incident!
Reheating magic: When you’re ready to serve again, pop the patties on a baking sheet in a 350°F oven for about 5 minutes until heated through. For that just-cooked freshness, I love using my toaster oven – it’s perfect for small batches and gives the cheese that beautiful melty texture again without drying out the meat.
Pro tip: If you’re reheating the buns too, give them a quick 30-second toast right before assembling to bring back that perfect soft-yet-slightly-crisp texture. And whatever you do, don’t microwave the assembled sliders unless you enjoy rubbery cheese and soggy bread – been there, regretted that!
Nutrition Information
Alright, let’s talk numbers – but don’t worry, we’re keeping it real simple! Here’s the lowdown on what’s in these delicious Classic Cheeseburger Game Day Sliders (per slider, because let’s face it – nobody’s stopping at just one!):
- Calories: 210
- Fat: 12g (5g saturated)
- Carbohydrates: 15g
- Protein: 12g
- Sodium: 380mg
- Sugar: 2g
Now, here’s my nutritionist-approved disclaimer: “These values are estimates – your actual nutrition may vary based on the brands you use and any extra toppings you pile on!” That slice of bacon or extra cheese you snuck on there? Yeah, that’s gonna change things a bit (but totally worth it in my book).
The good news? These sliders pack a decent protein punch while keeping carbs reasonable – perfect for balancing out all those game day snacks. And honestly, when you’re surrounded by cheering friends and an exciting game, who’s counting calories anyway? Just enjoy every melty, juicy bite!
FAQs About Classic Cheeseburger Game Day Sliders
Over the years, I’ve gotten so many questions about these sliders – seems like everyone wants to know the secrets to making them perfect! Here are the answers to the most common ones that pop up:
Can I make these sliders ahead of time?
Absolutely! I prep the patties all the time when I’m hosting big gatherings. Just form them as usual, place between sheets of parchment paper in a container, and refrigerate for up to 24 hours. You can even freeze them for a month – thaw overnight in the fridge before cooking. Game day pro tip: Keep the uncooked patties chilled right until you’re ready to cook them for the best texture.
What’s the best cheese substitute for American cheese?
While American gives that classic melty goodness, I love switching it up sometimes! Cheddar brings nice sharpness, while pepper jack adds a spicy kick. Swiss or provolone work great too if you prefer milder flavors. The key is choosing cheeses that melt well – steer clear of hard cheeses like parmesan that won’t give you that oozy perfection.
Can I bake these instead of pan-frying?
You sure can! Preheat your oven to 375°F and bake the patties on a parchment-lined sheet for about 12 minutes, flipping halfway through. Add the cheese during the last minute. The texture will be slightly different (less crispy edges), but still delicious. This method is perfect when you need to make a big batch all at once!
How do I keep the sliders warm for serving?
My favorite trick? Arrange the cooked sliders on a baking sheet and keep them in a 200°F oven until ready to serve. Cover loosely with foil to prevent drying out. For parties, I sometimes use a slow cooker on warm setting with a layer of parchment at the bottom – just be careful not to leave them too long or the buns can get soggy.
What’s the best way to transport these to a party?
After years of tailgating disasters (RIP, many flipped platters), I’ve perfected the system: Assemble sliders and place them snugly in a foil pan. Cover tightly with foil, then wrap the whole pan in a kitchen towel to keep warm. Bring toppings separately in small containers. At the party, reheat the whole pan in the oven for 5 minutes if needed – they’ll taste freshly made!
Made these Classic Cheeseburger Game Day Sliders for your crew? I’d love to see your creations! Tag me @YourBurgerQueen so I can admire your handiwork – bonus points if you capture that first glorious cheese pull shot!
20-Minute Classic Cheeseburger Game Day Sliders: Irresistible Crowd-Pleasers
Delicious mini cheeseburgers perfect for game day or any gathering.
- Total Time: 20 minutes
- Yield: 12 sliders 1x
Ingredients
- 1 lb ground beef
- 1/2 tsp salt
- 1/4 tsp black pepper
- 12 slider buns
- 6 slices American cheese, cut in half
- 1 tbsp vegetable oil
Instructions
- Preheat skillet over medium heat
- Mix ground beef with salt and pepper
- Form into 12 small patties
- Cook patties for 3 minutes per side
- Place cheese on patties during last minute
- Toast buns lightly
- Assemble sliders with patties
Notes
- Can substitute ground turkey for beef
- Add pickles or onions if desired
- Serve immediately for best results
- Prep Time: 10 minutes
- Cook Time: 10 minutes
- Category: Appetizer
- Method: Stovetop
- Cuisine: American
- Diet: Low Lactose
Nutrition
- Serving Size: 1 slider
- Calories: 210
- Sugar: 2g
- Sodium: 380mg
- Fat: 12g
- Saturated Fat: 5g
- Unsaturated Fat: 6g
- Trans Fat: 0.5g
- Carbohydrates: 15g
- Fiber: 1g
- Protein: 12g
- Cholesterol: 35mg