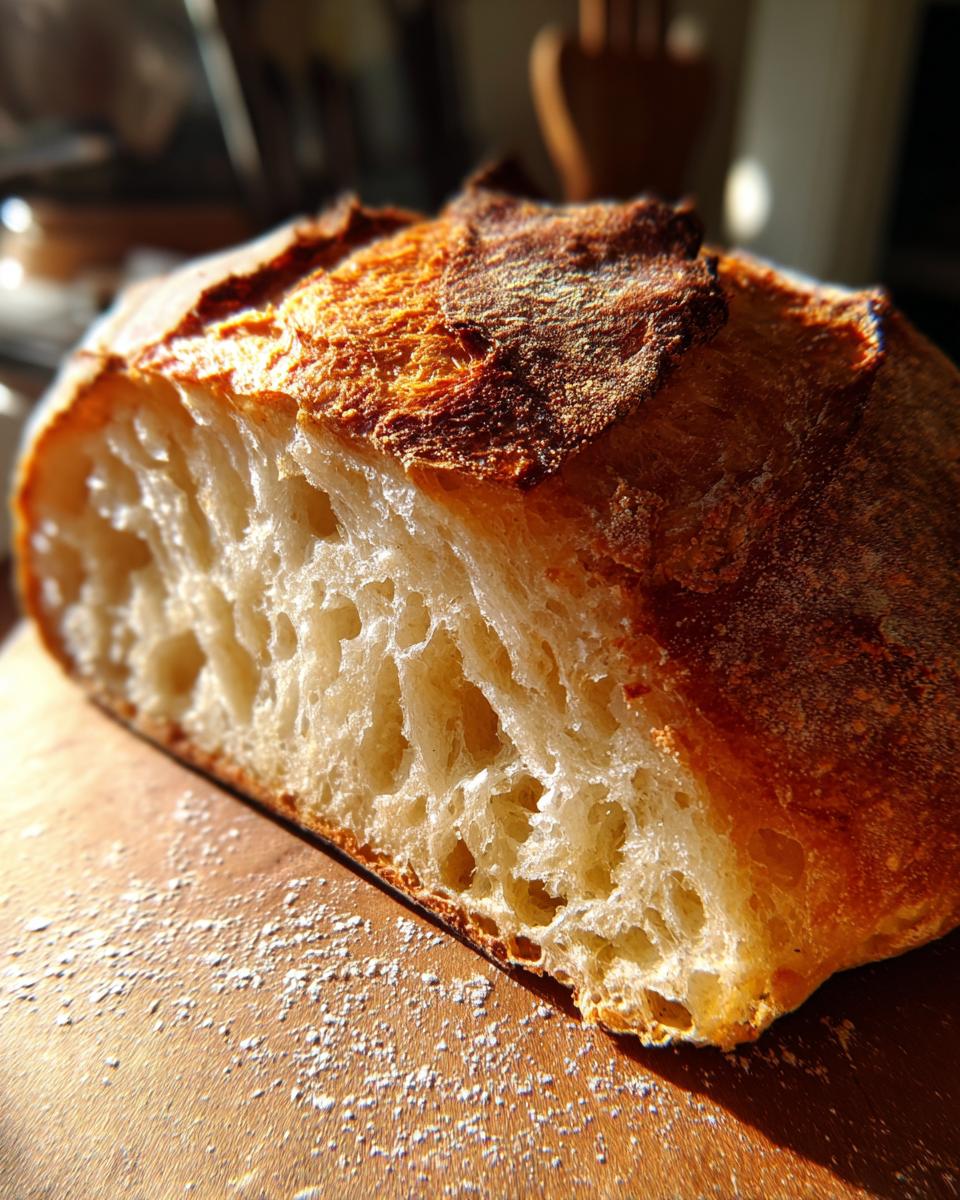
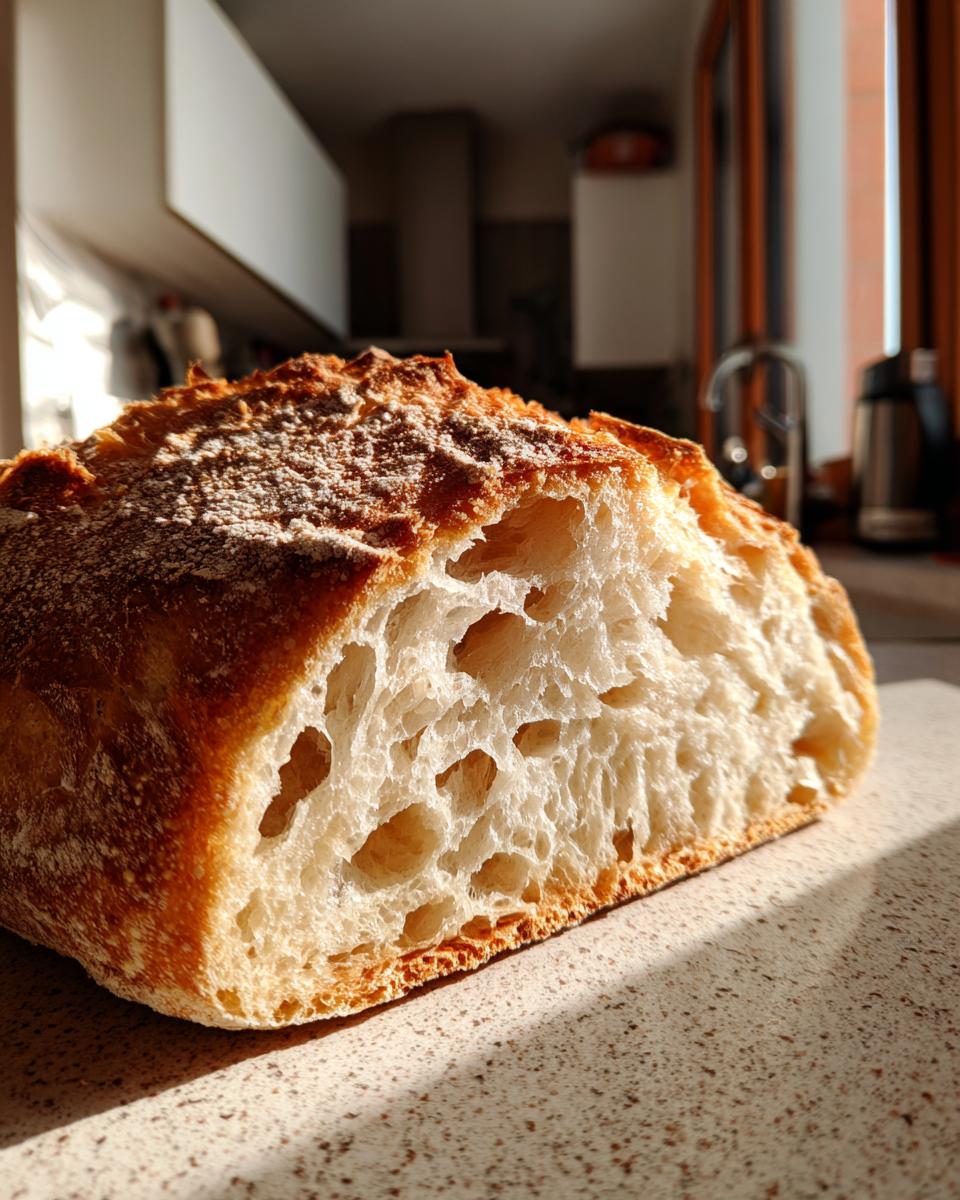
There’s nothing quite like the smell of fresh bread filling your kitchen—that warm, yeasty aroma that makes everyone gather around, waiting impatiently for the first slice. I’ve been baking this crusty Italian bread for years, and let me tell you, it never fails to impress. With just four simple ingredients and zero kneading (yes, you read that right!), you’ll have the perfect loaf with a crackly crust and soft, airy center. My kids call it “magic bread” because it somehow disappears within minutes of coming out of the oven. Whether you’re serving it with soup, using it for sandwiches, or just slathering it with butter, this really is The Best Crusty Italian Bread for Any Meal—my family’s absolute favorite.
Ingredients for The Best Crusty Italian Bread for Any Meal
You’ll be shocked how something so incredible comes from just four pantry staples:
- 3 cups all-purpose flour (spooned and leveled, not packed!)
- 1 1/4 cups warm water (about 110°F – think baby bottle temperature)
- 2 teaspoons instant yeast (the little granules that work magic)
- 1 teaspoon salt (non-negotiable flavor booster)
Ingredient Notes & Substitutions
Bread flour lovers, I see you! Swap in bread flour for extra chew – just add 1-2 extra tablespoons water since it’s thirstier. Only have active dry yeast? No panic! Use the same amount but dissolve it in the warm water first with a pinch of sugar and wait 5 minutes until frothy.
Now, about that salt…I know some folks try to skip it, but don’t! It’s not just for taste – it actually reins in the yeast so your bread doesn’t turn into a wild, airy mess. Learned that the hard way when I once forgot it – my bread tasted like cardboard and had craters big enough to hide Easter eggs!
How to Make The Best Crusty Italian Bread for Any Meal
Here’s where the magic happens, friends! I’ve broken this down so simply that even my twelve-year-old can do it (and has, many times). The keys? Patience during the rises, a hot oven, and don’t you dare skip that second rest—it makes all the difference in getting those gorgeous air pockets.
Step 1: Mixing the Dough
Grab your biggest mixing bowl—I use the same chipped yellow one my mom gave me when I moved out. Whisk together the flour, yeast and salt first. This spreads the yeast evenly so you won’t get those weird dense patches. Now pour in the warm water (test it on your wrist like baby formula!) and stir with a wooden spoon just until it comes together into a shaggy, sticky mess. Don’t overmix! And don’t panic when it looks too wet—that’s exactly what we want. No kneading needed here, promise.
Step 2: First Rise
Drape a clean kitchen towel over the bowl—I use the one with the burnt edge from when I got distracted by Grey’s Anatomy—and tuck it in the warmest spot in your kitchen. Near the oven works great if you’ve got nothing bubbling away inside. Set a timer for 2 hours and walk away! The dough should double in size and look bubbly and alive when you peek under the towel. If your kitchen’s chilly, it might need an extra 30 minutes—the dough will tell you when it’s ready.
Step 3: Shaping and Second Rest
Here’s where bakers get too handsy—resist the urge to overwork it! Flour your hands generously (this dough is sticky by design) and gently pull the edges toward the center to form a loose ball. Place it seam-side down on a floured surface and let it relax, uncovered, for 30 minutes. This second rest is crucial—it lets the gluten relax so you’ll get that perfect oven spring. Meanwhile, slide your baking stone or heavy tray into the oven and crank it up to 450°F.
Step 4: Baking The Best Crusty Italian Bread
When your oven’s screaming hot, grab the sharpest knife you’ve got (I use my paring knife because I can never find the lame) and make one confident slash across the top—about 1/2 inch deep. This isn’t just for looks; it controls how the bread expands. Carefully transfer the dough onto the hot stone—I just slide it right off the counter on some parchment paper. For extra crustiness, toss a few ice cubes on the oven floor to create steam. Bake 25-30 minutes until it’s deeply golden and sounds hollow when tapped. That first crackle when you take it out? Pure music.
Why You’ll Love The Best Crusty Italian Bread for Any Meal
Trust me, once you try this recipe, you’ll never go back to store-bought loaves again. Here’s why it’s become my absolute go-to:
- Four-ingredient magic: Flour, water, yeast, salt—that’s it! No fancy ingredients hiding in your pantry. I’ve made this at midnight when I suddenly realized we had no bread for school lunches.
- No kneading required: My wrists still remember the days of kneading for what felt like hours. This dough comes together with just a quick stir—your stand mixer can take the day off!
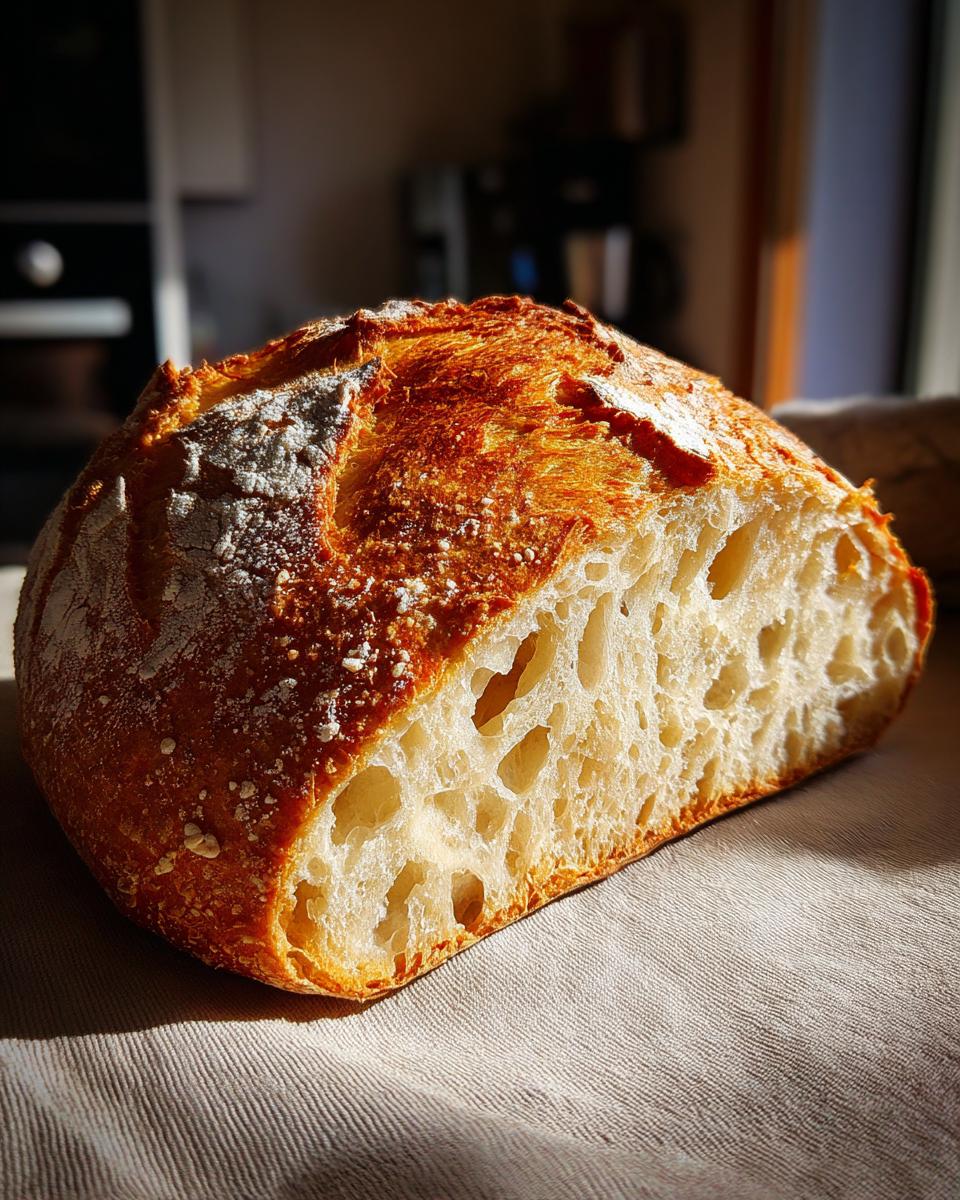
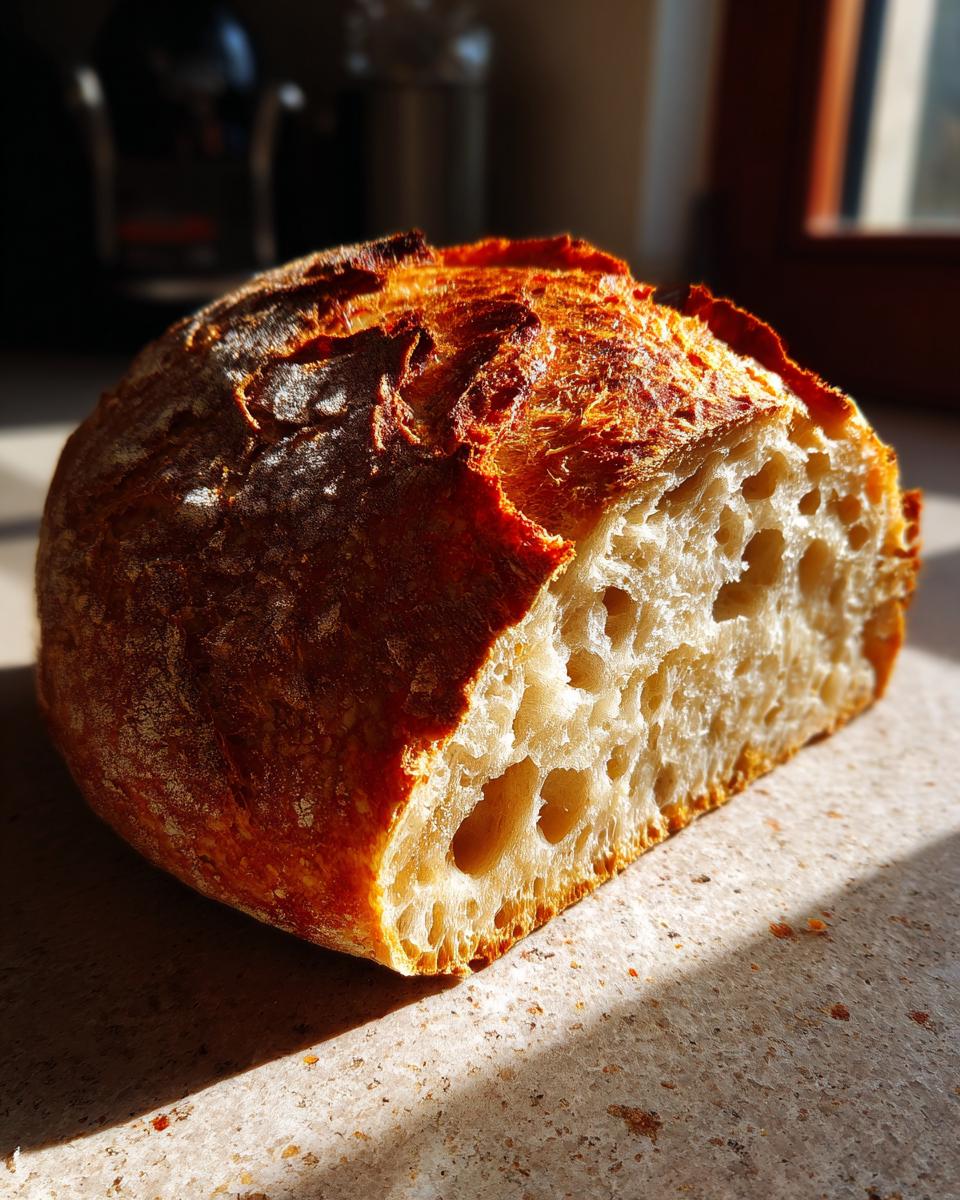
- Crackly crust that sings: That first tap on the golden-brown crust? Pure satisfaction. It shatters beautifully under your knife, revealing the softest interior.
- Pairs with everything: Soup night? Check. Bruschetta? Perfect. Morning toast? Absolutely. My personal favorite is tearing off hunks and dipping them in good olive oil while it’s still warm.
- Forgiving timeline: The long rise means you can start it after breakfast and have fresh bread by dinner. Or mix it before bed and bake it in the morning—the dough won’t judge!
The best part? Watching your family’s faces when they realize you made this bakery-worthy bread. My daughter once asked if I’d smuggled it from an Italian restaurant—highest compliment ever!
Equipment Needed for The Best Crusty Italian Bread
One of the things I love most about this recipe? You probably already have everything you need in your kitchen right now. No fancy gadgets required! Here’s my trusty lineup:
- A large mixing bowl: Mine’s seen better days—it’s got flour ghosts from a hundred batches—but it’s the perfect size for the dough to puff up happily during its rise.
- Baking stone or heavy baking tray: This is the secret to that incredible crust! I use a basic pizza stone I bought years ago. If you don’t have one, an upside-down heavy sheet pan works in a pinch.
- Razor-sharp knife or lame: That beautiful slash across the top isn’t just for looks—it needs to be clean and quick. I’ve used everything from a serrated knife to (don’t tell anyone) a box cutter in desperate times!
- Kitchen towel: Any clean cloth will do for covering the dough. I have a designated “bread towel” that’s permanently dusted with flour—it’s like my badge of honor.
- Measuring cups and spoons: Though let’s be real—after making this weekly for years, I mostly eyeball it now!
That’s seriously it! No stand mixer, no bread machine, no special pans. Just simple tools doing extraordinary work. The first time I made this bread, I couldn’t believe something so good came from such basic equipment—proof that great food doesn’t need fancy gear!
Tips for Perfect The Best Crusty Italian Bread
After countless loaves (and yes, a few flops along the way), I’ve learned exactly what makes this bread go from good to knock-your-socks-off amazing. Here are my hard-earned secrets:
Flour measuring matters more than you think
Listen, I used to scoop flour straight from the bag like everyone else—until I realized why my bread was sometimes dense as a brick. Now I always spoon flour into my measuring cup and level it off with a knife. That extra 30 seconds means perfect texture every time. Too much flour? Your bread turns into a doorstop. Too little? You’ll have a puddle instead of dough.
That second rest isn’t optional
I know, I know—you’re hungry and that dough looks ready to bake. But trust me, letting it rest after shaping makes all the difference! Those 30 minutes give the gluten time to relax so your bread can spring up beautifully in the oven. I set a timer because I’ve been tempted to rush it too—the smell is just too good!
Water temperature is your secret weapon
Here’s where my kitchen thermometer became my best friend. Water that’s too hot kills the yeast, too cold and it won’t wake up properly. 110°F is the sweet spot—warm like a baby’s bottle. No thermometer? Test it on your wrist like old-school moms did. It should feel comfortably warm, not hot.
Steam is the crust’s best friend
Want that professional bakery crackle? Toss a handful of ice cubes onto the oven floor when you put the bread in (just avoid the heating element!). The steam keeps the crust soft long enough for the bread to rise fully before setting into that perfect crispness. My oven has permanent water spots from all my “steam experiments”—worth every drip!
Wait before slicing (if you can!)
This is the hardest part—letting that gorgeous loaf cool for at least 20 minutes before cutting in. I know the temptation is real (my kids hover with butter knives at the ready), but slicing too soon lets all that precious steam escape. The bread keeps cooking internally as it cools, giving you that perfect tender crumb. Worth the wait!
Remember—even my “failed” loaves still tasted amazing dunked in soup! Bread baking is part science, part art, and all love. Don’t stress over perfection—just enjoy the process and that incredible first bite.
Storing and Reheating The Best Crusty Italian Bread
Here’s the good news—this bread stays delicious for days if you store it right! I learned the hard way that plastic bags turn the crust into rubber (RIP, loaf #3). Now I swear by the paper bag method—it keeps that perfect crackle while preventing the inside from drying out. Just tuck the cooled bread into a plain brown paper bag, fold the top over, and leave it on the counter. No fridge! The starch molecules get weird in the cold and turn your bread stale faster.
For next-level freshness, revive day-old bread by spritzing the crust lightly with water and popping it in a 350°F oven for 5 minutes. It’ll come out smelling and tasting like it just left the oven. My husband calls this my “bread resurrection trick”—he swears it’s better than fresh!
Freezing? Absolutely! Wrap cooled loaf tightly in foil, then slide it into a freezer bag. When the craving hits, thaw at room temp (still wrapped) for about an hour, then reheat as above. Pro tip: Slice before freezing for easy toast-ready portions. I keep a stash in my freezer for emergency garlic bread situations—because let’s be real, those happen more often than we’d like to admit!
Nutrition Information for The Best Crusty Italian Bread
Let’s be real—none of us are eating this bread because it’s “low-calorie.” We’re eating it because it’s downright delicious! But since you asked, here’s the nutritional breakdown per slice (about 1/12th of the loaf):
- Calories: 120 (worth every one!)
- Carbs: 25g (hello, energy!)
- Protein: 4g (more than you’d think from just flour!)
- Fat: 0.5g (practically floats off the plate)
- Fiber: 1g (hey, it’s something!)
- Sugar: 0g (naturally sweet from the flour alone)
- Sodium: 200mg (that salt doing its flavor thing)
Now, full disclosure—these numbers are estimates based on standard ingredients. Your exact nutrition will dance around a bit depending on your flour brand, how accurately you measure, and whether you slice your bread thick like my dad or thin like my calorie-conscious sister. I once calculated two versions of this recipe side by side—same ingredients, different measuring techniques—and got a 15-calorie difference per slice!
The beauty of homemade? You control what goes in. No mysterious preservatives or unpronounceable additives—just honest ingredients doing delicious work. And let’s be honest…when that warm bread hits your plate, numbers are the last thing on your mind!
FAQs About The Best Crusty Italian Bread for Any Meal
Can I use whole wheat flour instead of all-purpose?
Absolutely! I love experimenting with whole wheat—it adds such a lovely nutty depth. But here’s my trick: replace only half the all-purpose flour with whole wheat to keep that perfect balance of texture. Whole wheat absorbs more liquid, so you’ll need to add an extra 2-3 tablespoons of water. The dough should still be sticky, just slightly more manageable. My wheat-loving neighbor swears this version is even better than the original (but don’t tell my grandma I said that!).
Why did my bread turn out dense?
Oh honey, we’ve all been there! Dense bread usually means one of three things happened: 1) You packed the flour when measuring (always spoon and level!), 2) Your yeast was old and sleepy (test it in warm water with a pinch of sugar—if it doesn’t foam, it’s time for new yeast), or 3) You didn’t let it rise long enough in that cozy warm spot. My first loaf could’ve doubled as a hockey puck—turns out my “warm spot” was actually a drafty windowsill! Now I preheat my oven to 200°F, turn it off, then let the dough rise inside with the door cracked.
What’s the best way to freeze this bread?
Freezing is my secret to always having fresh bread on hand! Once completely cooled, wrap the whole loaf tightly in aluminum foil (don’t skip this—it prevents freezer burn), then slip it into a freezer bag. For grab-and-go slices, cut the loaf first and separate pieces with parchment before freezing. To revive, thaw wrapped at room temp for an hour, then crisp it up in a 350°F oven for 5 minutes. Pro tip from my mom: Freeze individual slices for instant toast—just pop ’em straight from freezer to toaster!
Can I make this without a baking stone?
Don’t own a baking stone? No problem! An upside-down heavy baking sheet works nearly as well—just preheat it along with your oven. The key is using something thick that holds heat like a champ. One snowy day when I was desperate, I even used my cast iron skillet—placed the dough right on its screaming hot surface. The crust wasn’t quite as perfect, but my family still devoured it before I could snap a photo!
My dough is too sticky to shape—help!
First, take a deep breath—sticky dough is actually what we want! But I get it, handling it can feel like wrestling with glue. My trick? Wet your hands instead of flouring them—the water prevents sticking without adding more flour to the dough. And remember, this isn’t meant to be a perfectly smooth ball—those rustic folds and imperfections give it character! If it’s sticking to your work surface, try shaping it right on parchment paper so you can lift the whole thing into the oven easily.
Try This Recipe and Share Your Results in the Comments!
Alright, my fellow bread enthusiasts – it’s your turn! I’ve shared all my secrets, my triumphs, and even my hilarious failures with this crusty Italian bread. Now I want to hear about your baking adventures. Did you get that perfect oven spring? Did your family go crazy for it like mine does? Maybe you put your own spin on it with some rosemary or garlic? (Ooh, now I’m hungry!)
Drop me a comment below and tell me all about it – the good, the bad, and the deliciously ugly. Did you nail it on the first try? Or did you have a “learning experience” like my hockey-puck-version? Either way, I want to celebrate with you! And if you have questions, ask away – I check comments daily because nothing makes me happier than helping someone discover the joy of homemade bread.
Now go preheat that oven and get baking! Your future self (and probably your entire household) will thank you. Can’t wait to see your crumb shots and hear your stories – happy baking, friends!
Print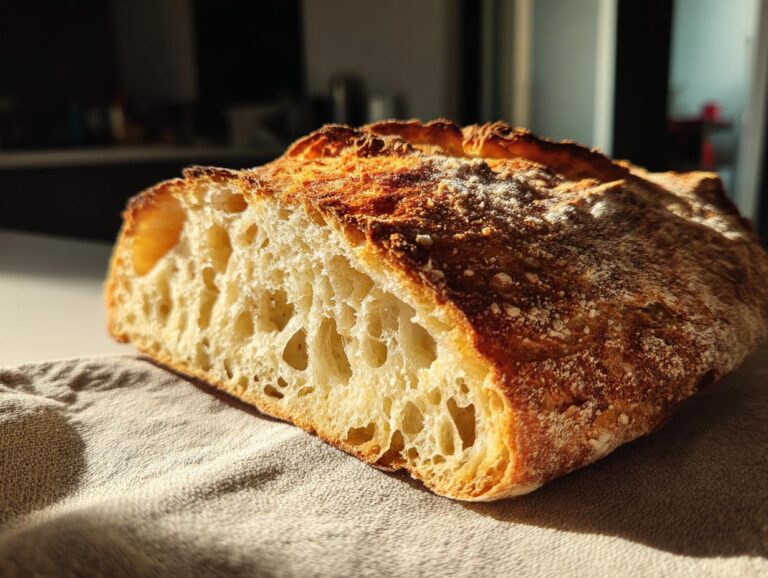
4-Ingredient Crusty Italian Bread That’ll Blow Your Mind
A simple yet delicious crusty Italian bread recipe with just four ingredients. Perfect for any meal, this bread has a crispy exterior and a soft, airy interior.
- Total Time: 3 hours
- Yield: 1 loaf 1x
Ingredients
- 3 cups all-purpose flour
- 1 1/4 cups warm water
- 2 teaspoons instant yeast
- 1 teaspoon salt
Instructions
- In a large bowl, mix flour, yeast, and salt.
- Add warm water and stir until a sticky dough forms.
- Cover the bowl and let the dough rise for 2 hours.
- Shape the dough into a round loaf and let it rest for 30 minutes.
- Preheat the oven to 450°F (230°C) with a baking stone or tray inside.
- Slash the top of the loaf with a sharp knife.
- Bake for 25-30 minutes until golden brown and crusty.
- Let cool before slicing.
Notes
- Use a baking stone for the best crust.
- Let the dough rise in a warm place for better results.
- Store leftovers in a paper bag to keep the crust crispy.
- Prep Time: 2 hours 30 minutes
- Cook Time: 30 minutes
- Category: Bread
- Method: Baking
- Cuisine: Italian
- Diet: Vegetarian
Nutrition
- Serving Size: 1 slice
- Calories: 120
- Sugar: 0g
- Sodium: 200mg
- Fat: 0.5g
- Saturated Fat: 0g
- Unsaturated Fat: 0.5g
- Trans Fat: 0g
- Carbohydrates: 25g
- Fiber: 1g
- Protein: 4g
- Cholesterol: 0mg