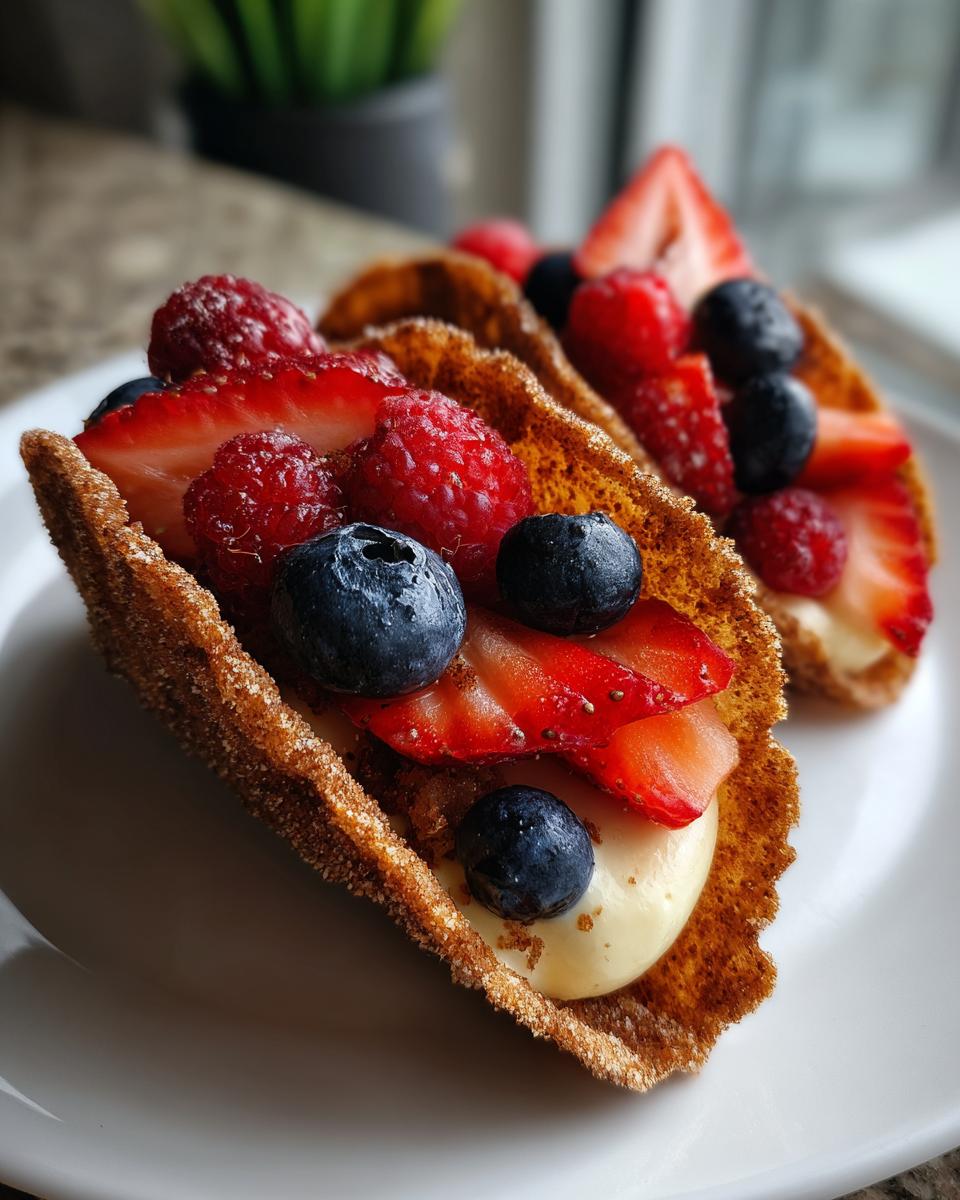
Oh my gosh, you have to try these Berrylicious Cheesecake Tacos – they’re my new favorite party trick! I first made them for my niece’s birthday, and let me tell you, the kids went wild (and let’s be honest, so did the adults). Who knew combining crispy cinnamon sugar shells with creamy cheesecake and juicy berries would be such a hit? The best part? They come together in just 25 minutes with ingredients you probably already have. Trust me, these little handheld treats are about to become your secret weapon for impressing guests – or just treating yourself to something special on a Tuesday night.

Why You’ll Love These Berrylicious Cheesecake Tacos
These aren’t just any dessert—they’re a total game-changer! Here’s why you’ll be obsessed:
- Super quick: From mixing bowl to table in under 30 minutes—perfect for last-minute cravings
- Party magic: That “wow” factor when you bring out a platter of these cuties? Priceless
- Play with toppings: Swap berries for whatever’s in season (peaches in summer? Yes please!)
- No fancy skills needed: If you can fold a tortilla and stir filling, you’ve got this
- Kid-approved: My picky nephew actually ate fruit when it came in a taco shell—miracle!
Seriously, these check all the boxes—easy, impressive, and downright delicious.
Ingredients for Berrylicious Cheesecake Tacos
Here’s what you’ll need to whip up these Berrylicious Cheesecake Tacos. Trust me, it’s all super straightforward, and you probably have most of this in your kitchen already:
- 4 small flour tortillas: The perfect size for a handheld dessert taco. Don’t skip these—corn tortillas just won’t work here!
- 2 tbsp melted butter (unsalted): For brushing the tortillas—this is what gives them that golden, crispy edge.
- 2 tbsp granulated sugar: Mixed with cinnamon for that sweet, spiced shell we all love.
- 1 tsp ground cinnamon: The secret to that warm, cozy flavor in every bite.
- 8 oz softened cream cheese (full-fat): Full-fat is key here—it makes the filling rich and creamy. Let it come to room temperature for smooth mixing.
- 1/4 cup powdered sugar (sifted): Sift it to avoid lumps in your filling. It’s the perfect amount of sweetness without being overpowering.
- 1 tsp pure vanilla extract: A must for that classic cheesecake flavor. Go for the real stuff—imitation just doesn’t hit the same.
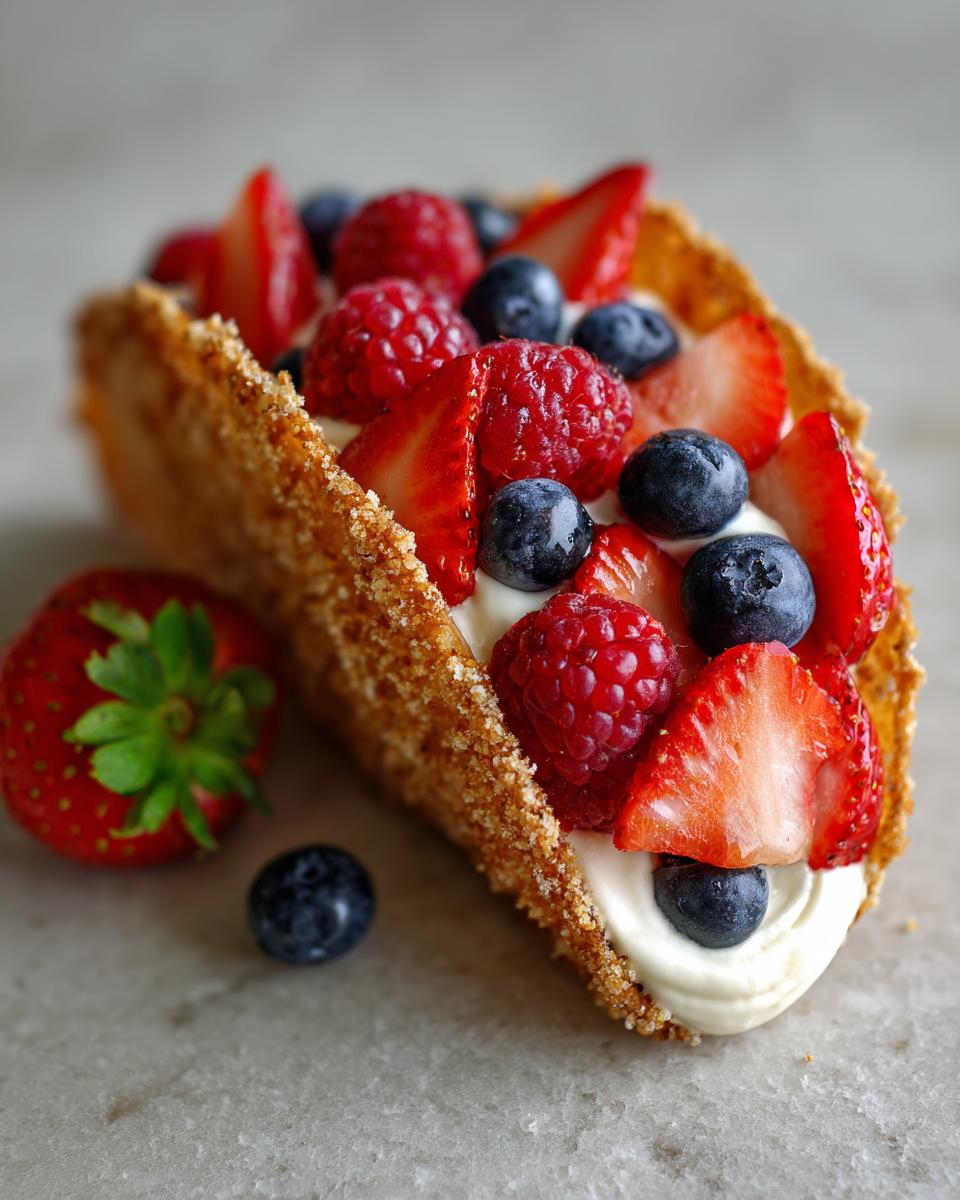
- 1 cup mixed fresh berries (washed and dried): Strawberries, blueberries, raspberries—whatever’s fresh and juicy. Just make sure they’re dry so they don’t make the shells soggy.
- 1/4 cup whipped cream (fresh or canned): A little dollop on top makes these tacos extra dreamy. Fresh is great, but canned works in a pinch!
That’s it! Simple, right? Now let’s get to the fun part—making them!
How to Make Berrylicious Cheesecake Tacos
Okay, let’s get cooking! These Berrylicious Cheesecake Tacos come together in just a few simple steps. I promise it’s easier than you think, and the results are absolutely worth it. Follow along, and you’ll have the most fun dessert tacos ready in no time.
Step 1: Prepare the Cinnamon Sugar Shells
First things first – preheat that oven to 350°F (175°C). While it’s heating up, grab your tortillas and give them a good brushing with that melted butter. You want to cover both sides, but don’t drown them – just a nice, even coating. Then, mix up your sugar and cinnamon in a small bowl (I just use my fingers – it’s more fun that way!).
Now comes the magic – sprinkle that cinnamon sugar mix all over both sides of the tortillas. Don’t be shy! Then gently fold each tortilla in half – I drape mine over the oven rack bars so they keep their perfect taco shape while baking. Pop them in the oven for 8-10 minutes until they’re golden and crisp. Keep an eye on them – they go from perfect to burnt surprisingly fast!
Step 2: Make the Cheesecake Filling
While your shells are baking, let’s make that luscious filling. This is where room temperature cream cheese is KEY – cold cream cheese will leave you with lumpy sadness. Beat it in a bowl until it’s smooth and creamy (about 1-2 minutes should do it). Then add your powdered sugar and vanilla, mixing just until combined. You don’t want to overbeat it, or the filling might get too runny.
Pro tip: If your filling seems too soft, pop it in the fridge for 10-15 minutes to firm up while your shells finish baking and cooling. This makes it easier to handle when filling the tacos.
Step 3: Assemble the Berrylicious Cheesecake Tacos
Now for the fun part! Let your shells cool for just a minute or two – you want them warm but not piping hot. Use a spoon to gently fill each shell with your cheesecake mixture. Don’t overstuff them – about 2 tablespoons per taco is perfect. Then pile on those gorgeous berries! I like to arrange them artfully, but honestly, just dumping them on tastes just as good.
Finish with a little dollop of whipped cream – because why not? The contrast of the crisp shell, creamy filling, and juicy berries is absolute perfection. Serve immediately while the shells are still crisp and enjoy the compliments that are definitely coming your way!
Tips for Perfect Berrylicious Cheesecake Tacos
Okay, here’s the inside scoop to make sure your Berrylicious Cheesecake Tacos turn out absolutely perfect every single time:
- Chill that filling if needed: If your cheesecake mixture seems too soft after mixing (especially on hot days), just pop it in the fridge for 10-15 minutes. It’ll firm right up and be so much easier to work with when filling those crispy shells.
- Timing is everything: These are definitely a “serve immediately” kind of dessert. Those cinnamon sugar shells lose their perfect crispness if they sit too long with the filling. I like to have everything prepped and assemble them right before serving.
- Parchment paper is your friend: Line your baking sheet with it before arranging your tortillas. This prevents any sugary drips from sticking and makes cleanup a breeze—no scrubbing burnt sugar off your pans!
- Berry prep matters: Make sure your berries are completely dry after washing. Wet berries = soggy taco shells, and nobody wants that. I pat mine dry with paper towels about 30 minutes before assembling.
Follow these simple tricks, and you’ll be making Berrylicious Cheesecake Tacos like a pro in no time!
Berrylicious Cheesecake Tacos Variations
Oh, the possibilities are endless with these Berrylicious Cheesecake Tacos! Once you’ve mastered the basic version (which is already perfection), it’s so fun to play around with different flavors. Here are my favorite twists that always impress:
For chocolate lovers (hi, that’s me!), drizzle some melted chocolate over the top—dark, milk, or white all work beautifully. I’ll sometimes mix cocoa powder right into the cheesecake filling for a double chocolate hit. And if you’re feeling fancy, sprinkle on some mini chocolate chips or crushed Oreos!
Not a berry person? Swap in sliced mangoes, kiwi, or even caramelized bananas—they’re all amazing with the cinnamon sugar shells. In the fall, I’ll use diced apples sautéed with a bit of butter and brown sugar. Basically, any fruit you’d put on cheesecake works here!
Want some crunch? Toasted coconut flakes or chopped nuts add wonderful texture. Pecans are my go-to—they pair perfectly with the cinnamon. I’ve even crushed up graham crackers to sprinkle on top for that classic cheesecake crust vibe.
The beauty of these tacos is how easily you can customize them to your taste or what’s in season. My niece insists on rainbow sprinkles, while my husband begs for a salted caramel version. Honestly, I’ve never found a combination that didn’t work!
Serving and Storing Berrylicious Cheesecake Tacos
Okay, let’s talk about the best way to enjoy these Berrylicious Cheesecake Tacos – because timing is EVERYTHING with this dessert! These babies are meant to be eaten right after assembling, while those cinnamon sugar shells are still perfectly crisp. That magical crunch against the creamy filling is what makes them so special. I always set up a little assembly line right before serving – it only takes a minute to fill them with the cheesecake mixture and top with berries, and the wow factor is totally worth it.
Now, I know life happens, so if you absolutely must store leftovers (though in my house, that’s never an issue!), here’s how to do it right. Keep the components separate – store any extra cheesecake filling in an airtight container in the fridge for up to 2 days. The baked taco shells can be kept in a paper bag at room temperature to maintain their crispness. When you’re ready to enjoy again, just re-crisp the shells in a 300°F oven for 3-4 minutes before filling.
One pro tip from experience – don’t try to store assembled tacos in the fridge overnight. The moisture from the filling will turn those beautifully crisp shells into a sad, soggy mess. Trust me, I learned this the hard way after trying to prep them for a brunch. Fresh is definitely best with these!
Berrylicious Cheesecake Tacos FAQs
I get so many questions about these Berrylicious Cheesecake Tacos – here are the answers to the ones that pop up most often!
Can I use corn tortillas instead of flour?
Oh honey, I wish! Corn tortillas just don’t have the flexibility we need here – they’ll crack when you try to fold them, and they get way too brittle when baked. Stick with small flour tortillas for that perfect crisp-yet-foldable texture. (I’ve tried every shortcut in the book, and this is one worth following!)
Can I make these ahead of time?
Here’s the deal – you can prep components separately, but don’t assemble until right before serving. The cheesecake filling keeps beautifully in the fridge for 2 days, and the baked shells stay crisp at room temperature in a paper bag overnight. Just resist the urge to fill them early – that crisp shell is everything!
What are the best berries to use?
Honestly? Whatever’s fresh and ripe! My personal favorite mix is strawberries, blueberries, and raspberries – the combo of textures and flavors is magic. But I’ve used blackberries, diced peaches, even pomegranate seeds in a pinch. Just make sure they’re dry and at room temperature so they don’t make your shells soggy. Pro tip: if berries aren’t in season, thawed frozen berries (well-drained!) work surprisingly well!
Nutritional Information
Just so you know what you’re indulging in (not that you’ll regret it!), here are the estimated nutrition facts per Berrylicious Cheesecake Taco. Remember, these numbers can vary a bit depending on your specific ingredient brands and how generous you are with those berry toppings!
Each delicious taco comes in at about 320 calories – totally reasonable for such a special treat! You’re looking at 19g of that heavenly fat (thank you, cream cheese and butter), 32g of carbs to satisfy your sweet tooth, and 5g of protein to make you feel slightly virtuous. The sugar content is about 22g per taco, but hey – berries count as healthy, right?
Now that you’re armed with all the delicious details, go make some Berrylicious Cheesecake Tacos and let me know how they turn out! Don’t forget to rate the recipe if you love them as much as we do.
Print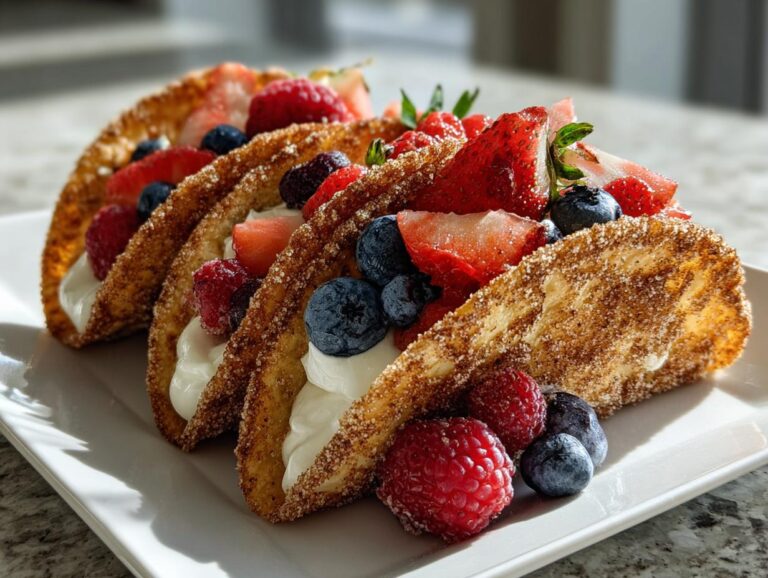
Berrylicious Cheesecake Tacos in Just 25 Minutes – Heavenly Treat
A fun twist on cheesecake with a taco shell made from cinnamon sugar tortillas, filled with creamy cheesecake and topped with fresh berries.
- Total Time: 25 mins
- Yield: 4 tacos 1x
Ingredients
- 4 small flour tortillas
- 2 tbsp melted butter
- 2 tbsp granulated sugar
- 1 tsp cinnamon
- 8 oz cream cheese, softened
- 1/4 cup powdered sugar
- 1 tsp vanilla extract
- 1 cup mixed fresh berries (strawberries, blueberries, raspberries)
- 1/4 cup whipped cream
Instructions
- Preheat oven to 350°F (175°C).
- Brush tortillas with melted butter. Mix sugar and cinnamon, then sprinkle over tortillas.
- Fold tortillas in half and place on a baking sheet. Bake for 8-10 minutes until crisp.
- Beat cream cheese, powdered sugar, and vanilla until smooth.
- Spoon cheesecake filling into taco shells. Top with berries and whipped cream.
- Serve immediately.
Notes
- Use room-temperature cream cheese for smoother filling.
- Add a drizzle of chocolate or caramel for extra flavor.
- Store leftover filling in the fridge for up to 2 days.
- Prep Time: 15 mins
- Cook Time: 10 mins
- Category: Dessert
- Method: Baking
- Cuisine: Fusion
- Diet: Vegetarian
Nutrition
- Serving Size: 1 taco
- Calories: 320
- Sugar: 22g
- Sodium: 280mg
- Fat: 19g
- Saturated Fat: 11g
- Unsaturated Fat: 6g
- Trans Fat: 0g
- Carbohydrates: 32g
- Fiber: 2g
- Protein: 5g
- Cholesterol: 55mg