Oh, heart shaped cakes – they’re not just adorable, they’re downright magical! There’s something about baking a cake in the shape of love that makes even the simplest recipe feel special. I’ve been making these for years – Valentine’s Day surprises, anniversary treats, even “just because” moments that deserved a little extra sweetness.
What I love most is how these cakes transform any occasion into something romantic. The first time I made one for my husband (back when we were dating!), his face lit up brighter than the candles. That’s the power of a heart shaped cake – it says “I care” in the sweetest, tastiest way possible.
The best part? They’re surprisingly easy to make. With just a heart-shaped pan and basic ingredients, you can create something that looks like it came from a fancy bakery. Whether you’re a baking newbie or a seasoned pro, these cakes always bring smiles.
Why You’ll Love These Heart Shaped Cakes
Let me tell you why these little beauties will become your go-to romantic dessert! First off, they’re ridiculously easy – just mix, pour, bake, and voilà! Instant love on a plate. The heart shape does all the fancy work for you, making even a simple vanilla cake look like you spent hours decorating.
Here’s what makes them so special:
- Foolproof baking: Even if you’ve never baked before, this recipe won’t let you down
- Endless customization: Swap in chocolate, add lemon zest, or mix in berries – make it your own!
- Instant romance: Nothing says “I love you” like a homemade heart-shaped cake
- Surprise factor: That moment when you reveal the shape? Pure magic every time
The secret’s out – these cakes are happiness you can eat. One bite and you’ll be hooked!
Ingredients for Heart Shaped Cakes
Alright, let’s gather our goodies! Here’s everything you’ll need for the perfect heart shaped cake – and trust me, using the right ingredients makes all the difference. I’ve learned this the hard way after many “oops” moments in my baking adventures!
- 2 cups all-purpose flour (spooned and leveled – no packing!)
- 1 cup granulated sugar (for that perfect sweetness)
- 1/2 cup softened butter (leave it out for 30 minutes first)
- 2 large eggs (room temp blends smoother)
- 1 cup whole milk (the richer, the better)
- 1 tsp pure vanilla extract (skip the imitation stuff)
- 1 tsp baking powder (fresh is best – check the date!)
- 1/2 tsp fine sea salt (balances all the flavors)
See? Nothing fancy – just simple, quality ingredients that come together to create something truly special. Now let’s get baking!
Equipment You’ll Need
Don’t worry – you won’t need any fancy gadgets! Just grab these basics from your kitchen:
- Heart-shaped cake pan (the star of the show!)
- Mixing bowls (one large, one medium)
- Whisk or electric mixer (your arms will thank you)
- Spatula (for scraping every last bit of batter)
- Measuring cups & spoons (precision is key)
That’s it! Now you’re ready to bake up some love.
How to Make Heart Shaped Cakes
Okay, let’s get to the fun part! Making heart shaped cakes is like creating edible love – and I’ll walk you through every step. Trust me, once you see how simple this is, you’ll be making these for every special occasion!
Step 1: Prep the Pan and Oven
First things first – preheat that oven to 350°F (175°C). While it’s warming up, grab your heart-shaped pan and give it a good greasing. I use butter and a dusting of flour, making sure to get into all those cute little curves of the heart shape. This step is crucial – nothing’s sadder than a beautiful cake that won’t come out of the pan!
Step 2: Mix Dry Ingredients
In a large bowl, whisk together 2 cups flour, 1 cup sugar, 1 tsp baking powder, and 1/2 tsp salt. Here’s my little secret – I always sift these together through my fingers to make sure there are no lumps. It takes just an extra minute but makes the batter so much smoother!
Step 3: Blend Wet Ingredients
In another bowl, beat together 1/2 cup softened butter, 2 eggs, 1 cup milk, and 1 tsp vanilla until everything’s perfectly smooth. The butter should be soft enough that it blends easily – if it’s too cold, you’ll end up with little butter chunks (learned that the hard way!).
Step 4: Combine and Bake
Now for the magic! Gradually add the wet ingredients to the dry, mixing just until combined. Overmixing is the enemy here – a few small lumps are totally fine. Pour that beautiful batter into your prepared pan and pop it in the oven for 30-35 minutes. Your kitchen will smell amazing!
Step 5: Cool and Decorate
Here’s where patience comes in – let the cake cool completely before decorating. I know it’s tempting, but if you try to frost a warm cake, you’ll end up with a melty mess! Once cooled, go wild with frosting, berries, sprinkles – make it as fancy or simple as you like. Every bite will taste like love!
Tips for Perfect Heart Shaped Cakes
After years of baking these beauties (and yes, a few flops along the way), I’ve picked up some foolproof tricks:
- Toothpick test is key – Insert it near the center. If it comes out with moist crumbs (not wet batter), you’re golden!
- Don’t overmix – Stop stirring as soon as ingredients combine. A few lumps are fine – they’ll disappear in baking.
- Rotate halfway – Ovens have hot spots. Turning the pan ensures even browning on that perfect heart shape.
- Cool completely – I know it’s hard to wait, but warm cakes crumble when you try to decorate them.
Follow these simple tips and your heart shaped cake will turn out bakery-perfect every time!
Variations for Heart Shaped Cakes
Oh, the possibilities are endless with these sweethearts! Once you’ve mastered the basic recipe, it’s time to play. My favorite part? Watching people’s faces light up when they taste your creative twists. Here are my go-to variations that never fail to impress:
Chocolate lovers: Swap out 1/2 cup flour for cocoa powder – instant chocolatey bliss! Add chocolate chips for extra oomph.
Zesty lemon: Mix in 1 tbsp lemon zest + 1 tbsp juice. Top with lemon glaze for a sunny, bright flavor.
Berry burst: Fold in 1 cup fresh raspberries or chopped strawberries – they make adorable pink hearts when baked!
Confetti fun: Stir in colorful sprinkles before baking. Perfect for birthdays or just-because celebrations!
The best part? Each variation keeps that perfect heart shape while adding your personal touch. Happy experimenting!
Serving Suggestions
Oh, the fun part – serving up your heart shaped masterpiece! My favorite way? Warm slices with vanilla ice cream melting over the top – pure heaven! For breakfast (yes, cake for breakfast!), pair it with fresh berries and coffee. Valentine’s Day brunch? Done!
Storing and Reheating Heart Shaped Cakes
Here’s how to keep your heart shaped cake tasting fresh and lovely! First, let it cool completely – I can’t stress this enough. Then wrap it tightly in plastic wrap or pop it in an airtight container. It’ll stay delicious for up to 3 days at room temperature.
Want to save some love for later? Freeze individual slices wrapped in foil – they’ll keep beautifully for a month! When you’re ready to enjoy, just thaw overnight in the fridge or give them a quick 10-second zap in the microwave if you’re impatient like me. The heart shape holds up perfectly!
Nutritional Information
Here’s the scoop on what’s in each slice of love! Remember, these numbers are estimates based on my ingredients – your cake might vary slightly depending on brands and customizations. Each serving (about 1/8th of the cake) has roughly:
- 250 calories
- 10g fat (6g saturated)
- 35g carbs (1g fiber, 20g sugar)
- 4g protein
And there you have it – sweet love with some numbers attached! Now go enjoy every bite guilt-free.
FAQs About Heart Shaped Cakes
Over the years, I’ve gotten so many questions about these sweet little cakes – let me share the answers that’ll save you some trial and error!
Can I use a regular pan if I don’t have a heart-shaped one?
Absolutely! While the special pan makes it easiest, you can bake the batter in round pans and cut into heart shapes after cooling. Stack two round cakes at an angle – instant heart!
How do I prevent sticking?
Ah, the eternal baker’s dilemma! Besides greasing well, try this trick: line the pan with parchment paper cut to fit the bottom. Comes out perfect every time!
Can I make cupcakes instead?
You bet! Fill heart-shaped cupcake liners about 2/3 full. Bake time drops to 18-20 minutes – just watch for that golden top!
Why did my cake sink in the middle?
Usually means it needed just a few more minutes in the oven. Next time, rotate the pan halfway through baking for even heat.
Share Your Heart Shaped Cake Creations
I’d love to see your beautiful heart shaped cakes! Snap a photo of your creation and share it below – nothing makes me happier than seeing all the different ways people spread love through baking. Did you try any fun variations? Any special moments you made the cake for? Tell me everything!
Print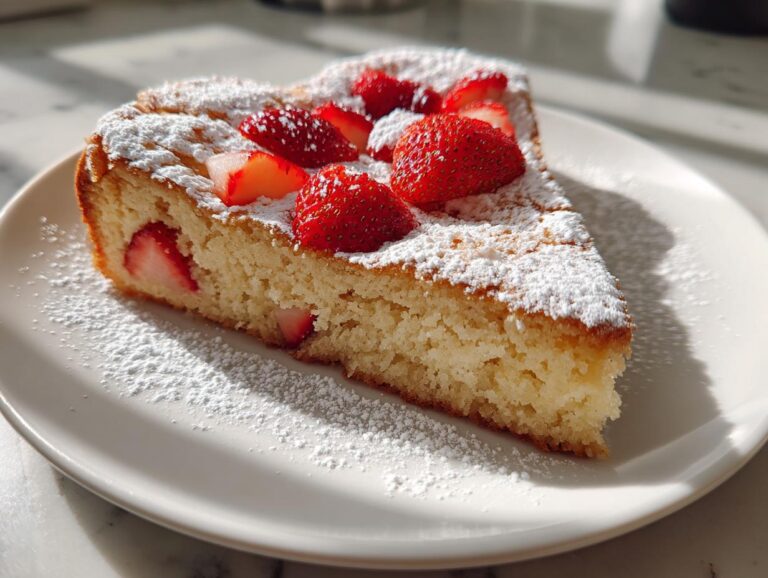
Irresistible Heart Shaped Cakes in Just 30 Minutes – Yummy!
Heart shaped cakes are perfect for romantic occasions. They are easy to make and customizable with flavors and decorations.
- Total Time: 50 minutes
- Yield: 1 cake 1x
Ingredients
- 2 cups all-purpose flour
- 1 cup sugar
- 1/2 cup butter, softened
- 2 eggs
- 1 cup milk
- 1 tsp vanilla extract
- 1 tsp baking powder
- 1/2 tsp salt
Instructions
- Preheat oven to 350°F (175°C). Grease a heart-shaped cake pan.
- Mix flour, sugar, baking powder, and salt in a bowl.
- Beat butter, eggs, milk, and vanilla in another bowl.
- Combine wet and dry ingredients. Stir until smooth.
- Pour batter into the pan. Bake for 30-35 minutes.
- Let cool before decorating.
Notes
- Use a toothpick to check if the cake is done.
- Decorate with frosting, berries, or sprinkles.
- Prep Time: 15 minutes
- Cook Time: 35 minutes
- Category: Dessert
- Method: Baking
- Cuisine: American
- Diet: Vegetarian
Nutrition
- Serving Size: 1 slice
- Calories: 250
- Sugar: 20g
- Sodium: 200mg
- Fat: 10g
- Saturated Fat: 6g
- Unsaturated Fat: 3g
- Trans Fat: 0g
- Carbohydrates: 35g
- Fiber: 1g
- Protein: 4g
- Cholesterol: 50mg